Para engenheiros de compras e designers de produtos na indústria de instrumentação, criar protótipos de alta qualidade é fundamental para reduzir custos de desenvolvimento e testar a viabilidade do projeto. PC (Policarbonato) material se destaca como a melhor escolha para protótipos de instrumentos, graças à sua força excepcional, transparência, e resistência ao impacto. Este artigo detalha todo PC material instrument prototype manufacturing process com exemplos do mundo real, dados, and practical tips to solve common challenges.
1. Seleção de Materiais: Choosing the Right Base for Your Prototype
The first step in prototype making is picking materials that match your product’s functional and aesthetic needs. PC plastic is the gold standard, but other polymers may be used for specific requirements.
| Tipo de material | Propriedades principais | Ideal Use Cases |
| PC Plastic | Alta resistência ao impacto (60kj/), transparência (88% transmitância de luz), resistência ao calor (até 135°C) | Medical device displays, industrial control panels |
| Plástico ABS | Good rigidity, baixo custo, fácil de pintar | Non-transparent instrument housings |
| PMMA Plastic | Higher transparency (92% transmitância de luz) than PC | Optical instrument components |
| PU Plastic | Flexibilidade, resistência ao desgaste | Soft-touch instrument grips |
Real Case: A medical equipment manufacturer once chose PC plastic for a blood pressure monitor prototype. Its impact resistance prevented damage during drop tests (simulating hospital use), while its transparency allowed clear visibility of the LCD screen—critical for user safety.
2. Data Collection: Laying the Foundation for Precision
Accurate data ensures your prototype matches the original design. This stage has two core steps:
- 3D Drawing File Import: Customers must provide detailed 3D models (por exemplo, ETAPA, IGES files) or CAD designs. These files are imported into computer-aided manufacturing (CAM) software to plan machining paths. Por exemplo, a sensor prototype team provided a SolidWorks 3D file that included tiny 0.5mm holes—this detail was critical for sensor wire installation.
- Gypsum Sample Production: A physical gypsum model is made from the 3D file to confirm shape, curvature, e dimensões. This step catches design flaws early. A thermal meter prototype project once found a 2° curvature error in the gypsum sample, which was fixed before CNC machining—saving 10 hours of rework.
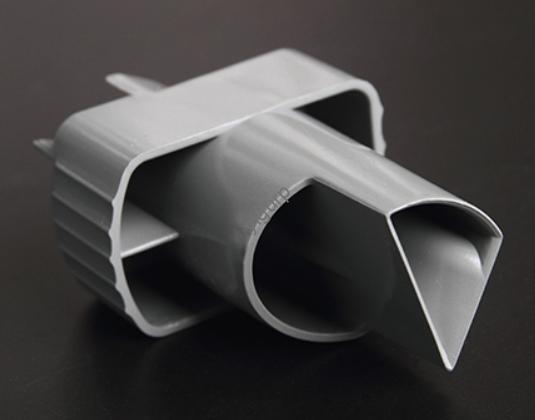
3. Usinagem CNC: Shaping the PC Prototype with High Precision
CNC (Controle Numérico Computadorizado) machining is the most reliable method for turning PC plastic into instrument prototypes. It ensures accuracy and smooth surfaces.
Key CNC Machining Steps:
- Programação & Configurar: Engineers write G-code to guide the CNC machine. The PC plastic sheet (usually 2-10mm thick) is clamped, and the machine removes excess material along the programmed path.
- Usinagem Multi-Eixos: Para peças complexas (por exemplo, curved instrument casings), 5-axis CNC machines are used. They can reach all angles of the PC material without repositioning, improving precision by up to 0.02mm compared to 3-axis machines.
Data Highlight: A study of 50 instrumentation prototype projects found that CNC machining achieved an average dimensional accuracy of ±0.05mm—well within the industry’s ±0.1mm standard for instrument components.
4. Post-Treatment: Melhorando a estética e a durabilidade
Raw CNC-machined PC parts need post-treatment to meet instrument standards.
- Rebarbação: Sandpaper (400-800 areia) or ultrasonic tools remove knife marks and burrs. This prevents sharp edges that could damage internal components (por exemplo, placas de circuito) during assembly.
- Tratamento de superfície: Common processes include:
- Pintura: Anti-scratch paint (por exemplo, polyurethane-based) is applied to PC housings. A temperature controller prototype used this to resist wear from daily handling.
- Silk Screen Printing: Ink is printed onto PC surfaces for labels (por exemplo, “Power Button”) or logos. It adheres well to PC and can withstand 500+ rub tests.
- Galvanoplastia: Metal coatings (por exemplo, níquel) are added to PC parts for conductivity. This is used in prototype connectors for industrial instruments.
5. Assembly Testing: Ensuring the Prototype Works as Intended
No prototype is ready until it passes assembly and functional tests.
Two Critical Test Stages:
- Test Assembly: Todas as peças (por exemplo, PC casing, internal circuits) are put together. Engineers check if parts fit smoothly—for example, a pH meter prototype once had a PC lid that didn’t close properly; adjusting the CNC machining path fixed the issue.
- Teste Funcional: The prototype is tested under real-use conditions:
- Structural Stability: Drop tests (1.2m height onto concrete) for portable instruments.
- Propriedades Mecânicas: Tensile tests to ensure PC parts don’t break under 50N of force (common for instrument knobs).
- Environmental Simulation: Tests at -20°C to 60°C to check PC’s performance in extreme temperatures.
6. Embalagem & Shipping: Delivering the Prototype Safely
Safe packaging protects the PC prototype during transit.
- Packaging Materials: PC parts are wrapped in anti-static foam (to prevent electrostatic damage) and placed in corrugated boxes with dividers.
- Delivery Time: Most PC instrument prototypes are shipped within 5-7 business days of testing. Para projetos urgentes (por exemplo, new product launches), expedited production can cut delivery time to 3 dias.
Yigu Technology’s Perspective on PC Instrument Prototypes
Na tecnologia Yigu, we’ve supported over 200 instrumentation clients with PC prototype manufacturing. We believe PC material’s balance of strength and workability makes it irreplaceable for early-stage testing. Our team uses 5-axis CNC machining and strict post-treatment checks to ensure each prototype meets industry standards. Para clientes, this means faster design validation—on average, our PC prototypes help reduce product development time by 20% em comparação com métodos tradicionais.
Perguntas frequentes
- P: Why is PC plastic better than ABS for instrument prototypes?
UM: PC has higher impact resistance and heat resistance than ABS, which is critical for instruments used in harsh environments (por exemplo, factories, hospitais). It also offers better transparency for display-based instruments.
- P: How long does it take to make a PC instrument prototype?
UM: Tipicamente 5-7 dias úteis, including material selection, Usinagem CNC, e testes. Urgent projects can be completed in 3 days with expedited production.
- P: Can PC prototypes be used for small-batch production (10-50 unidades)?
UM: Sim. CNC-machined PC prototypes are cost-effective for small batches, as they don’t require expensive molds (ao contrário da moldagem por injeção, which is only economical for 1000+ unidades).