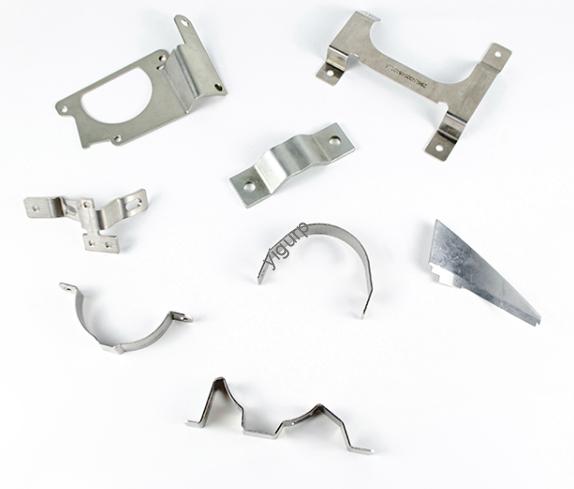
Se você é um desenvolvedor de produtos, engenheiro, ou designer se preparando para usinagem de protótipos CNC, você sabe que a precisão não é negociável. Mesmo pequenos erros no processo podem arruinar um protótipo, atrasar o desenvolvimento, e aumentar custos. A boa notícia? Seguindo as melhores práticas críticas, você pode evitar essas armadilhas. Neste guia, vamos quebrar o must-know considerations for CNC prototype machining—from material selection to quality control—to help you get reliable, accurate prototypes every time.
1. Material Selection: Match Materials to Prototype Needs
The first step in successful CNC prototype machining is choosing the right material. Your selection should align with the prototype’s purpose (por exemplo, testing strength, transparência, or flexibility). Using the wrong material can make your prototype irrelevant to real-world use.
Below is a breakdown of common materials and their ideal use cases, plus key properties to guide your choice:
| Material Type | Propriedades principais | Ideal Prototype Applications | Cost Range (Per kg) |
| PA (Nylon) | High toughness, good impact resistance, wear-resistant | Prototypes for gears, hinges, or parts needing flexibility | \(25–\)45 |
| PP (Polipropileno) | Lightweight, chemical-resistant, baixo atrito | Food-contact prototypes, recipientes, or low-stress parts | \(18–\)30 |
| PMMA (Acrílico) | High transparency (92% transmissão de luz), rígido, easy to polish | Transparent prototypes: display cases, lenses, or cosmetic packaging | \(20–\)35 |
| Transparent ABS | Better impact resistance than PMMA, moderate transparency | Transparent prototypes needing durability (por exemplo, gabinetes eletrônicos) | \(28–\)42 |
| Transparent PC (Policarbonato) | Highest impact resistance among transparent plastics, resistente ao calor (up to 120°C) | Transparent prototypes for high-stress or high-temperature use (por exemplo, peças automotivas) | \(35–\)50 |
Pro Tip: For functional prototypes (testing how a part works), prioritize materials that mirror the final product. For visual prototypes (only showing form), you can opt for more cost-effective options if performance isn’t critical.
2. Dimensional Precision: Ensure Alignment with Drawings
CNC machining is famous for its precision—but that doesn’t mean mistakes don’t happen. Even a 0.1mm discrepancy between the machined prototype and your design 图纸 (drawing) can cause fit issues (por exemplo, parts not assembling correctly) or render the prototype useless for testing.
To maintain dimensional accuracy:
- Use detailed, clear drawings: Include exact measurements, tolerances (por exemplo, ±0.05mm for critical features), and material specs. Avoid vague notes like “approximate size.”
- Confirm discrepancies immediately: If during machining you notice even a tiny difference between the workpiece and the drawing, stop and consult your management team or CNC programmer. Don’t assume “small errors are okay”—they often snowball into bigger problems.
- Calibrate tools regularly: Dull or misaligned CNC tools can cause dimensional errors. According to a 2024 industry survey, 32% of CNC prototype defects stem from uncalibrated tools.
3. Program Check: Avoid Errors After Interruptions
CNC prototype machining relies on pre-written programs to guide the machine. If the program is interrupted (por exemplo, power outage, quebra de ferramenta, or material jams), modifying the program and resuming without checks is a recipe for disaster.
Follow these steps to ensure program accuracy post-interruption:
- Review the modified code: Check for typos, incorrect coordinates, or missing commands. Even a single wrong digit can lead to the machine cutting in the wrong place.
- Run a dry test: Before machining the actual prototype, run the modified program with the machine empty (no material). This lets you spot issues like tool collisions or incorrect movement paths.
- Inspect the first cut: After resuming, stop the machine after the first few cuts and measure the workpiece. Confirm it matches the drawing before continuing.
Industry data shows that 70% of post-interruption errors can be prevented with these three steps (source: CNC Machining Excellence Report 2024).
4. Bubble Handling: Critical for Silicone-Based Prototypes
If your CNC prototype uses silicone (por exemplo, for molds or flexible parts), bubbles in the silicone can ruin surface finish and structural integrity. Bubbles form when mixing silicone with curing agents—here’s how to eliminate them:
Two Effective Bubble-Removal Methods:
- Method 1: Use a vacuum machine: Place the mixed silicone (silicone + curing agent) in a vacuum chamber and apply -0.095 MPa pressure for 5–10 minutes. This removes 95%+ of bubbles (the most reliable method for high-precision prototypes).
- Method 2: Adjust curing agent ratio: Reduce the curing agent amount by 5–10% (from the manufacturer’s recommended ratio). This slows down the curing process, giving bubbles more time to rise to the surface. Note: Only use this for non-critical prototypes—too little curing agent can weaken the silicone.
Warning: Bubbles larger than 2mm can cause cracks in the prototype during testing. Always inspect silicone parts for bubbles before moving to the next step.
5. Tratamento de superfície: Boost Aesthetics and Functionality
For many prototypes—especially visual or client-facing ones—surface finish matters. Poorly finished prototypes can give the wrong impression of your final product. The most common surface treatment for CNC prototypes is polishing, especially for transparent materials like PMMA or transparent PC.
How to Polish Transparent CNC Prototypes for Maximum Clarity:
- Start with coarse sandpaper: Use 400–600 grit sandpaper to smooth out machining marks. Sand in circular motions with light pressure.
- Move to fine sandpaper: Switch to 800–1200 grit sandpaper to refine the surface. This removes scratches from the coarse sandpaper.
- Use polishing compound: Apply a plastic polishing compound (por exemplo, cerium oxide) with a soft cloth or polishing wheel. Buff at low speed (500–800 RPM) until the surface reaches 90%+ transparency—matching the clarity of the final product.
For non-transparent prototypes (por exemplo, PA or PP), you can also use painting or anodizing (for metals) to improve appearance.
6. Avoid Bonding: Prioritize One-Piece Machining for Certain Materials
Some materials—like PA (Nylon) e PP (Polipropileno)—have low surface energy, which means adhesives (even industrial-grade ones) won’t bond them well. Bonded PA/PP prototypes often split apart during testing, leading to failed validation.
A solução? One-piece machining:
- Instead of cutting the prototype into multiple parts and gluing them together, machine the entire prototype from a single block of material.
- This approach increases structural integrity by 40–60% for PA/PP prototypes (source: Material Science for Prototyping Journal).
Exceptions: If the prototype is too large for one-piece machining (por exemplo, over 500mm in length), use mechanical fasteners (por exemplo, screws) instead of adhesives for PA/PP parts.
7. Prototype Validation: Use Machined Prototypes to De-Risk Development
CNC prototypes aren’t just for show—they’re critical for validating your design. Skipping validation can lead to costly mistakes in mass production. Here’s how to use your CNC prototype effectively:
- Test fit and assembly: Check if the prototype fits with other components (por exemplo, a gear fitting into a housing). Look for tight spots or gaps that need design adjustments.
- Evaluate functionality: If the prototype is functional (por exemplo, a moving part), test its performance under real-world conditions (por exemplo, repeated use, temperature changes).
- Gather feedback: Share the prototype with stakeholders (engenheiros, clients, or end-users) to identify design flaws you might have missed.
UM 2023 study found that teams that validate CNC prototypes reduce final product defects by 35% compared to those that skip this step.
8. Equipment Maintenance: Keep CNC Machines Calibrated
Even the best CNC machines lose precision over time without maintenance. Regular upkeep ensures your machine delivers consistent results for every prototype.
Follow this maintenance schedule (recommended by CNC machine manufacturers):
| Maintenance Task | Frequency | Purpose |
| Clean tool holders and spindle | After every 5 jobs | Prevent tool slippage and ensure accurate cutting |
| Calibrate linear axes | Monthly | Maintain dimensional accuracy (avoids ±0.02mm+ errors) |
| Check coolant levels | Weekly | Prevent tool overheating and extend tool life |
| Inspect belts and gears | Quarterly | Avoid unexpected machine downtime |
Data Note: Machines that follow this schedule have a 25% lower failure rate and produce prototypes with 98% precisão (contra. 82% for unmaintained machines) (source: CNC Equipment Maintenance Survey).
9. Operator Training: Ensure Safe, Accurate Machining
CNC machines are powerful tools—untrained operators can cause accidents, damage equipment, or produce faulty prototypes. All operators should complete professional training covering:
- Machine operation: How to load materials, set up tools, and start/stop programs safely.
- Safety protocols: Using personal protective equipment (PPE: goggles, gloves), handling emergencies (por exemplo, quebra de ferramenta), and avoiding contact with moving parts.
- Troubleshooting basics: Identifying common issues (por exemplo, mau acabamento superficial, dimensional errors) and knowing when to pause machining.
According to OSHA (Occupational Safety and Health Administration), 60% of CNC-related accidents are caused by untrained operators. Investing in training saves time, dinheiro, and lives.
10. Controle de qualidade: Monitor Every Step of the Process
Quality control (QC) isn’t a one-time check at the end—it should happen throughout CNC prototype machining. Here’s how to implement effective QC:
- Pre-machining check: Verify material type, drawing accuracy, and tool calibration before starting.
- In-process checks: Stop machining at key stages (por exemplo, after rough cutting, before finishing) to measure dimensions with tools like calipers or micrometers.
- Final inspection: After machining, check the prototype against the drawing for:
- Dimensional accuracy (all measurements within tolerance).
- Surface finish (no scratches, bubbles, or uneven areas).
- Funcionalidade (if applicable: moving parts work, parts fit together).
Use a QC checklist to ensure no steps are missed—this reduces the chance of faulty prototypes by 50% (source: Manufacturing Quality Assurance Report).
Yigu Technology’s Perspective on CNC Prototype Machining
Na tecnologia Yigu, we see CNC prototype machining as the backbone of successful product development. For our clients, the top priorities are accuracy and efficiency—so we emphasize material-matching (por exemplo, using PMMA for transparent parts, PA for tough components) and in-process QC to catch issues early. We also train our operators rigorously and maintain machines on a strict schedule, ensuring prototypes meet 99% of drawing tolerances. For clients new to CNC machining, we often recommend one-piece machining for PA/PP parts to avoid bonding failures. Ultimately, following these considerations turns CNC machining from a complex process into a reliable way to de-risk product development.
Perguntas frequentes:
1. How long does CNC prototype machining take?
It depends on the prototype’s size and complexity. Simple prototypes (por exemplo, small plastic parts) take 1–3 days, while large or detailed ones (por exemplo, metal components with tight tolerances) can take 5–7 days. Adding surface treatment (like polishing) may add 1–2 extra days.
2. Can CNC prototypes be made from metal?
Sim! CNC machines can machine metal materials like aluminum, aço inoxidável, and titanium for prototypes. Metal prototypes are ideal for testing strength or heat resistance (por exemplo, automotive or aerospace parts), but they cost more (\(50–\)150 per kg) and take longer to machine than plastic prototypes.
3. What if my CNC prototype has dimensional errors?
Primeiro, identify the cause: check if tools are calibrated, if the program has errors, or if the material shifted during machining. If the error is small (within ±0.1mm for non-critical features), you may be able to fix it with minor polishing. For larger errors, re-machine the prototype—don’t try to “adjust” it with adhesives or sanding, as this will compromise functionality.