Ao desenvolver um novo design de lâmpada, o processing of lamp prototypes is a critical link that directly determines whether the final product meets design expectations. Um protótipo bem executado não apenas verifica a funcionalidade e a estética, mas também estabelece as bases para a produção em massa. Este artigo detalha as etapas principais, considerações principais, and solutions to common challenges in lamp prototype processing, helping you avoid pitfalls and achieve optimal results.
1. Seleção de Materiais: The Foundation of Prototype Quality
Choosing the right material is the first step to success—different materials vary in transparency, resistência ao calor, e processabilidade, directly impacting the prototype’s performance and appearance.
| Tipo de material | Key Characteristics | Ideal Lamp Applications |
| Plástico ABS | Fácil de usinar, boa resistência ao impacto, dyeable | Desk lamps, floor lamps (non-heat-intensive parts) |
| Acrílico | High transparency, excellent gloss, moderate heat resistance | Lampshades, light diffusers |
| PC Plastic | Alta resistência ao calor, retardador de chama, forte | LED downlights, high-temperature lamp housings |
| Liga de alumínio | Leve, boa condutividade térmica, alta resistência | LED lamp heat sinks, quadros estruturais |
| Resina | Excellent for complex shapes, customizable transparency | Artistic lamps, prototypes with intricate details |
Key Question: How to prioritize material properties?
For light-transmitting parts (por exemplo, lampshades), prioritize transparência e lustro (por exemplo, acrílico). For heat-generating parts (por exemplo, LED bases), prioritize condutividade térmica (por exemplo, liga de alumínio).
2. Processing Technology: Matching Methods to Needs
The choice of processing technology depends on prototype complexity, tamanho do lote, e requisitos de precisão. Below is a comparison of the most common methods:
| Tecnologia | Vantagens | Disadvantages | Melhor para |
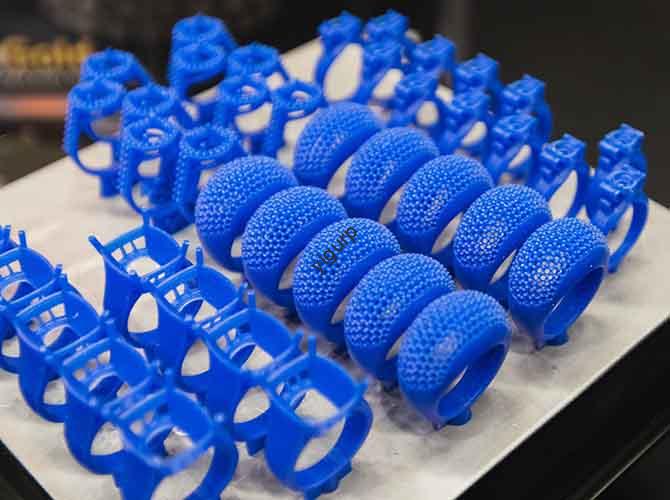
| 3Impressão D | Fast for complex shapes, baixo custo para pequenos lotes | Surface may have layering, limited material options | Intricate prototypes (por exemplo, artistic lamp bases), pequenos lotes (<10 unidades) |
| Usinagem CNC | Alta precisão (±0,01 mm), superfície lisa, suitable for hard materials | Slow for complex designs, high cost for small batches | Peças de alta precisão (por exemplo, metal heat sinks), grandes lotes (>20 unidades) |
| Silicone Molding | Low cost for multiple copies, qualidade consistente | Requires a master prototype (made via 3D printing/CNC) | Duplicating prototypes (por exemplo, 50+ identical lampshades) |
| Handcrafting | Flexible for unique details, suitable for special materials | Time-consuming, inconsistent quality | Custom touches (por exemplo, hand-sanded resin details, small-scale art lamps) |
Pro Tip: For complex components, combine technologies—e.g., use 3D printing to create a master prototype, then use silicone molding to produce multiple copies. This balances speed and cost.
3. Structural Design: Avoiding Common Failures
Poor structural design can lead to assembly issues, deformação, or functional failures. Focus on these three areas:
3.1 Assembly Compatibility
Design with assembly methods in mind to ensure components fit securely and easily. Common assembly methods include:
- Snaps: Ideal for plastic parts; ensure snaps have enough flexibility to avoid breaking.
- Parafusos: Suitable for metal/plastic connections; use standard sizes (por exemplo, M3, M4) for easy sourcing.
- Glue: Melhor para peças sem suporte de carga (por exemplo, lampshade attachments); choose heat-resistant glue for LED lamps.
Avoid: Tight fits (cause assembly difficulty) or loose fits (lead to instability).
3.2 Thin-Wall Treatment
Lampshades and light diffusers often use thin-wall structures. To prevent deformation or cracking:
- Maintain uniform wall thickness (1.5–3mm for plastic; 0.8–2mm for aluminum).
- Add stiffeners (por exemplo, small ribs) to ultra-thin sections (≤1 mm) for extra support.
3.3 Thermal Design (Critical for LED Lamps)
LED lamps generate heat, which can warp prototypes or reduce lifespan. Solutions include:
- Integrate heat dissipation holes (diâmetro: 2–5 mm) in the lamp housing.
- Usar metal bases (liga de alumínio) to transfer heat away from the LED chip.
- Avoid covering heat-generating parts with thick plastic (blocks heat escape).
4. Tratamento de superfície: Melhorando a estética e a durabilidade
Surface treatment improves the prototype’s appearance and protects it from wear. Below are the most effective methods:
| Treatment Method | Propósito | Key Considerations |
| Lixar & Polimento | Remover marcas de usinagem (por exemplo, CNC knife marks, 3D print layers) | Use 400–2000 grit sandpaper (coarse to fine); polish acrylic to a high gloss with a buffing wheel. |
| Pulverização | Add color or texture (fosco, lustroso, metálico) | Use UV-resistant paint for outdoor lamps; ensure no bubbles or flow marks. |
| Galvanoplastia | Create a metallic finish (cromo, níquel) | Suitable for metal parts; avoid plating on plastic (low adhesion). |
| Silk Screen Printing | Add text or patterns (por exemplo, logotipos de marcas) | Use durable inks; test for wear resistance (por exemplo, rub with a cloth). |
5. Conjunto & Teste: Verifying Prototype Reliability
Skipping testing can lead to costly mistakes in mass production. Follow this step-by-step process:
Etapa 1: Functional Validation
Test core lamp functions to ensure usability:
- Iluminação: Check if the light turns on/off smoothly; verify brightness (por exemplo, 500–800 lumens for desk lamps).
- Switches/Dimming: Test switch responsiveness and dimming range (se aplicável).
- Heat Dissipation: Run the lamp for 2–4 hours; measure surface temperature (should not exceed 60°C for touchable parts).
Etapa 2: Inspeção Visual
Compare the prototype to design requirements:
- Check consistência de cor (use a Pantone color chart for reference).
- Inspect for defects: arranhões, blemishes, or uneven gaps (gaps should be <0.5milímetros).
- Verificar transparência (for acrylic parts: ensure no cloudiness).
Etapa 3: Structural Stability
Simulate real-world use to test durability:
- Load-Bearing: Place a small weight (por exemplo, 500g) on the lamp base (should not tip over).
- Shock Resistance: Drop the prototype from 30cm (no cracks or loose parts).
- Durabilidade: Open/close the lamp shade 50 times (no damage to hinges).
6. Yigu Technology’s Perspective on Lamp Prototype Processing
Na tecnologia Yigu, we believe that precision and adaptability are key to successful lamp prototype processing. Many clients initially prioritize speed over material selection, leading to rework (por exemplo, using low-heat-resistance plastic for LED lamps). Our approach is to first align materials with functional needs—e.g., recommending PC plastic for high-temperature LED parts or aluminum alloy for heat sinks—then optimize processes to balance speed and cost. We also emphasize data management: saving 3D models, parâmetros de usinagem, and test reports ensures consistency if modifications or mass production are needed. By combining technical expertise with client feedback, we help turn lamp designs into reliable prototypes that accelerate product launch.
7. Perguntas frequentes: Solving Common Lamp Prototype Issues
Q1: My prototype has dimensional deviations—what causes this?
A1: Dimensional deviations usually stem from two issues: insufficient processing accuracy (por exemplo, CNC toolpath errors) ou material shrinkage (common with plastic). Soluções: Optimize CNC toolpaths (use high-precision tools) and reserve 1–2% shrinkage allowance for plastic materials (por exemplo, ABS shrinks ~1.5%).
Q2: The lamp shade has poor light transmittance—how to fix it?
A2: Poor transmittance is often due to wrong material selection (por exemplo, using opaque plastic instead of acrylic) ou inadequate polishing (machining marks block light). Correções: Switch to high-transparency acrylic and polish the surface with 1500–2000 grit sandpaper followed by a buffing wheel.
Q3: Assembled parts are loose—what’s the solution?
A3: Loose parts usually result from unreasonable design (por exemplo, snaps that are too thin) ou processing errors (por exemplo, CNC parts are too small). Soluções: Adjust the design (thicken snaps by 0.2–0.3mm) or improve machining accuracy (use a CNC machine with ±0.005mm precision).