Should You Consider 29 Medidor?
If you’re planning a new roof for your shed, siding for a barn, or an accent piece for your home, Você provavelmente já ouviu falar sobre 29 gauge sheet metal. This term comes up often, especially when you’re trying to save money. Você pode estar se perguntando: What exactly is it? And is it right for my project?
Simplesmente coloque, 29 gauge is a thinner, cheaper type of metal panel that’s commonly used for farm buildings, utility structures, and basic home projects. It gives you the classic metal look and easy maintenance at a great price. No entanto, that lower cost means you give up some strength and durability. This guide will give you a complete, straightforward look at 29 gauge sheet metal. We’ll explain how thick it is, how it compares to heavier options, onde usá -lo, what it costs, and important tips for buying and installing it based on years of real-world experience.
Entendimento 29 Gauge Specifications
To make a smart choice, you need to understand what “29 medidor” realmente significa. The gauge system for sheet metal can be confusing: the higher the gauge number, the thinner and lighter the metal. This is important to remember. UM 29 gauge panel is much thinner than a 22 gauge panel.
So how thin is it? For standard steel, 29 gauge has a thickness of about 0.0142 inches or 0.361 millimeters. This is the thickness of the base steel before any protective coatings—like zinc (Galvanizado) or zinc-aluminum alloy (Galvalume®)—and paint are added. The final thickness will be slightly more, geralmente ao redor 0.015 polegadas. While these numbers seem small, the difference between gauges is noticeable in both stiffness and weight.
The weight of 29 gauge steel panels is a major benefit for handling and installation. It typically weighs between 0.60 e 0.70 pounds per square foot, depending on the specific panel design. This makes it manageable for one person to handle shorter panels and reduces the overall weight on the building’s structure, which can be important for older barns or simple shed frames.
Para colocar isso em perspectiva, here’s how 29 gauge compares to other common gauges used in construction.
| Gauge Number | Nominal Thickness (Polegadas) | Nominal Thickness (milímetros) | Common Perception |
| 22 Medidor | 0.0299″ | 0.759 milímetros | Heavy Commercial |
| 24 Medidor | 0.0239″ | 0.607 milímetros | High-End Residential / Comercial |
| 26 Medidor | 0.0179″ | 0.455 milímetros | Standard Residential / Light Commercial |
| 29 Medidor | 0.0142″ | 0.361 milímetros | Economy / Agrícola / Utility |
As the table clearly shows, going from 29 medir para 26 gauge means a thickness increase of over 25%, which is a big difference that directly affects how well it performs.
29 Gauge vs. 26 Medidor
For most do-it-yourselfers, homeowners, and farm owners, the main decision isn’t about many different gauges; it comes down to one choice: 29 gauge or 26 medidor. This decision balances budget against long-term performance, and understanding the trade-offs is essential for project success. We see customers struggle with this choice every day, so we’ve broken down the direct comparison to make it clear.
| Recurso | 29 Gauge Sheet Metal | 26 Gauge Sheet Metal |
| Grossura & Durabilidade | Mais fino (approx. 0.0142″ base de aço). More flexible and prone to denting upon impact. | Mais espesso (approx. 0.0179″ base de aço). Much more rigid and durable. |
| Dent & Hail Resistance | Baixo a moderado. Can be damaged by large hail, falling branches, or being walked on improperly. | Good to excellent. The industry standard for home roofing where hail is a concern. |
| Wind & Snow Load | Lower capacity. Needs closer support spacing (purlins or sheathing) to meet wind uplift and snow load requirements. | Higher capacity. Can span greater distances between supports, often reducing framing costs. Better wind uplift resistance. |
| “Oil Canning” Risco | Higher risk. The thinner material is more likely to show waviness or distortion in the flat areas of the panel. | Lower risk. The added thickness and stiffness help the panel stay flat and resist thermal movement distortion. |
| Custo | O “economia” escolha. Tipicamente 20-30% less expensive per square foot than 26 medidor. | O “padrão” escolha. Represents a higher initial investment for greater longevity and performance. |
| Peso & Manuseio | Lighter and more flexible, making it easier for one person to handle. Can also be more easily damaged during transport. | Heavier and more rigid. Often requires two people for safe handling of long panels, but is less prone to kinking. |
| Casos de uso ideais | Galpões, barns, agricultural buildings, interior liners, accent roofs (Por exemplo, porches), and budget-driven projects. | Primary home roofing, edifícios comerciais, structures in high-wind or heavy-snow zones, and projects where longevity is the top priority. |
Understanding these points is important. The biggest functional difference is in strength and span capability. UM 26 gauge panel can safely span a greater distance between the structural supports (purlins) underneath it. This means you might be able to use less framing material on a new build. More importantly, its thickness provides better resistance to wind uplift—a critical factor for any roofing.
When it comes to impact, the difference is huge. We have seen hailstorms that leave a 29 gauge shed roof looking like a golf ball, while a nearby 26 gauge house roof remains undamaged. If you live in an area that gets hail or have large trees with overhanging branches, atualizando para 26 gauge is a smart investment for peace of mind.
Finalmente, there’s the appearance issue of “oil canning.” This is a visual waviness or distortion seen in the flat areas of a metal panel. It’s caused by a combination of factors, including thermal expansion and contraction and slight stresses in the material. Thinner metal like 29 gauge sheet metal is much more likely to have this problem. While it doesn’t usually affect the panel’s ability to keep water out, it can be an appearance concern for highly visible home projects.
The bottom line is straightforward: 29 gauge sheet metal is the clear winner for cost-sensitive projects where the structure is not a primary home and the environmental risks are lower. For a primary residence or a building you expect to be trouble-free for decades, the added cost of 26 gauge is almost always worth it.
Onde 29 Gauge Works Best
Despite the advantages of heavier gauges, 29 gauge metal remains very popular for good reason. When used in the right situation, it provides unbeatable value. It delivers the longevity, resistência ao fogo, and low-maintenance benefits of a metal system at a price that competes well with other materials like asphalt shingles or vinyl siding.
Here are the most common and appropriate uses where 29 gauge truly excels:
- Agricultural Buildings
For barns, pole sheds, livestock shelters, and equipment storage, 29 gauge is the industry standard. In these uses, cost-effectiveness is the main driver. The goal is to create a durable, weather-tight shelter, and minor cosmetic dents from farm use are often expected and accepted. The lightweight nature also makes it ideal for installation on large-scale structures.
- Utility and Storage Sheds
This is a perfect match of material and use. A backyard shed doesn’t need the same performance specifications as a house. 29 gauge provides more than enough protection from rain and sun to keep tools, lawn equipment, and stored goods safe and dry for decades, all while keeping the project on a tight budget.
- Home Accent Roofing
While we don’t recommend 29 gauge for a whole-house roof, it’s an excellent choice for smaller, steeper accent areas. Think of the roof over a front porch, a bay window, or a small dormer. These areas are typically small, so the cost savings are welcome, and they often don’t face the same direct weather exposure as the main roof.
- Interior Liners and Wainscoting
Inside a workshop, garage, or even a commercial kitchen or car wash, 29 gauge panels make a fantastic wall surface. They are incredibly durable, fácil de limpar, bright, and reflective. In this use, structural strength is not a factor, so using the more economical 29 gauge is a smart choice.
Quando evitar 29 Medidor
Just as important as knowing where to use it is knowing where not to. We strongly advise against using 29 gauge for:
- Primary home roofing in harsh climates. If your area experiences heavy snow loads, ventos fortes, or frequent hailstorms, the risk of panel damage, fastener pull-out, and leaks is too high.
- Low-slope roofs. Any roof with a pitch below 3:12 (three inches of rise for every twelve inches of run) is considered low-slope. Thinner panels are more likely to leak under the pressure of pooling water or wind-driven rain on these roofs.
- Buildings requiring a long-term, high-performance warranty. If your goal is a “50-year roof” with minimal maintenance and maximum property value, investing in a heavier 26 ou 24 gauge system is the correct path.
A Smart Buyer’s Guide
Purchasing 29 gauge metal isn’t just about finding the lowest price per foot. The quality and longevity of your project will be determined by the coatings on the steel. The base steel is just a carrier; the finish is what does the real work of protecting your investment from the elements.
1. Understanding the Finish
The finish is a two-part system: the metallic coating that protects the steel from rust, and the paint system that provides color and protects against fading.
Primeiro, the metallic coating under the paint. You will generally encounter two types:
- Galvanizado: This is the traditional process of coating steel with a layer of zinc. While it provides good protection, if the edge is cut or scratched, the exposed steel can begin to rust. You’ll see this specified by weight, such as G60 or G90, with G90 being a thicker, more protective coating.
- Galvalume®: This is a more modern, superior coating that consists of a mix of aluminum and zinc (tipicamente 55% alumínio). Galvalume® offers much better long-term corrosion resistance, especially at cut edges and scratches, where the aluminum component forms a protective oxide layer. Most quality painted panels today use a Galvalume® substrate, often designated as AZ50 or AZ55. For any exterior application, we always recommend a Galvalume® substrate over Galvanized.
Segundo, and arguably most important, is the paint finish. This is what you see, and it’s your first line of defense against UV degradation.
- SMP (Silicone-Modified Polyester): This is the workhorse of the industry and considered the “bom” or standard option for many years. SMP paints offer good color retention and durability for the price. You will typically find paint warranties for chalk and fade in the 25 to 40-year range for SMP systems. They provide a fantastic balance of performance and cost, making them the most common finish on 29 gauge agricultural panels.
- PVDF (Fluoreto de polivinilideno): Commonly known by the trade name Kynar 500®, this is the “melhor” or premium paint finish available. PVDF resins are exceptionally resistant to fading from UV exposure and chalking (the powdery residue that forms as paint breaks down). While more expensive, a PVDF finish will look better for longer. Warranties for PVDF systems often extend 30 years or more and have better terms for color fade. Choosing a PVDF finish, even on a thinner 29 gauge steel panel, is a way to maximize the long-term aesthetic value of your project.
2. Understanding Warranties
Warranties can be confusing. It’s vital to know that you are typically getting two separate warranties: one for the substrate and one for the paint.
- The substrate warranty protects against the panel rusting through (perfuração). A typical warranty might be 20-30 anos.
- The paint warranty protects against the paint film integrity and, more importantly, against specific levels of chalking and fading. A 40-year warranty might state that the panel will not chalk beyond a certain rating (Por exemplo, a rating of 8) or fade more than a certain number of Hunter units (a scientific measure of color change).
Always read the fine print. Warranties are almost always voided by improper installation, such as using the wrong fasteners or cutting with an abrasive blade. They also typically have exclusions for coastal environments (due to salt spray) or industrial fallout.
3. Panel Profiles Matter
A flat sheet of 29 gauge steel is very flimsy. The strength of a metal panel comes from its profile—the series of ribs and bends formed into the metal. Common profiles like an “Ag-Panel” (or Tuff-Rib) have major ribs every 9 polegadas, with smaller stiffening ribs in between. These ribs act like small beams, giving the panel immense rigidity and the ability to span between supports and shed water. When comparing 29 gauge sheet metal options, understand that a well-designed panel profile adds significant functional strength that is just as important as the metal’s base thickness.
Working With 29 Gauge Metal
Successfully installing 29 gauge metal requires specific techniques. Its thin, flexible nature is forgiving in some ways but demands respect in others. The number one cause of failed metal roofs isn’t the material itself; it’s improper installation. Here are the pro tips and common mistakes we see every day.
Handling and Safety
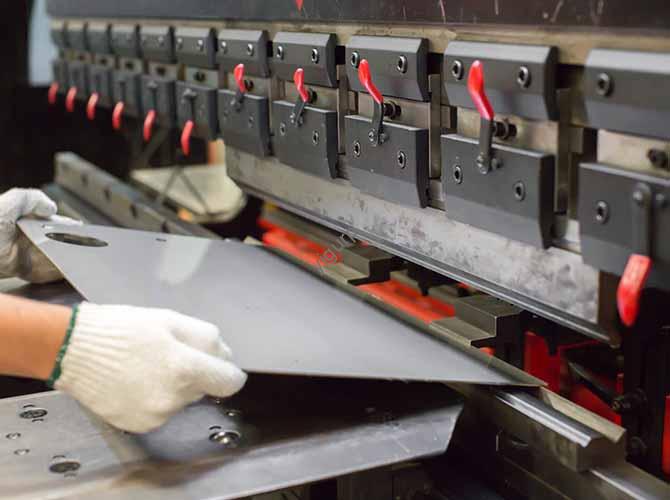
First and foremost: segurança. The factory-cut edges of 29 gauge panels are razor-sharp. Always wear high-quality, cut-resistant gloves when handling panels. Eye protection is non-negotiable. Because the panels are flexible, they can be unwieldy, especially in the wind. When carrying long panels, keep the leading edge low to prevent it from catching the wind like a sail. Be gentle to avoid kinking or bending the panels before they even get on the roof, as these dents are often impossible to remove.
Corte: The Right and Wrong Way
How you cut a metal panel is one of the most critical steps for ensuring its longevity.
- The Right Way (Cool Cuts): The best tools for cutting metal panels are ones that shear the metal without creating significant heat.
- Electric Metal Shears: These are the best option for long, cortes retos. They work like a powered can opener, making a clean, fast cut with no heat or sparks.
- Hand Snips (Aviator Snips): Para pequeno, intricate cuts, entalhes, or trimming around pipes, a good set of left, right, and straight-cutting snips is essential.
- A Nibbler: This tool takes small “bites” out of the metal and is excellent for curved or complex cuts.
- The Wrong Way (Hot Cuts): The number one mistake we see DIYers make is using an abrasive blade, like a circular saw with a metal-cutting abrasive disc or a grinder with a cutoff wheel. NEVER do this. The intense heat and sparks generated by these tools will burn off the protective Galvalume® and zinc coating along the cut edge. This super-heated edge will be the first place to rust, often within a year, and it will void your material warranty instantly.
Fixação: A etapa mais crítica
The fasteners are what hold the system together and keep the water out. Getting this right is paramount.
- Screw Type: Use the correct fastener. For installing panels over a wood substrate, the standard is a #9 ou #10 self-tapping wood screw. It should have a hex-head for positive driver engagement and, most importantly, a high-quality EPDM rubber washer. This washer is the gasket that creates the seal. Do not cheap out on screws; use the ones recommended by the panel manufacturer.
- Colocação: This is another area where mistakes are common. The screws should be installed in the flat area of the panel, conhecido como o “frigideira,” right next to the major rib. Do not install screws on top of the major rib. Placing the screw in the pan firmly secures the panel to the structure and allows the EPDM washer to create a perfect seal against the flat surface. It also allows the panel to naturally expand and contract with temperature changes without stressing the fastener.
- The Golden Rule of Proper Torque: The perfect screw is all about tightness. You must use a screw gun with an adjustable clutch.
- Over-tightening is disastrous. It squashes the EPDM washer out from under the screw head, breaking the seal and often dimpling the thin 29 gauge panel. This can create a small depression that collects water and will eventually leak.
- Under-tightening is also a problem. The washer won’t be compressed enough to create a watertight seal.
- The perfect torque is when the washer is compressed just enough to see it bulge slightly around the perimeter of the screw head. The washer should look compressed, not flattened like a pancake. Practice on a scrap piece until you get the clutch setting just right.
Making the Final Decision
After reviewing the technical specs, comparações, and expert tips, o que 29 gauge sheet metal is should be clear: it is an excellent, highly economical material when used in the right application. It is not a “bad” material, but it is a specialized one. Your final decision should be a simple one based on your project’s specific needs.
To summarize, here is your final decision-making checklist:
- Escolher 29 Gauge If:
- You are working on a tight budget where cost is a primary factor.
- Your project is a utility structure like a barn, shed, or workshop.
- The project involves an interior liner or a small home accent roof.
- You are not in a region known for severe hail, very high winds, or heavy snow loads.
- Upgrade to 26 Gauge If:
- The project is your home’s primary roof or a significant commercial building.
- Long-term durability and minimal maintenance are your top priorities.
- You live in an area with harsh weather conditions (hail, high wind, heavy snow).
- The roof design requires panels to span longer distances between supports.
By understanding these fundamental trade-offs between cost and performance, you are now fully equipped to look at your project, evaluate your priorities, and choose the perfect metal panel for a successful, long-lasting result.