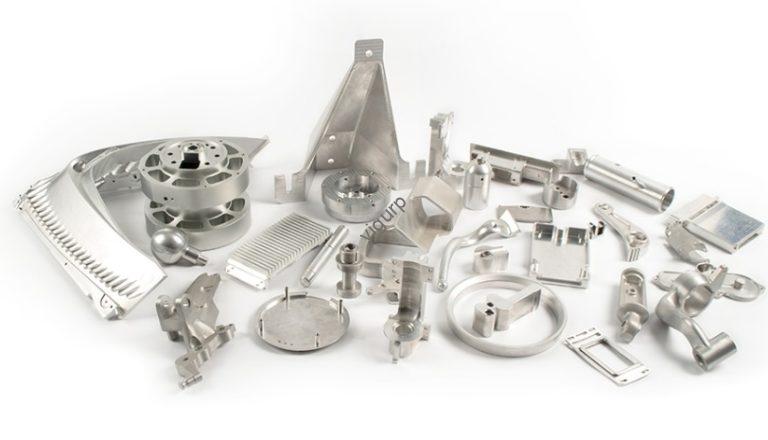
Usinagemcomplex CNC parts—think aerospace turbine blades with cooling channels, implantes médicos com recursos em escala micrométrica, ou gabinetes eletrônicos com rebaixos — requer mais do que apenas um operador qualificado. Exige uma avaliação cuidadosa do projeto, otimização estratégica, e estreita colaboração com os fabricantes para evitar atrasos dispendiosos, quebra de ferramenta, ou peças fora das especificações. This guide breaks down how to identify truly complex CNC parts, optimize their designs for manufacturability, work effectively with CNC shops, and explore alternatives when CNC machining hits its limits—all with real-world examples and actionable data.
Primeiro: What Makes a CNC Part “Complex”? (The Critical Checklist)
Not every detailed part is “complex”—but parts with specific features force CNC machines to work harder, increasing time, custo, and risk. Use this checklist to determine if your part qualifies as complex, and why each feature matters:
| Complex Feature | Definição | Machining Challenge | Example Impact |
|---|---|---|---|
| Thin Walls/Slender Structures | Metal walls <0.8milímetros; plastic walls <1.5milímetros | Prone to deformation from cutting forces; requires special fixtures or slower speeds. | A 0.6mm aluminum bracket warped during machining—scrapping 20% do lote. |
| Buracos profundos | Depth-to-width ratio >3:1 (por exemplo, a 3mm wide hole 10mm deep) | Tool deflection (causes off-center holes), acúmulo de calor, and poor chip evacuation. | A 5mm wide, 20mm deep hole (4:1 razão) had rough surfaces—required rework that added $50 por parte. |
| Hard-to-Reach Cavities/Undercuts | Internal spaces or recessed features that standard tools can’t access | Needs long-shank tools (prone to vibration) ou máquinas multieixos (adds setup time). | An electronics enclosure with an undercut required a 5-axis CNC machine—doubling production time vs. a 3-axis machine. |
| Complex Surface Geometry | Freeform curves, non-uniform shapes, or 3D contours | Requires advanced CAD/CAM programming and multiple tool changes; increases tool wear. | A custom automotive dashboard with curved surfaces needed 8 different tools and 3x more programming time than a flat part. |
| Micron-Scale Features | Detalhes <2.5milímetros (por exemplo, tiny fillets, micro-furos) | Needs specialized micro-tools (fast wear) and ultra-precise spindle speeds. | A medical device with 1.5mm fillets broke 3 micro-tools during machining—delaying production by a week. |
| Bulky Size | Peças >1000mm or beyond standard CNC worktables | Requires specialized equipment; thermal expansion causes dimensional errors. | A 1200mm steel frame had 0.2mm warpage due to heat—failed quality checks and needed re-machining. |
| Full-Size Tight Tolerances | Tight precision (por exemplo, ±0,01 mm) applied to all features, not just critical ones | Increases machining time (slower feeds/speeds) and inspection costs. | A part with ±0.01mm tolerance on non-critical edges cost 40% more than the same part with selective tolerances. |
| Cutting Interruptions/Narrow Grooves | Uneven tool contact (por exemplo, slots <3mm de largura) | Causes tool chatter (mau acabamento superficial) and premature tool failure. | Narrow 2mm grooves on a gear led to tool chatter—surface roughness doubled, requiring sanding. |
Estudo de caso: A turbine manufacturer’s initial design had 0.7mm thin walls, 5:1 buracos profundos, and full ±0.02mm tolerances. The first batch had 35% scrap rate due to warping and off-center holes. By adjusting the design (thickening walls to 1mm, reducing hole ratio to 3:1), scrap rate dropped to 5%.
Etapa 1: Optimize Complex CNC Part Designs (Reduce Cost & Risk)
The best way to tackle complex CNC parts is to optimize their designantes production starts. Small changes—like adjusting wall thickness or simplifying features—can cut machining time by 30% ou mais. Below are 7 proven optimization strategies, with specific methods and tools:
1. Fix Wall Thickness & Cavidades Profundas (The Foundation of Success)
Thin walls and deep cavities are the top causes of failed complex parts. Fix them with these rules:
- Minimum Thickness: Use 0.8mm for metal, 1.5mm for plastic—avoids deformation.
- Cavity Ratio: Keep depth-to-width ratio ≤3:1—improves tool access and chip evacuation.
- Ferramenta: Use CAD software like SolidWorks ou Autodesk Fusão 360 to simulate thickness; the software flags areas too thin for machining.
Exemplo: A plastic electronics enclosure had 1.2mm walls (below the 1.5mm plastic minimum) e 4:1 cavidades profundas. Optimizing to 1.5mm walls and 3:1 cavities cut machining time by 25% and eliminated warping.
2. Simplify Complex Geometries (Replace Curves with Feasible Shapes)
Freeform surfaces or intricate curves require 5-axis machines and specialized programming. Simplify without losing functionality:
- Replace overly complex curves with standard arcs (por exemplo, a 10mm radius instead of a custom 12.7mm radius) that match standard tool sizes.
- Move decorative features (por exemplo, embossed logos) to post-processing (pintura, laser engraving)—reduces material removal time.
- Use CAM software like HyperMill ou Mastercam to generate efficient toolpaths for remaining complex surfaces.
Estudo de caso: A consumer goods brand simplified a custom curved handle to use standard 8mm and 10mm arcs. Machining time dropped from 45 minutos para 25 minutes per part—no loss in user comfort.
3. Eliminate Hard-to-Reach Features (Modular Design Works)
Undercuts or internal cavities that trap tools can force you to use expensive 5-axis machines. Fix them by:
- Modular Design: Split the part into 2–3 smaller pieces (machined separately, then assembled). Por exemplo, an enclosure with an internal undercut became two parts joined by screws—no 5-axis needed.
- Extended Tools: For unavoidable cavities, use long-shank tools (with vibration-damping handles) and optimize paths in Fusion 360.
- EDM as Backup: For extreme cases (por exemplo, a closed internal cavity), use Electrical Discharge Machining (Música eletrônica) for that feature—then CNC machine the rest.
Ponto de dados: Modular design reduced the cost of a complex medical valve by 30%—vs. trying to machine it as one piece on a 5-axis machine.
4. Remove Micro-Scale Features (Or Use Specialized Methods)
Características <2.5milímetros (por exemplo, pequenos buracos, 1mm fillets) break standard tools and slow production. Fix them:
- Redesign to remove non-essential micro-features (por exemplo, a 1.5mm decorative notch became 3mm—no impact on function).
- For critical micro-features (por exemplo, a medical device’s 2mm hole), usar micro-EDM ou corte a laser instead of CNC—these methods handle small details better.
- Validate redesigns with simulation tools like Siemens NX to ensure functionality isn’t lost.
Exemplo: A 2mm micro-hole in a sensor was replaced with a 3mm hole (with a insert to maintain fit). CNC machining time dropped by 15%, and no micro-tools were broken.
5. Standardize Fillet Radii (Reduce Tool Changes)
Inconsistent fillet radii (por exemplo, 1milímetros, 1.5milímetros, 2milímetros) force operators to switch tools repeatedly. Fix this:
- Design all internal fillets to be 130% of the tool radius (por exemplo, a 4mm tool needs 5.2mm fillets). This lets the same tool cut all fillets.
- Use Fusion 360’s built-in design rules to automatically adjust radii—avoids manual checks.
Impacto: A gear with 3 different fillet radii (1milímetros, 1.5milímetros, 2milímetros) required 3 mudanças de ferramentas. Standardizing to 2mm fillets cut tool change time by 40%.
6. Use Standard Hole Sizes & Tópicos (Avoid Custom Tools)
Non-standard holes or long threads require custom drills or taps—adding cost and delay. Follow these rules:
- Hole Sizes: Use industry standards (por exemplo, 3milímetros, 5milímetros, 8milímetros) that match off-the-shelf drills.
- Thread Length: Keep threads ≤1.5x the diameter (por exemplo, an M6 thread should be ≤9mm long)—prevents tool breakage and ensures strength.
- Hole Layout: Align holes along the CNC machine’s axes (X/Y/Z)—reduces tool deflection.
Estudo de caso: A bracket with non-standard 4.2mm holes required custom drills (custo $150 per tool). Switching to 4mm standard holes eliminated custom tools and cut per-part cost by $3.
7. Apply Tolerances Selectively (Don’t Over-Specify)
Full-size tight tolerances (por exemplo, ±0.01mm on every edge) waste time—only critical features need precision. Do this:
- Critical Features: Use tight tolerances (±0.01–0.02mm) for mating surfaces, alignment points, or moving parts.
- Non-Critical Features: Use standard tolerances (por exemplo, ISO 2768 medium grade: ±0,1mm para peças <100milímetros) for edges, non-mating surfaces.
- Ferramenta: Usar GD&T (Dimensionamento Geométrico & Tolerância) em Creo ou SolidWorks to mark tolerance zones clearly.
Ponto de dados: A part with selective tolerances took 2 hours to machine—vs. 3.5 hours for the same part with full tight tolerances.
Etapa 2: Work Effectively with CNC Manufacturers (Avoid Miscommunication)
Even the best optimized design fails if your manufacturer doesn’t understand your needs. Use these 3 strategies to collaborate smoothly:
1. Provide Complete CAD Models (No Missing Details)
CAD models are the “blueprint” for complex CNC parts—missing info leads to guesswork and errors. Incluir:
- All dimensions, tolerâncias, e requisitos de acabamento superficial (por exemplo, Ra 1.6μm for mating surfaces).
- Clear labels for key features: tópicos (por exemplo, M8x1.25), post-processing areas (por exemplo, “deburr all edges”), and critical mating surfaces.
- File formats compatible with CNC software: ETAPA ou IGES (avoid proprietary formats that cause import errors).
Exemplo: A startup forgot to label thread lengths in their CAD model. The manufacturer used 10mm threads instead of the required 5mm—scrapping 50 parts and delaying production by 2 semanas.
2. Share Material Data (Dureza & Toughness Matter)
Material choice impacts machining difficulty—high-hardness metals (titânio, aço temperado) wear tools faster; low-thermal-conductivity metals (aço inoxidável) trap heat. Tell your manufacturer:
- Material grade (por exemplo, Ti6Al4V titanium, 304 aço inoxidável).
- Propriedades principais: dureza (HRC value), resistência, and thermal conductivity—helps them choose the right tools and speeds.
Estudo de caso: A client specified “stainless steel” but didn’t note it was 440C (endurecido para 58 CDH). The manufacturer used standard tools, which wore out 3x faster—adding $200 in tool costs.
3. Ask About Their Capabilities (Don’t Assume They Can Do It All)
Not all CNC shops have 5-axis machines, micro-tools, or EDM capabilities. Ask upfront:
- Do you have multi-axis machines (4/5-eixo) para geometrias complexas?
- Can you handle micro-features (por exemplo, <2.5furos mm) or deep holes (ratio >3:1)?
- What’s your experience with my material (por exemplo, titânio, PEEK plastic)?
Para dica: Ask for a sample part before full production—validates their ability to handle complexity.
Etapa 3: When to Use Alternatives to CNC Machining
CNC machining is versatile, but some complex parts are better suited for other processes. Use this table to choose the right alternative:
| Alternative Process | Como funciona | Melhor para | Key Advantage Over CNC |
|---|---|---|---|
| Fabricação Aditiva (3Impressão D) | Builds parts layer by layer from powder/resin (por exemplo, mjf, SLA, DMLS) | Complex internal structures (treliças, canais de resfriamento); peças leves | No tool access issues—can make shapes CNC can’t (por exemplo, a hollow turbine blade with internal channels). |
| Usinagem de Descarga Elétrica (Música eletrônica) | Eroded material with electrical sparks | Materiais duros (titânio, aço temperado); sharp edges or micro-features | No cutting forces—avoids deformation of thin parts; handles hardness CNC tools can’t. |
| Fabricação Híbrida | Combines CNC machining with laser/plasma cutting | Parts needing both precision milling and fine cutting (por exemplo, componentes aeroespaciais) | Reduces steps—CNC mills the main shape; laser cuts intricate contours in one workflow. |
| Fundição | Pours molten material into a mold (alumínio, plástico) | High-volume complex parts with internal cavities (por exemplo, blocos de motor) | Lower per-part cost for batches >10,000—vs. CNC’s high labor time. |
Estudo de caso: An aerospace company tried to CNC machine a turbine blade with 0.5mm internal cooling channels—tool deflection made it impossible. Switching to DMLS 3D printing produced the channels perfectly, com 0% taxa de sucata.
Yigu Technology’s Perspective on Complex CNC Parts Machining
Na tecnologia Yigu, we tackle complex CNC parts by starting with design optimization—our team reviews CAD models to flag thin walls, buracos profundos, or over-spec tolerances before production. For hard-to-reach features, we use 5-axis machines with vibration-damping tools; for micro-features, we combine CNC with micro-EDM. We also collaborate closely with clients to share material insights (por exemplo, titanium’s tool wear risks) and provide sample parts to validate designs. When CNC hits limits, we recommend 3D printing or hybrid manufacturing—ensuring parts meet specs without unnecessary cost. For us, complex parts aren’t a challenge—they’re an opportunity to deliver innovative solutions.
FAQ About Complex CNC Parts Machining
1. Can I machine a part with 0.6mm metal walls using CNC?
It’s possible but risky—0.6mm walls are below the 0.8mm minimum for metal and will likely warp during cutting. We recommend thickening to 0.8mm; if functionality requires 0.6mm, use special fixtures (to reduce vibration) and slow cutting speeds—adding ~20% to production time but lowering scrap rate.
2. How much more does it cost to machine a complex CNC part vs. a simple one?
Complex parts cost 2–5x more than simple parts. Por exemplo, a simple aluminum bracket costs $10 maquinar; a complex version with thin walls, buracos profundos, and 5-axis work costs $25–$50. Otimização (por exemplo, simplifying features) can cut this premium by 30–40%.
3. When should I choose 3D printing over CNC for a complex part?
Choose 3D printing if your part has internal structures (treliças, closed channels) that CNC tools can’t reach, or if you need small batches (10–100 peças). CNC is better for parts needing ultra-tight tolerances (±0,01 mm) or large batches (100+ peças) with simple-to-moderate complexity.