Em indústrias como eletrônica, automotivo, e bens de consumo, creating high-precision plastic parts is non-negotiable—and CNC plastic machining stands out as the most reliable solution. Ao contrário da usinagem manual tradicional, CNC (Controle Numérico Computadorizado) usa programas automatizados para garantir precisão consistente, mesmo para projetos complexos. This article breaks down the full CNC plastic machining process, from pre-production planning to final inspection, helping you understand how to optimize your projects for quality and efficiency.
1. O 7 Core Stages of the CNC Plastic Machining Process
Every successful CNC plastic part goes through a linear, fluxo de trabalho passo a passo. Skipping or rushing any stage can lead to defects (por exemplo, erros dimensionais, surface burrs). Below is a detailed breakdown of each step, with key goals and best practices.
| Stage | Objetivo principal | Tools/Software Needed | Desafios Comuns & Soluções |
| 1. Programação | Translate 3D models into machine-readable code | CAD (SolidWorks, AutoCAD), CAM (Mastercam, Fusão 360) | Desafio: Poor tool path design causes tool wear. Solução: Use CAM software to simulate paths before machining. |
| 2. Seleção de Materiais | Pick plastics that match part performance needs | Material sample kits, tensile strength testers | Desafio: Choosing the wrong material (por exemplo, brittle plastic for load-bearing parts). Solução: Refer to material property charts (veja a seção 2). |
| 3. Clamping | Secure plastic to the worktable without deformation | Vises, braçadeiras, vacuum chucks | Desafio: Over-clamping bends thin plastic sheets. Solução: Use soft-jaw vises to distribute pressure evenly. |
| 4. Usinagem Desbaste | Remove 80-90% of excess material quickly | Fresas finais (10-20mm de diâmetro), aço rápido (HSS) ferramentas | Desafio: High cutting speed melts plastic. Solução: Adjust feed rate to 500-1000 mm/min for thermoplastics like ABS. |
| 5. Acabamento | Achieve tight dimensional tolerance and smooth surfaces | Ball-end mills (2-5mm de diâmetro), carbide tools | Desafio: Surface scratches from dull tools. Solução: Replace tools after 50-100 peças (dependendo da dureza do material). |
| 6. Moagem & Polimento | Eliminate burrs and improve appearance | Sandpaper (400-1200 areia), abrasive paste, rodas de polimento | Desafio: Over-polishing reduces part thickness. Solução: Use a micrometer to check thickness during polishing. |
| 7. Inspeção | Verify part meets design specifications | Compassos de calibre, máquinas de medição por coordenadas (CMMs), testadores de rugosidade de superfície | Desafio: Missing hidden defects (por exemplo, internal cracks). Solução: Combine visual checks with CMM scans for 3D accuracy. |
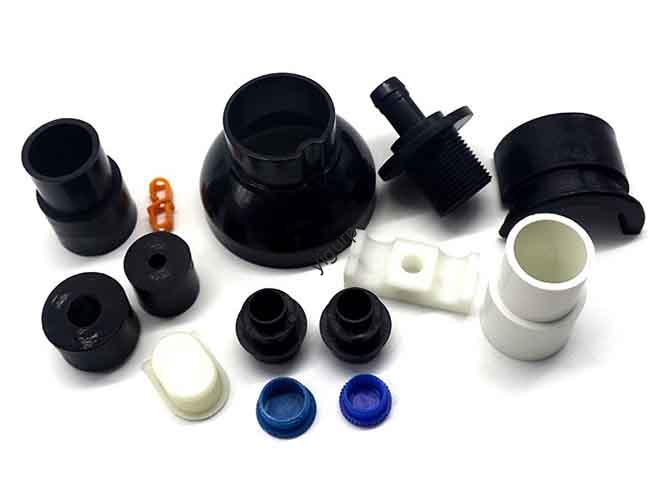
2. How to Choose the Right Plastic Material for CNC Machining
Not all plastics are equal—each has unique properties that impact machining difficulty and part performance. The table below compares the most common CNC-friendly plastics, seus melhores usos, and machining tips.
2.1 Common CNC Plastic Materials: Propriedades & Aplicativos
| Tipo de plástico | Key Physical Properties | Aplicações ideais | Dicas de usinagem |
| ABS (Acrilonitrila Butadieno Estireno) | Alta resistência ao impacto, good heat stability (80-100°C) | Peças internas automotivas, gabinetes eletrônicos | Use coolant to prevent melting; avoid high cutting speeds (máx. 800 mm/min). |
| PC (Policarbonato) | Transparente, alta resistência à tração (65 MPa) | Safety goggles, capas de exibição | Use sharp carbide tools to avoid chipping; polish with 800-grit sandpaper for clarity. |
| PMMA (Acrílico) | Excelente transparência (92% transmissão de luz), rígido | Sinalização, componentes ópticos | Machining produces fine dust—use a vacuum system to keep the workspace clean. |
| PA (Nylon) | Resistente ao desgaste, low friction coefficient | Engrenagens, rolamentos, fixadores | Use lubricants (por exemplo, mineral oil) to reduce tool friction; rough machine at 600 mm/min. |
| POM (Acetal) | High dimensional stability, low moisture absorption | Engrenagens de precisão, peças da bomba | Avoid excessive heat—use air cooling instead of liquid coolant to prevent warping. |
| PP (Polipropileno) | Flexível, resistente a produtos químicos | Medical containers, embalagens de alimentos | Clamp lightly (PP is soft); use a 45° end mill for clean edges. |
3. Critical Factors That Impact CNC Plastic Machining Quality
Even with a perfect workflow, ignoring these three factors can ruin your parts. Think of them as “quality checkpoints” to address before starting production.
3.1 Seleção de ferramentas: The Foundation of Accurate Machining
- Material da ferramenta: Carbide tools are better than HSS for hard plastics (por exemplo, PC, POM) because they stay sharp longer. HSS tools work for softer plastics (por exemplo, PP, ABS) and are more affordable.
- Geometria da ferramenta: Ball-end mills are ideal for curved surfaces (por exemplo, a rounded electronics enclosure), while flat-end mills excel at straight edges (por exemplo, a rectangular ABS bracket).
- Exemplo: A manufacturer switched from HSS to carbide tools for machining PMMA—tool changes dropped from 3x per shift to 1x, and surface defects decreased by 40%.
3.2 Parâmetros de corte: Avoid Melting, Chipping, or Warping
Plastics are more heat-sensitive than metals, so adjusting speed, taxa de alimentação, and depth of cut is critical:
- Velocidade: For thermoplastics (por exemplo, ABS), keep spindle speed between 10,000-15,000 RPM. Higher speeds generate too much heat; lower speeds cause rough cuts.
- Taxa de alimentação: Faster feed rates (800-1200 mm/min) reduce heat buildup but may leave burrs. Slower rates (400-600 mm/min) improve surface finish but increase production time.
- Profundidade de corte: For roughing, use 2-5mm depth; para acabamento, stick to 0.1-0.5mm to avoid tool vibration.
3.3 Pós-processamento: Don’t Overlook Grinding & Polimento
- Moagem: Usar 400-600 grit sandpaper for initial burr removal—focus on edges where the tool exited the material (this is where burrs form most often).
- Polimento: For transparent plastics (por exemplo, PMMA), usar 800-1200 grit sandpaper followed by abrasive paste. Buff with a cotton wheel to restore clarity.
- Aviso: Over-polishing PA or POM can remove critical material—stop and measure thickness every 2-3 minutes with a caliper.
4. Yigu Technology’s Perspective on CNC Plastic Machining
Na tecnologia Yigu, we see CNC plastic machining as a balance of precision and practicality. For small-batch projects (10-50 peças), we recommend optimizing programming with our in-house CAM software— it reduces tool path errors by 30% compared to generic tools. Para produção de alto volume, our automated clamping systems cut setup time by 50% while preventing plastic deformation. We also advise clients to test material samples first: our material lab offers free tensile and heat resistance tests to ensure the plastic matches their part’s needs. As CNC machines become more intelligent, we’re integrating AI-driven defect detection to catch issues (like surface scratches) in real time—helping clients reduce rework costs.
5. Perguntas frequentes: Common Questions About CNC Plastic Machining
1º trimestre: How long does the CNC plastic machining process take for a single part?
It depends on part size and complexity. Um pequeno, parte simples (por exemplo, a 50x50mm ABS bracket) leva 10-15 minutos (5 min roughing + 3 min finishing + 2 min polishing). A large, parte complexa (por exemplo, a 300x200mm PC display cover) pode levar 1-2 horas.
2º trimestre: Can CNC plastic machining produce parts with tight tolerances (por exemplo, ±0,01 mm)?
Sim, but it requires the right tools and setup. Use ferramentas de metal duro, a high-precision CNC machine (with ±0.005mm repeatability), and finishing cuts with 0.1mm depth. Materials like POM and PMMA are easier to machine to tight tolerances than flexible plastics like PP.
3º trimestre: What’s the difference between rough machining and finishing in CNC plastic work?
Rough machining prioritizes speed—it removes most excess material with large tools and fast feed rates, but leaves a rough surface (Rá 5-10 μm). Finishing prioritizes quality—it uses small tools and slow feed rates to achieve smooth surfaces (Rá 0.8-1.6 μm) and tight dimensions (±0.05mm or better). Skipping rough machining would make finishing too slow and costly.