Have you ever wondered why some CNC machining projects turn out perfectly, enquanto outros têm dimensões defeituosas ou superfícies ásperas? A resposta geralmente está em pular ou apressar etapas importantes. A usinagem CNC é um processo sistemático – cada estágio se baseia no anterior para garantir precisão e qualidade. Este guia detalha o 7 essencial CNC machining steps, solving common pain points and giving you a roadmap to successful projects, whether you’re making a prototype or a production part.
1. Requirements Analysis: Lay the Groundwork for Success
Before touching a machine, you need to clarify what the final workpiece needs to achieve. This step is like planning a trip—without knowing the destination, you’ll likely get lost.
What to Cover in Requirements Analysis
- Design Requirements: Understand the workpiece’s purpose (por exemplo, a gear for a machine or a bracket for electronics). Note critical details from the design drawing, such as 3D shape and assembly needs.
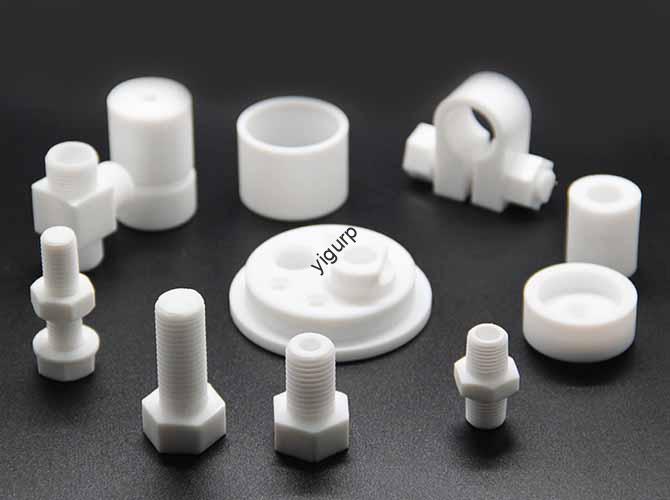
- Propriedades dos materiais: Choose the right material (por exemplo, aluminum for light parts, stainless steel for strength) and confirm its hardness, usinabilidade, e resistência ao calor. Por exemplo, a part used in high-temperature engines needs heat-resistant alloy like Inconel.
- Dimensional Tolerances & Surface Roughness: Define how precise the part must be. A medical component might need a tolerance of ±0.005mm, while a simple bracket could use ±0.1mm. Rugosidade superficial (Ra value) matters too—Ra 0.8μm for visible parts vs. Ra 6.3μm for hidden components.
Common Problem Solved: “Why did my part fail to fit with other components?”
You skipped clarifying assembly requirements! During analysis, ask:
- Will the part connect to other parts? (Note hole positions and thread sizes.)
- Does it need to withstand weight or pressure? (Choose a material with matching strength.)
Here’s a checklist to ensure you don’t miss anything:
- Review the design drawing with the customer/engineer.
- Document material type, tolerance, e acabamento superficial.
- Confirm the workpiece’s intended use (por exemplo, indoor vs. outdoor, load-bearing vs. decorative).
2. Process Design: Plan the Machining Strategy
Once requirements are clear, you need to map out como to make the part. This step is like creating a recipe—you decide the order of steps, ferramentas, and fixtures.
Key Elements of Process Design
- Process Route Design: Choose the order of machining operations. For a cylindrical part, the route might be: Turn the outer diameter → Drill a hole → Mill a slot. Avoid unnecessary steps—e.g., don’t mill before turning if it could damage the part.
- Tool Selection & Configuration: Pick tools based on material and operation. Use a carbide end mill for aluminum (fast cutting) and a high-speed steel drill for stainless steel (handles hardness). Ensure tools have the right size—e.g., a 5mm drill for a 5mm hole.
- Fixture Design & Instalação: Fixtures hold the material in place. For a flat metal sheet, use a vice with soft jaws to avoid scratching. For irregular shapes, design a custom fixture to keep the part stable during machining.
The table below compares good vs. bad process routes for a simple aluminum bracket:
| Aspect | Good Process Route | Bad Process Route |
| Operation Order | Cut the sheet to size → Drill holes → Mill edges | Mill edges → Cut to size → Drill holes |
| Tool Choice | Carbide end mill (rápido, smooth cuts) | High-speed steel mill (slow, rough surface) |
| Fixture Use | Custom jaw to hold the sheet flat | No fixture (part shifts during drilling) |
| Result | Accurate holes, smooth edges | Misaligned holes, bent edges |
3. CNC Programming: Turn Design into Machine Instructions
CNC machines don’t read drawings—they need code. Programming converts your design into a language the machine understands (G-code/M-code).
Steps to CNC Programming
- CAD Modeling: Create a 3D digital model of the part using software like SolidWorks or AutoCAD. Ensure the model is error-free (no missing faces or overlapping edges).
- CAM Programming: Use CAM software (por exemplo, Mastercam, Fusion 360) to generate toolpaths. Set parameters like cutting speed (1000 RPM for aluminum) and feed rate (500 mm/min). The software turns the 3D model into G-code.
- Program Simulation & Otimização: Run a virtual simulation to check for collisions (por exemplo, tool hitting the fixture). Optimize the program—e.g., shorten tool travel time to speed up machining.
Example: A programmer is making a 3D model of a plastic knob. They use SolidWorks to create the model, then Mastercam to set a 2000 RPM cutting speed for plastic. Simulation reveals the tool almost hits the fixture—they adjust the toolpath to fix it.
4. Machine Tool Preparation: Get the Machine Ready to Run
Even the best program fails if the machine isn’t set up right. This step ensures everything is calibrated and in place.
Preparation Tasks
- Machine Tool Calibration: Check the machine’s accuracy (por exemplo, use a dial indicator to test spindle runout). If the spindle is off by 0.01mm, the part will have dimensional errors.
- Tool Installation & Calibration: Install tools in the tool holder and set their length / 直径 offsets. Use a tool setter to measure tool length—this tells the machine where the tool tip is. Por exemplo, a 10mm end mill needs its length offset set to 50mm from the spindle.
- Fixture Installation & Debugging: Mount the fixture on the machine table and align it with the spindle. Test the fixture by clamping a sample material—ensure it doesn’t move when pressure is applied.
Common Problem Solved: “Why is my tool leaving uneven cuts?”
You forgot to calibrate tool length! If the tool length offset is wrong by 0.5mm, the machine will cut too deep or too shallow. Always use a tool setter to confirm offsets.
5. Machining Execution: Let the Machine Do the Work
With setup complete, the machine runs the program automatically. But you still need to monitor to catch issues early.
What Happens During Execution
- Roughing: Remove most of the excess material quickly. For a 100mm aluminum block being turned into a 50mm cylinder, roughing cuts away 40% of the material in fast, deep passes.
- Semi-Finishing: Refine the shape, bringing it closer to the final dimensions. Cuts are shallower (por exemplo, 0.5mm per pass) and faster than roughing.
- Acabamento: Make the final, precise cuts. Use slow feed rates (por exemplo, 200 mm/min) and sharp tools to achieve the desired surface finish. For a part needing Ra 1.6μm, finishing passes smooth out any rough spots.
Pro Tip: Stay nearby during the first 10 minutes of machining. If the tool is chattering (making a loud noise) or the material is melting, stop the machine—you may need to adjust cutting speed or tool alignment.
6. Quality Inspection: Ensure the Part Meets Requirements
You can’t assume the part is perfect—inspection verifies it meets all specs. This step is like proofreading an essay before submitting it.
What to Inspect
- Dimensional Inspection: Use tools like calipers (for simple measurements), micrometers (for precision), and CMM (Coordinate Measuring Machine) for complex 3D parts. Check if all dimensions match the drawing (por exemplo, hole diameter, part length).
- Shape Inspection: Look for deformities like warping or bending. A flat part should lie perfectly on a surface plate—if it rocks, it’s warped.
- Surface Quality Inspection: Check for scratches, rebarbas, or unevenness. Use a surface roughness tester to confirm Ra value, or visually inspect for visible flaws.
Example: A manufacturer inspects a batch of 100 brackets. They use a CMM to check 10 random parts—9 are within ±0.05mm tolerance, mas 1 has a hole 0.1mm off. They adjust the program and re-inspect to avoid more defects.
7. Pós-processamento: Polish the Final Part
Even a precise part may need extra steps to improve performance or appearance. Post-processing is like adding the final touches to a painting.
Common Post-Processing Operations
- Deburring: Remove sharp edges or small metal shavings (rebarbas) using a file, sandpaper, or deburring tool. Burrs can cut hands or damage other parts during assembly.
- Tratamento térmico: Strengthen the material (por exemplo, annealing aluminum to reduce brittleness, quenching steel for hardness). A tool part might undergo heat treatment to withstand heavy use.
- Tratamento de superfície: Improve appearance or durability. Options include:
- Anodizing (for aluminum parts—adds a colored, corrosion-resistant layer).
- Painting (for visible parts like consumer electronics).
- Plating (por exemplo, chrome plating for a shiny, wear-resistant finish).
Yigu Technology’s Perspective
Na tecnologia Yigu, we see CNC machining steps as the backbone of precision manufacturing. Many clients face delays or defects because they rush steps like requirements analysis or calibration. Our solutions include a step-by-step checklist for each stage, plus AI-powered simulation tools to catch programming errors early. We also train teams to prioritize inspection—because a small flaw early becomes a big problem later. As CNC tech advances, we’ll integrate more automation (por exemplo, auto-calibration) to simplify steps, helping clients cut time while keeping quality high.
Perguntas frequentes
1. Can I skip the simulation step in CNC programming?
No—simulation is critical to avoid costly mistakes. Skipping it could lead to tool collisions (breaking tools or damaging the machine) or incorrect toolpaths (ruining the material). Even for simple parts, a 5-minute simulation saves hours of rework.
2. How long does the CNC machining process take for a single part?
It depends on the part’s complexity and step speed. A simple aluminum bracket might take 30 minutos (10 mins setup, 15 mins machining, 5 mins inspection). A complex medical part could take 2–3 hours (more time for precision programming and inspection).
3. What if the part fails quality inspection?
Primeiro, identify the cause: Was it a programming error (fix the code), desgaste da ferramenta (replace the tool), or material issue (switch materials)? For small defects (por exemplo, a tiny burr), rework the part with post-processing. For major issues (por exemplo, wrong dimensions), restart from the process design step to correct the root problem.