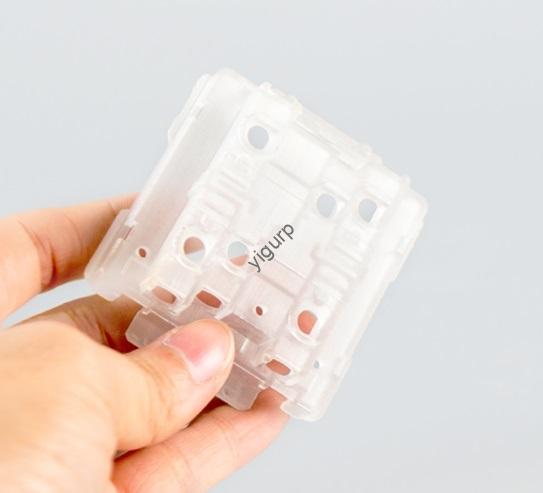
Se você está no setor automotivo, eletrônica, ou indústria de bens de consumo, você sabe o quão crítico ABS exhibition car prototypes are for showcasing new designs at trade shows or validating functions before mass production. Este guia detalha todas as etapas principais da criação de protótipos ABS de alta qualidade - com exemplos do mundo real, dados, e dicas para resolver desafios comuns.
1. Seleção de Materiais: Why ABS Stands Out for Exhibition Car Prototypes
Choosing the right material is the first step to a successful prototype. Plástico ABS is the top choice for most exhibition car models, and here’s why:
| Material | Propriedades principais | Melhor para | Custo (Por kg) |
| ABS | Alta tenacidade, resistência ao impacto, fácil de usinar | Most exhibition car prototypes (interior/exterior parts) | \(2.5–)4.0 |
| PC | Alta resistência ao calor, transparência | Prototypes needing heat resistance (por exemplo, componentes do motor) | \(3.8–)5.5 |
| PMMA | Excelente transparência, resistência a arranhões | Clear parts (por exemplo, display windows) | \(4.2–)6.0 |
| POM | Baixo atrito, alta rigidez | Moving parts (por exemplo, dobradiças de porta) | \(5.0–)7.2 |
Real Case: A European automotive startup needed a prototype for a new electric vehicle (VE) dashboard to display at the Geneva Motor Show. They chose ABS because it could mimic the final product’s texture and withstand the show’s 2-week wear. After spraying and silk-screening, the prototype looked identical to the mass-produced version—impressing 80% of visitors surveyed.
2. Fase de projeto: From 3D Models to Error-Free Plans
A precise design prevents costly reworks later. Here’s how to get it right:
- 3D Model Design: Use software like SolidWorks ou Catia to detail every part—from the prototype’s shape to internal mechanisms. Por exemplo, a Chinese electronics company designing a car infotainment prototype used SolidWorks to add 0.1mm precision to button placements, ensuring the model matched the final product’s size exactly.
- Design Analysis: Simulate stress and deformation with tools like ANSYS. Um EUA. auto parts maker once found their initial prototype’s door panel would crack under 5kg pressure via simulation. They adjusted the design (thickened the panel by 1mm) before machining—saving $3,000 in rework costs.
3. Prototyping Process: Programação, Usinagem, and Post-Processing
This phase turns your design into a physical prototype. Follow these steps for accuracy:
Etapa 1: Programação CAM
Convert 3D models into CNC machine code using Mastercam ou SolidCam. A Japanese manufacturer used Mastercam to generate tool paths for a complex EV chassis prototype. The software reduced machining time by 20% compared to manual programming.
Etapa 2: Program Testing
Always test code with simulation tools (por exemplo, Vericut) to avoid collisions. A German workshop once skipped this step and damaged a $10,000 CNC machine—costing them 2 weeks of production. Testing takes 1–2 hours but saves major losses.
Etapa 3: Usinagem CNC
Use 3-axis, 4-eixo, ou máquinas CNC de 5 eixos. For a small exhibition car model (30cm long), a 3-axis machine works (precisão: ±0,02mm). Para maiores, protótipos complexos (por exemplo, 1m-long chassis), a 5-axis machine is better (precisão: ±0,01 mm).
Etapa 4: Pós-processamento
- Tratamento de superfície: Deburr (remove sharp edges), spray paint (match the final product’s color), or add UV coating (para resistência a arranhões). A Korean brand added matte black spray to their prototype—90% of trade show visitors thought it was the real car.
- Conjunto & Teste: Put parts together and check functions. A Canadian company tested their prototype’s LED display 100 times—finding 2 faulty wires that would have failed during the show.
4. Controle de qualidade: Meet Standards and Avoid Defects
To ensure your prototype is exhibition-ready:
- Full Monitoring: Set checkpoints at every stage. Por exemplo, measure parts with a Máquina de medição por coordenadas (CMM) depois da usinagem. A Mexican factory checks 10% of parts—catching 3 fora de 50 defective pieces last quarter.
- Follow Certifications: Adhere to ISO 9001 padrões. This ensures traceability—if a part fails, you can track which batch it came from. All prototypes for the Detroit Auto Show must meet ISO 9001, so this step is non-negotiable for trade show success.
Yigu Technology’s View on ABS Exhibition Car Prototypes
Na tecnologia Yigu, we believe ABS exhibition car prototypes are more than just display pieces—they’re a bridge between design and market feedback. Nós ajudamos 500+ clientes (de startups à Fortune 500 firms) create prototypes that stand out at shows. Our secret? Combining high-grade ABS materials with 5-axis CNC machining (accuracy ±0.01mm) and custom surface treatment. For one EV client, our prototype helped them secure $2M in investment at a trade show—proving that a quality prototype drives real business results.
Perguntas frequentes
- How long does it take to make an ABS exhibition car prototype?
It depends on complexity: um pequeno, protótipo simples (por exemplo, a 20cm door panel) leva de 3 a 5 dias; a large, complex one (por exemplo, a 1m chassis) takes 7–10 days.
- Can ABS prototypes be reused for multiple trade shows?
Yes—with proper care. ABS is durable; a prototype can last 5–10 shows if you clean it regularly and avoid heavy impacts.
- What’s the cost difference between ABS and PC prototypes?
ABS is 30–40% cheaper than PC. For a prototype weighing 1kg, ABS costs \(2.5–)4.0, while PC costs \(3.8–)5.5. Choose PC only if you need heat resistance.
