Já sonhou em possuir um modelo Bugatti ou Lamborghini hiper-realista - um que capturasse cada curva do corpo, cada detalhe das rodas, e até pequenos detalhes interiores? 3D printing sports car models turns that dream into reality. Ao contrário dos kits de plástico produzidos em massa (que muitas vezes carecem de detalhes), 3Os modelos impressos em D oferecem precisão incomparável, personalização infinita, and the flexibility to replicate any sports car you love. This guide solves the biggest challenges hobbyists and designers face—from choosing materials to perfecting post-processing—so you can create display-worthy models every time.
1. Why 3D Printing Sports Car Models Stands Out
What makes 3D-printed sports car models better than traditional kits? Let’s break down their four unbeatable advantages, com exemplos do mundo real:
Vantagem 1: Unmatched Material Variety
3D printing lets you choose from materials that match the look and feel of real sports cars. The table below highlights popular options and their best uses:
| Tipo de material | Best For Sports Car Models | Principais benefícios | Example Use Case |
|---|---|---|---|
| PLA (Ácido Polilático) | Hobbyist models, bright colors (por exemplo, red Ferrari). | Cheap ($20–$30 per spool), fácil de imprimir, ecológico. | Printing a 1:24 scale Porsche 911 in classic white—no post-processing needed for a clean look. |
| ABS (Acrilonitrila-Butadieno-Estireno) | Durable models (por exemplo, race cars for display). | Resistente ao calor, impact-proof, easy to sand/paint. | Making a 1:18 scale BMW M3 that can withstand accidental knocks without breaking. |
| Resina (Photopolymer) | Hyper-detailed models (por exemplo, Bugatti Chiron with interior details). | Superfície lisa, captures tiny features (por exemplo, headlight lenses). | Printing a 1:43 scale Lamborghini Aventador with visible engine components and door handles. |
| TPU (Poliuretano Termoplástico) | Peças flexíveis (por exemplo, model tires with texture). | Rubber-like feel, stretches without breaking. | Adding realistic tires to a 1:20 scale Shelby Cobra—they even “bend” like real rubber. |
Vantagem 2: High Precision for Realistic Details
Traditional model kits often skip small details (por exemplo, side mirror mounts or brake calipers), but 3D printing captures them with accuracy as tight as±0,1 mm. Por exemplo:
- A 3D-printed 1:24 scale Pagani Huayra can include:
- Tiny air vents on the hood (1mm de largura).
- Detailed wheel spokes (0.5mm de espessura).
- Even a miniature steering wheel inside the cockpit.This level of precision makes the model look like a shrunk-down version of the real car—something no mass-produced kit can match.
Vantagem 3: Full Personalization (Create Your Dream Car)
Tired of only choosing from pre-made models? 3D printing lets you customize every part:
- Adjust Scale: Print a 1:10 scale Ducati Devil Motorcycle for a shelf centerpiece, ou um 1:50 scale Aston Martin for a collection.
- Add Custom Accents: Add racing stripes to a Ferrari, change the color of a Mercedes-Benz GLS580’s rims, or even add a “custom” license plate with your name.
- Modify Parts: Remove the roof of a Lamborghini Gallardo to make a convertible, or add a rear spoiler to a Porsche 911 for a sportier look.Estudo de caso: A hobbyist used Blender (3D modeling software) to tweak a 1:24 scale Bugatti Veyron model—adding a gold finish to the wheels and a custom front bumper. The final print looked so realistic, it was featured in a local car enthusiast magazine.
Vantagem 4: Wide Applications Beyond Collection
3D-printed sports car models aren’t just for display—they’re useful in industries like design, educação, and gaming:
- Car Design: Engineers use 3D-printed models to test new concepts. Por exemplo, a design team printed a 1:10 scale prototype of a new “electric sports car” to check if the body shape reduces wind resistance.
- Educação: Schools use models to teach automotive basics. Students can take apart a 3D-printed car model to learn about engine placement and suspension systems.
- Gaming: Game developers import 3D-printed model files into engines like Unity or Unreal—creating more realistic in-game cars (por exemplo, a 3D-printed Renault from QQ Flying Car used to design in-game textures).
2. The Step-by-Step Workflow for 3D Printing Sports Car Models
Creating a 3D-printed sports car model is linear and repeatable—follow these 5 steps to avoid mistakes:
Etapa 1: Choose or Design a 3D Model
- Use Ready-Made Models: Download free/paid models from sites like Thingiverse or MyMiniFactory—search for “3D printing sports car model” to find options like Bugatti Fire Meteor or Supercar S7.
- Design Your Own: Use software like Tinkercad (beginner-friendly) or Blender (avançado) to create a custom model. Start with a simple shape (por exemplo, a car body) and add details like wheels and windows.
Pro Tip: Always check the model file (Formato STL/OBJ) for errors—use Meshlab to fix “non-manifold geometry” (parts that aren’t connected properly) antes de imprimir.
Etapa 2: Prepare the Model with Slicing Software
Software de fatiamento (por exemplo, Tratamento, PrusaSlicer) converts the 3D model into instructions the printer can follow. Use these optimal settings for sports car models:
| Setting | PLA Recommendations | Resin Recommendations |
|---|---|---|
| Altura da camada | 0.15–0,2 mm (balances detail and speed) | 0.05–0,1 mm (for ultra-fine details) |
| Infill | 20–30% (enough strength for display models) | N / D (resin prints are solid by default) |
| Print Speed | 40–60 mm/s (slower = more precise) | 50mm/s (resin printers use UV light, not speed) |
| Suporta | Enable “tree supports” (menos desperdício de materiais) | Enable “light supports” (avoid marking details) |
Etapa 3: 3D Print the Model (Monitor for Issues)
- For FDM Printers (PLA/ABS):
- Heat the bed to 50–60°C (PLA) or 100–110°C (ABS).
- Start the print and check the first layer—if it’s bumpy, pause and adjust the nozzle height.
- Avoid drafts (they cause warping, especially with ABS).
- For Resin Printers:
- Pour resin into the vat and level the build plate.
- Depois de imprimir, remove the model and rinse it in isopropyl alcohol (90%+) for 5–10 minutes to remove excess resin.
- Cure the model with UV light for 10–20 minutes (makes it stronger).
Etapa 4: Post-Process to Perfect the Model
Even the best print needs post-processing to look professional. Use these techniques (from our earlier post-processing guide, tailored for sports cars):
- Remove Supports: Use needle-nose pliers for FDM prints or peel off resin supports gently—sand leftover marks with 400-grit sandpaper.
- Sand & Polish: For PLA, sand with 240–800 grit sandpaper; for resin, use 1000–2000 grit. Polish with acrylic glue (PLA) or a resin polish to make the body shine like real car paint.
- Paint & Detail:
- Use spray paint for the body (por exemplo, metallic silver for a Lamborghini).
- Add small details with a fine brush: paint brake calipers red, add “chrome” accents to the grille, or even add tiny decals (por exemplo, “Ferrari” logos).
Etapa 5: Assemble (If Printing in Multiple Parts)
Large models (por exemplo, 1:18 escala) need to be printed in parts (corpo, rodas, interior). Use the right adhesive to assemble:
- PLA Parts: Hot melt glue (temporary) or acrylic adhesive (permanent).
- Resin Parts: 502 glue (cyanoacrylate)—use a tiny dot to avoid white residue.
3. 3 Common Problems & How to Fix Them
Even experienced hobbyists run into issues—here’s how to solve them:
| Problema | Cause | Solução |
|---|---|---|
| Layer Separation (PLA) | Nozzle temperature too low (below 180°C) or print speed too fast. | Increase nozzle temp by 5–10°C and slow speed to 40mm/s. Add a “brim” to improve bed adhesion. |
| Resin Model Has Bubbles | Resin wasn’t mixed properly or air got into the vat. | Stir resin slowly for 2–3 minutes before printing. Tap the vat gently to release air bubbles. |
| Paint Peels Off | Print surface wasn’t cleaned (dust/oil) or no primer was used. | Wipe the model with isopropyl alcohol before painting. Apply a thin coat of primer (por exemplo, white primer for light colors) and let it dry for 1 hora. |
4. Yigu Technology’s Perspective on 3D Printing Sports Car Models
Na tecnologia Yigu, we’ve helped 150+ hobbyists and design studios create stunning 3D-printed sports car models. The biggest mistake we see? Rushing post-processing—many users skip sanding and jump to painting, leading to uneven color and lost details.
Our pro tip: For clients making high-end models (por exemplo, 1:12 scale collectibles), we recommend resin printing with 0.05mm layer height and a UV curing station—this captures every detail, from tire treads to headlight reflections. We also offer custom slicer presets for sports cars, optimizing settings to cut print time by 20% without losing precision. As 3D printing tech advances, we’re excited to see even more realistic models—like ones with working doors or light-up headlights—in the future.
Perguntas frequentes: Your Top 3D Printing Sports Car Model Questions Answered
Q1: What’s the best scale for a 3D-printed sports car model?
A1: It depends on your space and detail needs. 1:24 escala (10–15cm long) is perfect for shelves—big enough for details but not too bulky. 1:43 escala (5–8cm long) works for collections, enquanto 1:18 escala (20–25cm long) is great for showpieces (but takes longer to print).
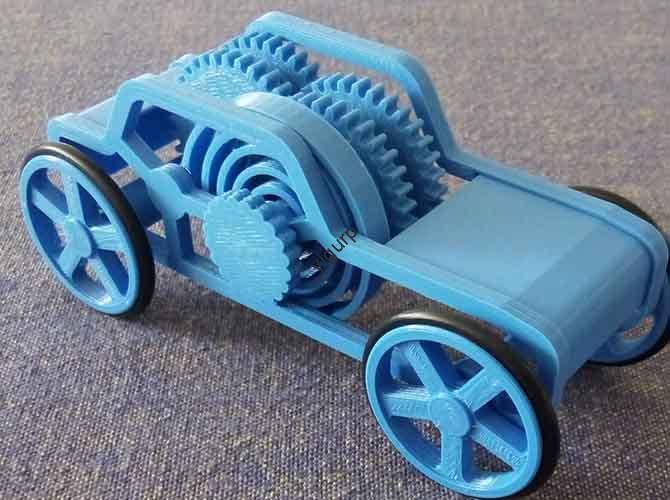
Q2: Can I 3D print a sports car model with moving parts (por exemplo, wheels that spin)?
A2: Sim! Design the model with a small gap (0.2-0,3mm) between the wheel and axle—this lets the wheel spin freely. Use TPU for the axle (flexível) and PLA for the wheel (duro). Por exemplo, um 1:24 scale Ford Mustang can have spinning wheels if the axle is printed in TPU.
Q3: How long does it take to 3D print a 1:24 scale PLA sports car model?
A3: 4–8 horas, depending on detail. A simple model (no interior) takes 4–5 hours, while a detailed model (with interior and tiny parts) takes 7–8 hours. Resin models take longer (8–12 hours) but need less post-processing.