No mundo da manufatura aditiva, 3SLS impresso em D (Sinterização Seletiva a Laser) destaca-se como uma tecnologia versátil e poderosa. Ao contrário dos métodos tradicionais de impressão 3D que dependem de filamentos ou resinas, SLS usa lasers de alta potência para fundir materiais em pó em sólidos, peças duráveis – não são necessárias estruturas de suporte extras. De componentes mecânicos industriais a implantes médicos personalizados, 3SLS impresso em D is transforming how businesses turn designs into real-world products. This guide breaks down how SLS works, seus principais benefícios, aplicações do mundo real, technical challenges, and how to leverage it for your projects.
How 3D Printed SLS Works: A Step-by-Step Breakdown
3SLS impresso em D follows a simple yet precise three-step process that enables it to create complex parts with ease. Each step is critical to ensuring the final product is strong, preciso, and ready for use:
1. Powder Layer Laying
Primeiro, the SLS printer spreads a thin, even layer of polymer powder (such as PA12 or TPU) onto a preheated build platform. The platform is heated to a temperature just below the material’s melting point—this “preheating” helps the powder fuse more easily later and reduces warping in the final part. Por exemplo, when printing with PA12 (a common SLS material), the platform is typically heated to 170–180°C (338–356°F), just below PA12’s melting point of 185°C (365°F).
2. Laser Scanning & Sinterização
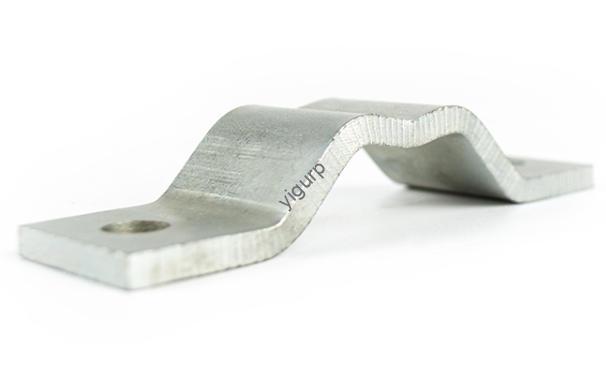
Próximo, a high-powered infrared laser (usually with a wavelength of 10.6 μm) scans the powder layer according to a 2D pattern generated by slicing software (which converts your 3D model into layer-by-layer instructions). The laser’s heat melts the surface of the powder particles, causing them to “sinter” (fuse together) into a solid layer. This layer bonds tightly to the one below it, creating a strong, continuous structure. A small manufacturing shop in Ohio uses this step to print custom gear teeth— the laser’s precision (até 0,1 mm) ensures each tooth is perfectly shaped, so the gears mesh smoothly without friction.
3. Layer-by-Layer Building
After one layer is scanned and sintered, the build platform drops by a distance equal to the layer thickness (usually 0.1–0.2mm). The printer then spreads a new layer of powder over the completed layer, and the laser scanning process repeats. This cycle continues until the entire 3D part is built. Once finished, the part is left in the printer to cool slowly—this prevents cracking from rapid temperature changes. A aerospace supplier in Texas uses this process to print small engine brackets; a bracket with 50 layers takes about 4 hours to print, comparado com 2 days with traditional machining.
Key Benefits of 3D Printed SLS: Why It’s a Top Choice
3SLS impresso em D offers four major advantages that make it ideal for a wide range of projects—from prototyping to low-volume production. These benefits solve common pain points of other 3D printing methods:
1. No Support Structures Needed (Saves Time & Material)
Ao contrário do FDM (Modelagem de Deposição Fundida) ou SLA (Estereolitografia), 3SLS impresso em D doesn’t require extra support structures to hold up overhanging or complex parts. The unsintered powder around the part acts as a natural support, which means:
- You don’t have to spend time designing or removing supports (cutting post-processing time by 30–50%).
- No material is wasted on supports (reducing material costs by 15–20%).
Exemplo: A design firm uses SLS to print a complex robotic arm with multiple overhanging joints. With FDM, they would have needed 20+ estruturas de suporte (que levou 1 hour to remove); with SLS, they just brush off the excess powder—done in 5 minutos.
2. Material Diversity (Match Parts to Your Needs)
3SLS impresso em D works with a wide range of polymer powders, each with unique mechanical properties (força, flexibilidade, resistência ao calor). This lets you choose the perfect material for your project:
| Material | Propriedades principais | Aplicações ideais |
| PA12 (Nylon 12) | Alta resistência, resistência ao desgaste, water resistance | Engrenagens industriais, caixas elétricas |
| TPU (Poliuretano Termoplástico) | Flexibilidade, resistência ao impacto | Capas de telefone, juntas, medical padding |
| PA11 (Nylon 11) | Biocompatível, leve | Implantes médicos, outdoor equipment parts |
| PP (Polipropileno) | Resistência química, baixa densidade | Recipientes seguros para alimentos, equipamento de laboratório |
Exemplo: A medical device company uses PA11 for 3D printed SLS implants (like bone screws). PA11’s biocompatibility means it won’t react with the body, and its strength matches natural bone—reducing the risk of implant failure.
3. Alta Produtividade (Fast Design-to-Part Cycles)
3SLS impresso em D is much faster than traditional manufacturing methods (como usinagem ou moldagem por injeção) para pequenos lotes. Its efficient process lets you:
- Turn a 3D model into a physical part in hours (not days or weeks).
- Print multiple parts at once (the build chamber can hold 10–20 small parts, dependendo do tamanho).
Exemplo: A startup needs 50 prototype drone frames to test. With injection molding, they would have to wait 2 weeks for a mold (costing \(5,000); with SLS, they print all 50 frames in 8 horas (costing \)800)—and can tweak the design and reprint in a day if needed.
4. Durável, Peças Funcionais (Ready for Real Use)
Parts made with 3SLS impresso em D are strong and durable—they’re not just for show. Most SLS materials have mechanical properties similar to traditional plastics, so the parts can handle real-world use:
- PA12 parts have a tensile strength of 50 MPa (semelhante ao plástico ABS), so they can hold weight or resist pressure.
- TPU parts can stretch up to 300% of their original length and bounce back—great for parts that need flexibility.
Exemplo: A automotive supplier uses 3D printed SLS TPU gaskets for car doors. The gaskets withstand temperature changes (from -40°C to 80°C) and don’t crack after 10,000+ door openings—same as rubber gaskets, but cheaper to produce.
Real-World Applications of 3D Printed SLS: Industries Using It Today
3SLS impresso em D is used across three key industries to improve product quality, reduzir custos, and speed up production. These examples show how it solves industry-specific problems:
1. Fabricação Industrial
Manufacturers use 3SLS impresso em D to create functional parts for machines, veículos, e equipamentos. It’s especially useful for:
- Ferramentas personalizadas: A factory prints SLS tool holders that fit their specific machines—these holders last 2x longer than generic ones and reduce tool breakage by 25%.
- Low-volume production: A tractor company prints 100 SLS plastic gear covers per month (instead of using injection molding, which is only cost-effective for 10,000+ peças). This saves them $10,000 per year in mold costs.
2. Medical Field
In healthcare, 3SLS impresso em D is a game-changer for personalized care and medical device production:
- Fixed medical devices: A hospital prints SLS orthotic insoles for patients with foot pain. Each insole is custom-molded to the patient’s foot (using a 3D scan), and the PA12 material is soft enough for all-day wear—patients report a 40% reduction in pain.
- Assistive tools: A physical therapy clinic uses SLS to print lightweight, durable hand grips for patients recovering from surgery. The grips are easy to clean and can be adjusted for different hand sizes.
3. Educational & Entertainment
Schools and entertainment companies use 3SLS impresso em D to create engaging, hands-on tools and props:
- Educational models: A university uses SLS to print 3D models of human organs (like the heart) for biology classes. The models are detailed enough to show blood vessels, and they’re durable—they last for 5+ years of classroom use (contra. 6 months for plastic models).
- Entertainment props: A movie studio prints SLS props like futuristic weapons and armor. The PA12 material is lightweight (actors can wear the armor for hours) e forte (it doesn’t break during stunts)—saving the studio $50,000 on foam or metal props.
Technical Challenges of 3D Printed SLS: How to Overcome Them
Enquanto 3SLS impresso em D has many benefits, it also has two key challenges. The good news is there are simple solutions to minimize their impact:
1. High Initial Equipment Costs (But Long-Term Savings)
SLS printers have a higher upfront cost than FDM or SLA printers—entry-level SLS machines start at \(50,000 (contra. \)1,000–$5,000 for FDM). No entanto, this cost is often offset by long-term savings:
- For businesses that print 100+ peças por mês: The savings on material (sem suporte) e trabalho (less post-processing) can cover the printer cost in 1–2 years.
- For small businesses or hobbyists: Use SLS printing services (like Shapeways or 3D Hubs) instead of buying a printer. These services charge \(1–\)5 per gram of material—affordable for small projects.
Exemplo: A small electronics company uses an SLS service to print 20 sensor housings per month. They pay \(3 per housing (total \)60/mês) instead of spending $50,000 on a printer—perfect for their low volume.
2. Post-Processing Requirements (Garanta a qualidade)
3SLS impresso em D parts need post-processing to improve surface quality and mechanical properties. The most common steps are:
- Powder Cleaning: Brush or blow off excess powder (use a dedicated powder recovery system to reuse powder—saves 80% of unused material).
- Lixar: Lightly sand the part to smooth rough surfaces (takes 5–10 minutes for small parts).
- Infiltration (Opcional): For extra strength, soak the part in a resin or epoxy (adds 10–15% to the part’s strength).
Exemplo: A furniture company prints SLS chair legs. After cleaning, they sand the legs for 5 minutes to remove powder residue, then infiltrate them with epoxy—this makes the legs strong enough to hold 150kg (330 libras) without breaking.
Yigu Technology’s View on 3D Printed SLS
Na tecnologia Yigu, we see 3SLS impresso em D as a cornerstone of flexible manufacturing. We’ve helped clients across industries—from medical device makers to industrial manufacturers—leverage SLS’s strengths: advising a hospital on PA11 for custom implants, and helping a factory switch to SLS tooling to cut costs. We also help clients navigate challenges, like recommending SLS services for small batches to avoid high printer costs. As SLS material costs drop (expected to fall 20% por 2026) and printer speeds increase, we believe 3SLS impresso em D will become even more accessible—unlocking new possibilities for personalized, produção eficiente. Our goal is to make SLS simple for every client, so they can focus on creating great products.
Perguntas frequentes:
- P: Are 3D printed SLS parts waterproof?
UM: Depende do material. PA12 and PP are naturally waterproof—they can be used for parts that come into contact with water (like outdoor gear or lab containers). TPU is water-resistant but not fully waterproof (it can absorb small amounts of water over time). Para proteção extra, you can coat any SLS part with a waterproof sealant.
- P: How long do 3D printed SLS parts last?
UM: SLS parts are very durable—they can last for 5–10 years (ou mais) with proper care. PA12 parts, por exemplo, resist wear and UV damage, so they’re great for outdoor use. The only exception is TPU parts, which may lose flexibility after 3–5 years (but can be replaced easily).
- P: Can 3D printed SLS be used for mass production (10,000+ peças)?
UM: SLS is best for low-to-medium production (10–1.000 peças). Para produção em massa (10,000+ peças), injection molding is cheaper (since molds have lower per-part costs). No entanto, SLS is great for “bridge production”—printing parts while you wait for an injection mold to be made. This lets you launch your product faster (saving 2–4 weeks of time).