No desenvolvimento de produtos, o tempo é tudo. Esperar semanas para que protótipos tradicionais testem um design ou validem uma funcionalidade pode atrasar lançamentos e aumentar custos. That’s where 3D batch printing prototypes come in—this technology lets you produce multiple high-quality prototypes quickly, resolvendo pontos problemáticos comuns, como retorno lento, custos elevados, e flexibilidade de design limitada. This guide breaks down what 3D batch printing prototypes are, how to use them effectively, and how they transform product development.
1. What Are 3D Batch Printing Prototypes?
3D batch printing prototypes refer to the mass production of product prototypes using 3D printing technology. Unlike single-prototype printing, batch printing focuses on creating 5–100+ identical or customized prototypes at once, making it ideal for design validation, teste funcional, and pre-production reviews.
Think of it like baking a batch of cookies instead of one at a time: you prepare the dough (projeto), use a tray (3D printer build plate) to bake multiple cookies (protótipos) together, and get results faster—without sacrificing quality.
Key Purposes of 3D Batch Printing Prototypes
- Design Validation: Test if a design works for users (por exemplo, a phone case’s grip or a medical device’s ergonomics) by giving prototypes to multiple testers.
- Teste Funcional: Check if parts perform as intended (por exemplo, a gear’s rotation or a container’s leak resistance) across multiple samples.
- Pre-Production Display: Show stakeholders (por exemplo, clientes, investors) physical prototypes to get feedback before mass production.
Exemplo: A startup developing a new water bottle needs to test 20 prototypes—some with a flip lid, some with a straw lid. 3D batch printing lets them produce all 20 em 2 dias (contra. 20 days with traditional machining), so they can quickly compare which lid users prefer.
2. Material Selection for 3D Batch Printing Prototypes
Choosing the right material is critical—pick the wrong one, and your prototypes won’t accurately represent the final product. The table below compares common materials, their traits, e melhores usos:
| Tipo de material | Key Traits | Melhor para | Batch Printing Compatibility | Custo (Por kg) |
| PLA (Ácido Polilático) | Biodegradável, fácil de imprimir, low odor, low heat resistance | Decorative prototypes, basic design validation (por exemplo, peças de brinquedo) | Excellent—fast printing, no warping | \(20–\)30 |
| ABS (Acrilonitrila Butadieno Estireno) | Forte, resistente ao calor (até 90ºC), durável | Protótipos funcionais (por exemplo, cabos de ferramentas, car interior parts) | Good—needs heated enclosure to avoid warping | \(30–\)40 |
| PETG (Polietileno Tereftalato Glicol) | Resistente a produtos químicos, impermeável, difícil, fácil de imprimir | Prototypes needing durability (por exemplo, garrafas de água, recipientes para alimentos) | Excellent—balances speed and strength | \(35–\)45 |
| Photosensitive Resin | Alto detalhe (0.05mm de altura da camada), superfície lisa, frágil | Protótipos de alta precisão (por exemplo, joia, modelos dentários) | Good—resin printers handle small batches well | \(50–\)80 |
| Nylon Powder | Resistente ao desgaste, forte, flexível | Protótipos funcionais (por exemplo, engrenagens, dobradiças) | Limited—needs SLS printers (industrial) | \(100–\)150 |
| Pós Metálicos (Aço inoxidável, Titânio) | Ultra-forte, resistente ao calor, resistente à corrosão | Industrial prototypes (por exemplo, peças aeroespaciais, implantes médicos) | Limited—needs SLM/EBM printers (alto custo) | \(500–\)1,000 |
Common Problem Solved: “Why do my prototypes break during functional testing?”
You likely used PLA for a part that needs strength. Switch to PETG or ABS—for example, a prototype hinge made with PETG can withstand 1,000+ openings (contra. 100 with PLA), accurately testing how the final part will perform.
3. The 3D Batch Printing Prototype Process
The process is highly automated, turning digital designs into physical prototypes in 4 simple steps. Follow this linear workflow to avoid mistakes:
Etapa 1: Design the CAD Model
Use software like Fusion 360, SolidWorks, or Tinkercad to create a 3D model. For batch printing:
- Optimize for Build Plate Size: Arrange multiple models on the build plate to maximize space. For a 22cm x 22cm plate, you can fit 10–15 small prototypes (por exemplo, 5cm x 5cm phone cases).
- Add Batch-Specific Features: If prototypes need customization (por exemplo, different sizes), use “parametric design” to adjust dimensions quickly (por exemplo, a water bottle model with 3 size options: 300ml, 500ml, 700ml).
Etapa 2: Slice the Model
Use slicer software (por exemplo, Tratamento, PrusaSlicer) to convert the CAD model into printer code. Key settings for batch printing:
- Altura da camada: 0.2mm for most prototypes (balances speed and quality).
- Infill: 20–50% (20% for decor, 50% para peças funcionais).
- Batch Arrangement: Use the slicer’s “copy” tool to duplicate the model across the build plate—ensure 1–2mm spacing between prototypes to avoid sticking.
Etapa 3: 3D Batch Printing
Load the sliced file into your 3D printer and start printing. For best results:
- Use a Large Build Plate: Printers with 30cm x 30cm plates (por exemplo, Creality Ender 5 Mais) handle more prototypes per batch than smaller 22cm plates.
- Monitor the First Layer: The first layer determines if prototypes stick—if it’s uneven, pause and adjust the build plate level.
Etapa 4: Pós-processamento
Finish prototypes to improve appearance and functionality:
- Remove Supports: Use pliers or a support removal tool to take off excess material—resin prototypes may need soaking in isopropyl alcohol first.
- Sand Surfaces: Use 200–400 grit sandpaper to smooth rough edges (por exemplo, a PLA prototype’s layer lines).
- Paint/Coat (Opcional): Add paint or a clear coat to match the final product’s appearance (por exemplo, a car part prototype painted to look like metal).
Time Comparison: 3D Batch Printing vs. Traditional Prototyping
| Etapa | 3D Batch Printing (20 Protótipos) | Traditional Machining (20 Protótipos) |
| Projeto & Configurar | 1 dia | 3 dias |
| Produção | 2 dias | 17 dias |
| Pós-processamento | 1 dia | 5 dias |
| Total Time | 4 dias | 25 dias |
4. Advantages of 3D Batch Printing Prototypes
3D batch printing solves key product development problems that traditional methods can’t. Veja como isso agrega valor:
- Retorno Rápido: Produzir 20 protótipos em 4 dias (contra. 25 days with machining)—critical for meeting tight launch deadlines.
- Alta Precisão: Errors as low as ±0.05mm ensure prototypes match the final product’s dimensions (por exemplo, a medical device prototype that fits exactly like the production version).
- Economia de custos: No expensive molds or tooling—batch printing 50 PLA prototypes costs \(50–\)100 (contra. \(500–\)1,000 para usinagem tradicional).
- Flexibilidade de projeto: Easily adjust designs between batches (por exemplo, change a phone case’s color or a gear’s teeth size) sem reequipar.
Exemplo: A car manufacturer needs 50 prototypes of a new dashboard button. 3D batch printing costs \(80 (PLA material) and takes 3 dias. Traditional machining would cost \)800 and take 20 days—saving the manufacturer $720 e 17 dias.
5. Limitations and How to Overcome Them
While 3D batch printing has many benefits, it’s not perfect. Here are common limitations and fixes:
| Limitation | Solução |
| Some materials (por exemplo, PLA) lack strength/durability | Use stronger materials (PETG, ABS) for functional prototypes; test with 50% infill instead of 20%. |
| Large prototypes are hard to batch print (build plate limits) | Split large prototypes into smaller parts (por exemplo, a 60cm tall robot into 5 peças), print in batches, then assemble. |
| Resin prototypes need safety gear (gloves, mask) | Use water-washable resin (less toxic) and always wear PPE; work in a well-ventilated area. |
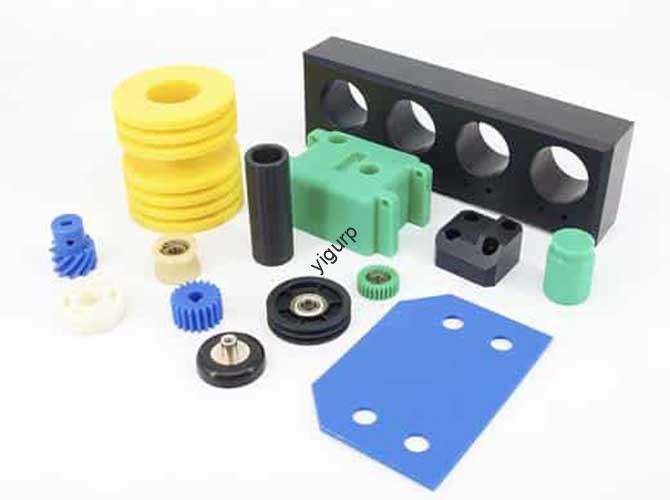
6. Application Fields of 3D Batch Printing Prototypes
3D batch printing is used across industries to speed up development. Here are the most common use cases:
- Aeroespacial: Print 20+ prototypes of small engine parts to test heat resistance and fit.
- Automotivo: Produzir 50+ interior prototypes (por exemplo, porta-copos, maçanetas) to test user comfort.
- Dispositivos Médicos: Batch print 10–15 custom prosthetic socket prototypes to find the best fit for patients.
- Eletrônicos de consumo: Create 30+ phone case prototypes with different designs to test market appeal.
Yigu Technology’s Perspective
Na tecnologia Yigu, we see 3D batch printing prototypes as a game-changer for product development. Many clients struggle with slow traditional prototyping, which delays launches. Our solutions include high-speed FDM printers (up to 150mm/s) optimized for batch printing and a “Material Selector Tool” that recommends the right material for your prototype’s needs. We also offer pre-sliced templates for common parts (por exemplo, capas de telefone, engrenagens) to save setup time. As 3D tech evolves, we’ll add larger build plates and faster resin printers to handle bigger batches, helping clients turn ideas into validated prototypes faster than ever.
Perguntas frequentes
1. How many prototypes can I print in one batch?
It depends on your printer’s build plate size and prototype size. A 22cm x 22cm plate can fit 10–15 small prototypes (5centímetros x 5cm) or 2–3 medium prototypes (10cm x 10cm). Industrial printers with 40cm x 40cm plates can handle 50+ small prototypes per batch.
2. Can I print different prototype designs in one batch?
Sim! Slicer software lets you arrange multiple unique models on the build plate. Por exemplo, you can print 5 phone cases with flip lids and 5 with straw lids in the same batch—great for comparing designs quickly.
3. Are 3D batch printed prototypes strong enough for pre-production testing?
Depende do material. PETG, ABS, or nylon prototypes are strong enough for most pre-production tests (por exemplo, testes de queda, load tests). Avoid PLA for high-stress tests—use PETG instead, which has similar strength to the plastic used in many final products.