If you’ve ever wondered how to create precise replicas of objects—from custom toys to industrial parts—2 part mould making is the answer. Simplificando, um molde de 2 partes é uma ferramenta reutilizável dividida em duas metades que, quando se juntou, crie uma cavidade correspondente ao seu objeto original (chamado de “mestre”). Uma vez fechado, você derrama materiais líquidos como resina, plástico, or rubber into the cavity, and once cured, you open the mould to reveal an exact copy. This method is beloved by hobbyists, artisans, and manufacturers because it balances precision, reusability, and versatility—unlike single-part moulds, it lets you easily remove complex, 3D objects without damaging the final piece.
Neste guia, detalharemos tudo o que você precisa saber: from choosing the right materials for your project to avoiding common mistakes, plus real-world examples to help you apply what you learn. Whether you’re making a small craft or scaling up to small-batch production, this article will turn confusion into confidence.
What Is 2 Fabricação de moldes de peças, and Why Should You Use It?
Before diving into steps, vamos esclarecer o básico: 2 part mould making involves creating two interlocking mould halves (often called “A” and “B” sides) around a master object. The key advantage? Unlike single-part (or “block”) moulds—where you have to pull the cured part out of a single cavity—2-part moulds separate cleanly, making them ideal for objects with undercuts (like a toy with arms that stick out), deep details, or irregular shapes.
Key Benefits of 2-Part Moulds (contra. Single-Part Moulds)
To help you decide if a 2-part mould is right for your project, here’s a side-by-side comparison:
| Feature | 2-Part Moulds | Single-Part Moulds |
|---|---|---|
| Ideal Object Type | Formas 3D complexas, cortes inferiores, details | Simple flat/rounded objects (no undercuts) |
| Reusability | Alto (20–100+ uses, dependendo do material) | Baixo (5–20 uses, prone to tearing) |
| Detail Preservation | Excelente (captures fine textures) | Bom (may miss small details) |
| Ease of Demoulding | Easy (split halves, no force needed) | Duro (risk of damaging part/mould) |
| Melhor para | Amadores (artesanato em resina), produção de pequenos lotes, protótipos | One-off projects, simple crafts (por exemplo, soap bars) |
Real-World Example: Sarah, a resin artist, wanted to make replicas of a hand-sculpted animal figurine. At first, she tried a single-part silicone mould—but every time she pulled the cured resin out, the figurine’s ears (cortes inferiores) would tear. Switching to a 2-part mould let her split the mould around the ears, resulting in perfect replicas every time.
Essential Materials for 2 Fabricação de moldes de peças (Beginners to Pros)
Choosing the right materials is make-or-break for your mould. The best options depend on your project’s size, orçamento, and the material you’ll use to make replicas (por exemplo, resina, cera, ou plástico). Below are the most common materials, plus when to use each.
1. Mould Base Materials (The “Shell” of Your Mould)
The base holds the mould material (like silicone) in place while it cures. For most projects, you have two options:
- Melamine Board/Plastic Containers: Affordable and easy to cut. Great for small to medium moulds (por exemplo, a 6×6-inch figurine). Melamine is non-stick, so the mould material won’t stick to it.
- 3D-Printed Mould Boxes: More precise for complex shapes. Ideal if you’re making multiple moulds of the same size (por exemplo, small-batch jewelry). 3D-printed boxes can be reused 50+ times.
2. Mould Making Materials (The “Cavity” Material)
This is the flexible (or rigid) material that creates the replica’s shape. The two most popular choices are:
Borracha de silicone (Best for Most Projects)
Silicone is the gold standard for 2-part moulds because it’s flexible, resistente ao calor (up to 400°F for some types), and captures fine details. It comes in two parts (A e B) that you mix together before pouring.
- Tipo: Tin-Cure Silicone: Budget-friendly (about $20–$30 per quart). Cures fast (4–6 horas) and works for non-food projects (por exemplo, artesanato em resina, candles). Not recommended for high-heat replicas (like plastic injection).
- Tipo: Platinum-Cure Silicone: More durable (2–3x longer lifespan than tin-cure) and food-safe. Cures slower (12–24 hours) but is heat-resistant up to 500°F. Perfect for food moulds (chocolate, doce) or high-heat applications (por exemplo, wax for candles). Custo: $40–$60 per quart.
Pro Tip: For beginners, start with tin-cure silicone—it’s forgiving if you mess up the mix ratio. I once used tin-cure to make a mould of a vintage key, and even though I mixed it slightly off (10:1 em vez de 8:1), it still cured and captured the key’s tiny engravings.
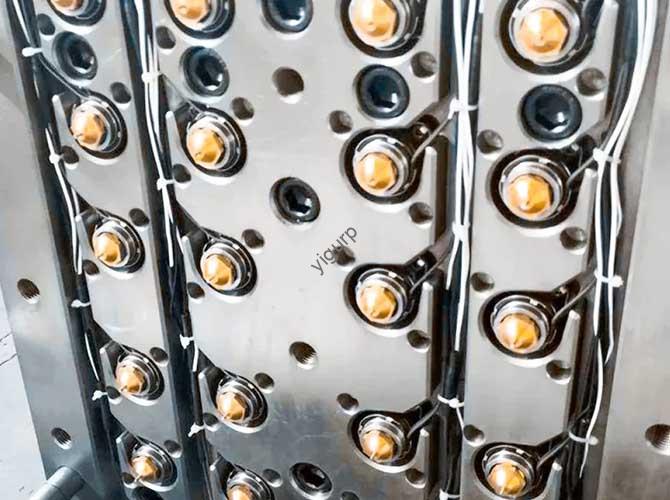
Urethane Rubber (For Industrial/Heavy-Duty Use)
Urethane is rigid or semi-rigid, making it better for large, heavy replicas (por exemplo, peças automotivas, garden statues). It’s more durable than silicone (100+ usa) but less flexible—so it’s not ideal for objects with undercuts. Custo: $35–$50 per quart.
3. Agentes de liberação (Prevent Sticking!)
A release agent is a spray or liquid that keeps the mould material from sticking to your master object or mould base.Never skip this step—without it, you could ruin your master or mould.
- For Silicone Moulds: Use a petroleum-based release agent (por exemplo, CRC 3-36) or a silicone-specific spray. Avoid water-based sprays—they can cause bubbles in the silicone.
- For Urethane Moulds: Use a wax-based release agent (por exemplo, Partall Wax #2). Urethane sticks more easily than silicone, so a thicker coat is better.
4. Master Object (The “Original” You’re Copying)
Your master can be almost anything—sculptures, brinquedos, peças, or even natural objects (like a seashell). But keep these rules in mind:
- The master must be non-porous (or sealed with a primer like Mod Podge). Porous materials (like wood or clay) will absorb the mould material, ruining the mould.
- The master should be suave (sand rough edges with 220-grit sandpaper). Rough spots will show up in every replica.
Step-by-Step Guide to Making a 2 Part Mould (For Beginners)
Now that you have your materials, let’s walk through the process. We’ll use a small resin figurine as an example (master size: 4x3x2 inches) and tin-cure silicone as the mould material. This project takes about 24 horas (including curing time).
Etapa 1: Prepare Your Workspace & Master Object
- Workspace: Choose a well-ventilated area (silicone fumes can be strong) with a flat surface. Cover the surface with plastic or newspaper to catch spills.
- Master: Clean the master with soap and water to remove dust or grease. If it’s porous (por exemplo, a clay sculpture), apply 2–3 coats of primer (let each coat dry for 1 hora). Once dry, lightly sand any rough spots with 220-grit sandpaper.
- Release Agent: Spray the master with 2–3 thin coats of release agent (hold the can 6–8 inches away). Let each coat dry for 10 minutes—this ensures the silicone won’t stick to the master.
Etapa 2: Build the First Mould Half (Part A)
- Create a Mould Box: Cut melamine board into a box that’s 1–2 inches larger than your master on all sides. Glue the sides together with hot glue (it dries fast and is easy to remove later).
- Secure the Master: Place the master in the center of the box. Use small pieces of clay or hot glue to prop it up so it’s ½ inch above the box’s bottom (this ensures the silicone covers the bottom of the master).
- Mix the Silicone: Read the manufacturer’s instructions—most tin-cure silicones have a 10:1 ratio (Part A: Part B). Use a disposable cup and stir stick to mix them for 2–3 minutes (scrape the bottom of the cup to avoid unmixed silicone). Don’t mix too fast—this creates bubbles.
- Pour the Silicone: Slowly pour the silicone into the box, starting at the edge (not directly on the master). Pour until the silicone covers the master by ½ inch. Tap the box gently on the table 5–10 times—this releases air bubbles.
- Cure the Silicone: Let it sit for 4–6 hours (or as directed by the manufacturer). Don’t touch it during this time—moving the box can cause the master to shift.
Etapa 3: Prepare the Second Mould Half (Part B)
- Add Registration Marks: Once Part A is cured, use a sharp knife to cut 3–4 small “V” shaped notches (½ inch deep) along the top edge of the silicone. These marks help align Part A and Part B later—never skip this (misaligned halves will ruin replicas).
- Apply Release Agent to Part A: Spray the cured silicone (Part A) with 2–3 coats of release agent. This prevents Part B from sticking to Part A.
- Seal the Box: If your melamine box is removable, reattach the sides (or add new sides) to make the box the same size as Part A. Make sure it’s secure—silicone can leak if the box is loose.
- Mix & Pour Part B: Repeat Step 2c–2d: mix the silicone, pour slowly, and tap out bubbles. Pour until Part B is the same thickness as Part A (about ½ inch above the master).
- Cure Part B: Let it sit for another 4–6 hours.
Etapa 4: Demould & Clean Up
- Remove the Mould Box: Once Part B is cured, peel off the melamine box (hot glue should come off easily).
- Split the Mould Halves: Gently pull Part A and Part B apart. The master should stay in one half—carefully remove it (use a toothpick to loosen it if needed).
- Trim Excess Silicone: Use scissors or a utility knife to cut off any excess silicone (chamado de “flash”) along the edges of the mould. This makes it easier to close the mould later.
- Test the Mould: Pour a small amount of resin (or your chosen replica material) into the mould, close it, and let it cure. If the replica comes out clean with all details, your mould is ready!
Common Mistakes in 2 Fabricação de moldes de peças (E como corrigi-los)
Even experienced makers run into issues—here are the most frequent problems and how to solve them.
1. Bubbles in the Mould
Problema: Small air bubbles in the silicone leave holes in your replicas.Causas: Mixing silicone too fast, pouring directly on the master, or not tapping the mould box.Fix:
- Mix silicone slowly (1–2 minutes) and scrape the cup’s bottom.
- Pour silicone along the edge of the box (not the master).
- Tap the box on the table 10–15 times after pouring—this releases trapped air.Pro Tip: For large moulds, use uma pistola de ar quente em configuração baixa (segurar 12 inches away) to pop surface bubbles.
2. Mould Halves Won’t Align
Problema: When closing the mould, the halves shift, leading to lopsided replicas.Cause: Forgetting to add registration marks (the “V” notches) in Step 3a.Fix: If you skipped marks, use a marker to draw alignment lines on both halves before closing. For future moulds, always cut 3–4 deep notches—space them evenly around the mould (por exemplo, top, bottom, left, right).
3. Silicone Won’t Cure
Problema: The silicone stays sticky or liquid after the recommended curing time.Causas: Incorrect mix ratio (por exemplo, 5:1 em vez de 10:1), expired silicone, or mixing in a cold room (below 65°F).Fix:
- Always measure with a scale (not cups)—volume measurements are inaccurate. Most silicones need precise weight ratios.
- Check the expiration date—old silicone loses its ability to cure.
- Cure in a warm room (70–80°F) or use a space heater (keep it 3 feet away from the mould).
Real-World Example: A friend of mine once mixed silicone using cups instead of a scale—he thought “close enough” would work. Depois 8 horas, the silicone was still sticky. He had to scrape it off the master and start over. Investing in a $10 kitchen scale saved him time (e dinheiro) on his next try.
Avançado 2 Fabricação de moldes de peças: For Small-Batch Production
If you want to make 50+ réplicas (por exemplo, custom jewelry, small toys), you’ll need to upgrade your process for durability and efficiency. Here’s how:
1. Use a Rigid Backing (For Silicone Moulds)
Silicone is flexible, which is great for demoulding—but it can warp when pouring heavy materials (like urethane plastic). To fix this, add a rigid backing to each mould half:
- Materiais: Plaster of Paris, fibra de vidro, or 3D-printed plastic.
- Processo: After curing the silicone (Parts A and B), pour plaster or fiberglass over the back of each half. Let it cure for 2–4 hours. The rigid backing keeps the silicone from warping, ensuring consistent replicas.
2. Add a Pour Spout & Air Vents
For faster, cleaner pours:
- Pour Spout: When building the mould box, leave a small gap (1 inch wide) at the top of one side. The silicone will fill this gap, creating a spout where you can pour replica material.
- Air Vents: Use a toothpick to poke 2–3 small holes (1/8 inch wide) in the top of the mould (opposite the pour spout). These vents let air escape as you pour, reducing bubbles in the replica.
3. Choose High-Durability Materials
- Mould Material: Switch to platinum-cure silicone (it lasts 2–3x longer than tin-cure). Para peças industriais, use urethane rubber with a fiberglass backing (pode suportar 200+ usa).
- Replica Material: Para produção de pequenos lotes, use low-viscosity resin or thermoplastic (por exemplo, Plástico ABS). These materials cure fast (15–30 minutes for resin) and are easy to demould.
Industry Trends in 2 Fabricação de moldes de peças (2024–2025)
The world of mould making is evolving—here are the trends shaping how hobbyists and manufacturers work:
1. 3Impressão D + 2 Part Moulds = Faster Prototyping
More makers are using 3D printers to create masters (instead of hand-sculpting). 3D-printed masters are precise, repetível, and can be designed in CAD software (por exemplo, Tinkercad, Fusão 360). Por exemplo, a small business making custom phone cases can 3D-print a master in 2 horas, then make a 2-part silicone mould to produce 50+ cases in a day.
2. Eco-Friendly Mould Materials
Sustainability is a big focus. Brands like Smooth-On now offerbio-based silicone (made from plant oils instead of petroleum) that’s just as durable as traditional silicone. These materials are non-toxic and can be recycled (check with the manufacturer for recycling programs).
3. Automation for Large-Scale Production
Manufacturers are using robots to handle 2-part moulds—this reduces human error and speeds up production. Por exemplo, a toy factory might use a robot to mix silicone, pour it into mould boxes, and demould cured replicas—all in a fraction of the time it would take a human.
Yigu Technology’s Perspective on 2 Fabricação de moldes de peças
Na tecnologia Yigu, we see 2 part mould making as a bridge between creativity and practicality—whether for hobbyists or small businesses. Over the years, we’ve supported clients who use 2-part moulds to turn unique designs into tangible products, from custom keychains to industrial prototypes. We often recommend platinum-cure silicone for long-term projects, as its durability cuts down on replacement costs, and pairing it with 3D-printed masters to save time on design iterations. We also believe eco-friendly materials are the future—they let makers create responsibly without sacrificing quality. For beginners, we advise starting small (por exemplo, a 2-inch figurine) to master the basics before scaling up; this avoids wasted materials and builds confidence. Ultimately, 2 part mould making is about accessibility—it lets anyone turn their ideas into repeatable products, and that’s the magic of the craft.