Whether you’re an automotive engineer testing a new sensor housing or a medical device designer refining a surgical tool, SLA resin 3D printing prototypes offer unmatched precision for rapid iteration. Tidak seperti FDM (Pemodelan pemendapan yang bersatu), SLA uses UV light to cure liquid photoresin layer by layer—resulting in smooth surfaces, tight tolerances (as low as ±0.1mm), and complex geometries that traditional manufacturing can’t match. Panduan ini memecah keseluruhan proses, shares real-world use cases, and provides data to help you decide if SLA is right for your project.
1. Why Choose SLA Resin 3D Printing for Prototypes?
Sebelum menyelam ke dalam proses, let’s clarify why SLA stands out for prototyping. For engineers and product teams, the goal is often to validate design concepts quicklytanpa mengorbankan kualiti—and SLA delivers on both fronts.
Kelebihan utama (With Real-World Examples)
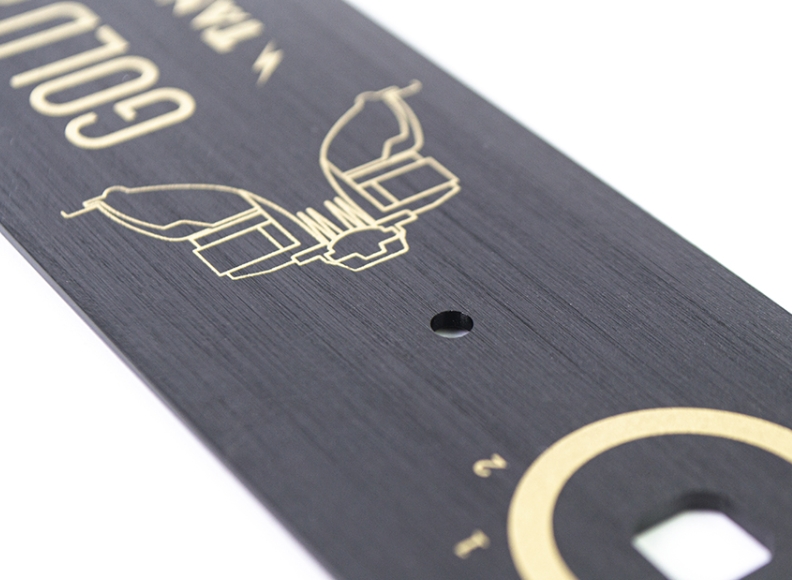
- Ultra-Precision for Detailed Parts: A consumer electronics company used SLA to prototype a smartwatch face with micro-engraved branding. The process captured details as small as 0.2mm, avoiding the “garis lapisan” common in FDM.
- Pemulihan cepat: An automotive supplier needed to test a custom valve prototype. With SLA, they went from CAD design to physical part in 48 hours—compared to 2 minggu dengan pemesinan CNC.
- Complex Geometries: A medical startup prototyped a porous bone implant. SLA printed the intricate lattice structure (1mm gaps) that would be impossible to mill with traditional tools.
SLA vs. Other Prototyping Technologies: A Data Comparison
| Teknologi | Tolerance Range | Kekasaran permukaan (Ra) | Masa utama (Bahagian mudah) | Terbaik untuk |
|---|---|---|---|---|
| SLA Resin | ±0.1–0.3mm | 0.8-3.2 μm | 12-48 jam | Detailed, bahagian yang licin |
| FDM | ±0.2–0.5mm | 5-20 μm | 6-24 jam | Functional, low-cost parts |
| Pemesinan CNC | ±0.01–0.1mm | 0.4-1.6 μm | 3-7 hari | High-strength metal parts |
2. Step-by-Step Process for SLA Resin 3D Printing Prototypes
Mewujudkan berkualiti tinggiSLA resin 3D printing prototype requires careful attention to each step—from design to post-treatment. Skipping a detail (like model repair or support placement) can lead to failed prints or inconsistent results. Below is the full workflow, with tips from industry experts.
2.1 Pemodelan & Export: Start with a Solid CAD File
The first step is to design a 3D model that’s optimized for SLA. Use professional software like SolidWorks, Fusion 360, or Blender—avoid overly thin walls (minimum 0.5mm for most resins) or sharp overhangs (more than 45° will need supports).
Setelah reka bentuknya muktamad, export it as anSTL file (Bahasa tessellation standard). This format breaks the 3D model into tiny triangular facets, which the SLA printer can interpret. Untuk hujungnya: Use a high STL resolution (50–100 microns) for detailed parts—this reduces “faceting” (visible triangle edges) on the final prototype.
2.2 Software Processing: Betulkan & Optimize with Magics
Import your STL file intoMagics (a leading 3D printing prep software) to fix common issues and optimize for printing:
- Inspect & Betulkan: Use Magics’ “Repair Wizard” to fix gaps, overlapping facets, or non-manifold edges (these cause printers to misread the model). A 2023 survey by 3D Hubs found that 68% of failed SLA prints are due to unpatched STL errors—so don’t skip this step!
- Orient the Model: Position the part to minimize supports. Contohnya, a curved phone case should be oriented with the curve facing up—this reduces the number of supports needed and keeps the smooth surface intact.
2.3 Struktur sokongan: Prevent Warping & Collapse
Suspended or tall parts (Mis., a 10cm-tall gear) keperluansupport structures to stay stable during printing. You can add supports automatically in Magics or manually for complex areas.
- Automatic Supports: Terbaik untuk bahagian mudah (Mis., a basic bracket). The software places thin, tree-like supports at overhangs.
- Manual Supports: Use for high-precision parts (Mis., a dental crown). Manually place thicker supports at critical points to avoid bending.
Kajian kes: A aerospace team prototyped a small turbine blade. They used manual supports at the blade’s tip (a 30° overhang) and reduced support removal time by 30% compared to automatic supports.
2.4 Tetapan parameter & Mengiris: Prepare for the Printer
Seterusnya, slice the model (split it into thin layers) and set parameters tailored to your resin and part:
- Ketinggian lapisan: Most SLA printers use 25–100 microns. Thinner layers (25μm) = smoother surfaces (great for prototypes like jewelry) but longer print times. Thicker layers (100μm) = faster prints (ideal for functional tests).
- Z-Axis Compensation: Adjust the Z-axis to account for resin shrinkage (most resins shrink 2–5% during curing). Contohnya, if your part needs to be 100mm tall, set the Z-axis to 103mm to offset shrinkage.
- Export the File: Save the sliced model as a CLI or SLT file (printer-specific formats) and transfer it to the SLA machine.
2.5 SLA Printing: Layer-by-Layer Curing
Load your resin (choose a type based on your needs: rigid resin for functional parts, flexible resin for gaskets) into the printer’s tank, then start the print:
- The printer’s build plate lowers into the resin tank, touching the surface.
- A UV laser scans the first layer of the model, curing the resin into a solid.
- The build plate lifts slightly, and the laser scans the next layer—repeating until the part is complete.
Typical Print Times: Prototaip kecil (5cm x 5cm x 5cm) takes 2–4 hours with a 50μm layer height. A larger part (15cm x 10cm x 8cm) may take 8–12 hours.
2.6 Selepas rawatan: Turn Raw Prints into Finished Prototypes
Freshly printed parts are soft and covered in uncured resin—so post-treatment is critical:
- Pembersihan: Bilas bahagian dalam isopropil alkohol (IPA) for 5–10 minutes to remove excess resin. Use a soft brush for detailed areas (Mis., lubang kecil).
- Support Removal: Use pliers or a craft knife to carefully remove supports. Untuk bahagian halus, heat the supports slightly (with a hair dryer) to soften them first.
- Pengamplasan & Menggilap: Sand the part with 400–2000 grit sandpaper (start coarse, end fine) to smooth support marks. For a glossy finish, use a polishing compound.
- Selepas pembedahan: Cure the part in a UV chamber for 10–20 minutes. This hardens the resin fully and improves strength (most resins gain 30–50% more tensile strength after post-curing).
2.7 Pemeriksaan Kualiti & Penghantaran: Ensure It Meets Specs
Before delivering the prototype, run a comprehensive inspection:
- Pemeriksaan dimensi: Use calipers or a 3D scanner to verify the part matches the CAD design (tolerance should be within ±0.1mm for critical features).
- Pemeriksaan visual: Check for cracks, gelembung, or uneven surfaces—these indicate issues with printing (Mis., too much laser power) or post-treatment (Mis., incomplete cleaning).
- Ujian fungsional: Untuk prototaip berfungsi (Mis., a hinge), prestasi ujian (Mis., how many times it can bend before breaking).
If the part passes, it’s ready for use—whether that’s design reviews, assembly testing, or customer demos.
3. Yigu Technology’s Perspective on SLA Resin 3D Printing Prototypes
Di Yigu Technology, we’ve supported hundreds of engineers and procurement teams in optimizing theirSLA resin 3D printing prototype workflows. What sets SLA apart is its ability to bridge the gap between design and production—helping teams catch flaws early and reduce time-to-market by 40% Rata -rata. We often recommend SLA for medical and automotive clients who need both precision and speed, and we’ve seen firsthand how post-curing (a step many overlook) can turn a good prototype into a production-ready sample. Untuk pasukan perolehan, SLA also offers cost savings: small-batch prototypes (1-10 bahagian) cost 50–70% less than CNC machining.
4. FAQ About SLA Resin 3D Printing Prototypes
Q1: How much does an SLA resin 3D printing prototype cost?
Cost depends on part size, resin type, and post-treatment. Kecil, simple prototype (5cm x 5cm x 5cm) typically costs $20–$50. A large, detailed part (15cm x 10cm x 8cm) with premium resin (Mis., medical-grade) may cost $100–$300.
S2: What’s the maximum size of an SLA resin 3D printing prototype?
Most desktop SLA printers have a build volume of 15cm x 15cm x 20cm. Industrial printers (used for larger parts like automotive bumpers) can handle build volumes up to 60cm x 60cm x 100cm.
Q3: How long does it take to get an SLA resin 3D printing prototype?
From design to delivery, the total time is usually 3–5 days. This includes 1–2 days for modeling/printing, 1 day for post-treatment, dan 1 day for quality inspection. Perintah tergesa -gesa (24–48 hour delivery) are available for urgent projects.
