If you’re looking for a fast, cost-effective way to make small-batch prototypes or low-volume production parts, The silicone Vacuum casting process adalah penukar permainan. Unlike mass-production methods like injection molding (which requires expensive molds), silicone vacuum casting uses flexible silicone molds to create high-quality parts—perfect for new product development or small runs of 10–500 pieces. Di bawah, we break down every step of the process, key materials, benefits, and tips to help you decide if it’s right for your project.
1. What is the Silicone Vacuum Casting Process? Core Definition & Purpose
Pertama, let’s clarify what the process is—and why it’s so useful for product teams. The silicone Vacuum casting process (also called vacuum infusion casting) is a manufacturing technique that uses a silicone mold and vacuum pressure to inject liquid materials (like polyurethane resins) into the mold, creating precise, bahagian terperinci.
Its main purpose is to bridge the gap between:
- Rapid prototyping (Mis., 3D Percetakan, Pemesinan CNC) for 1–10 pieces.
- Pengeluaran besar -besaran (Mis., pengacuan suntikan) untuk 1,000+ kepingan.
Data spotlight: 75% of product developers use silicone vacuum casting for low-volume runs (10–500 pieces) because it cuts costs by 40–60% compared to making injection molding tools for small batches. It’s especially popular for consumer electronics, Peranti perubatan, and automotive components—where detailed, consistent parts are needed without the high upfront investment.
2. Step-by-Step Breakdown of the Silicone Vacuum Casting Process
The process has 5 key stages, from creating a master prototype to finishing the final parts. Each step requires precision to ensure the end product matches your design.
Stage 1: Buat prototaip induk (The “Template” for the Mold)
Before you make a silicone mold, you need a prototaip induk—a physical model of your part that the mold will replicate.
- How to make the master prototype: Use methods that deliver detail and accuracy, seperti:
- Pemesinan CNC: Best for rigid materials (Mis., Abs, aluminium) and tight tolerances (±0.01mm). Ideal for functional parts like gear prototypes.
- SLA 3D Printing: Great for complex shapes or parts with fine details (Mis., a phone case with texture). SLA prints have smooth surfaces that transfer well to the silicone mold.
- FDM 3D Printing: More affordable for simple parts (Mis., a basic housing), but may need sanding to smooth layer lines.
- Key requirement: The master prototype must be 100% free of defects (scratches, Jurang, uneven surfaces)—any flaw will be copied into every part made from the silicone mold.
Stage 2: Prepare & Fix the Master Prototype for Mold Making
Once you have a perfect master prototype, you need to prepare it to create the silicone mold.
- Clean the prototype: Wipe it with isopropyl alcohol to remove dust, minyak, or fingerprints—these can cause bubbles in the silicone mold.
- Fix the prototype to a mold base: Use double-sided tape or epoxy to attach the prototype to a rigid base (Mis., a plastic or metal tray). The base should be 2–3 inches larger than the prototype on all sides to leave space for the silicone.
- Add mold release agent (pilihan): If the prototype is made of a sticky material (Mis., some 3D printing resins), spray a light layer of mold release agent to help the prototype separate from the silicone later.
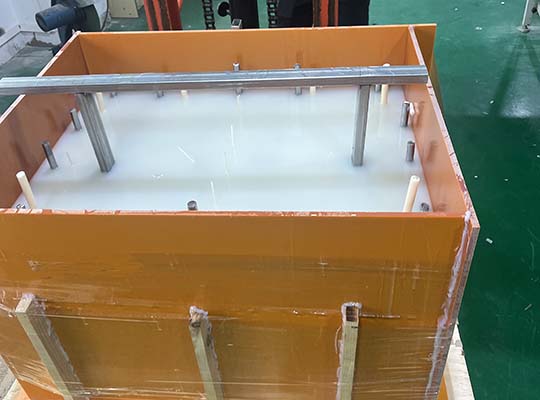
Stage 3: Mix & Pour Silicone to Create the Mold
This is where the silicone mold— the heart of the process—comes to life.
- Choose the right silicone: Pick a silicone material based on your needs (see Table 1 below). Most factories use two-part addition-cure silicone (A+B components) because it’s durable and has a long mold life.
- Mix the silicone: Combine the A and B components in the correct ratio (usually 1:1 atau 10:1 mengikut berat badan) using a mixing bowl. Stir slowly for 2–3 minutes to avoid creating bubbles—bubbles in the silicone will lead to holes in the final parts.
- Pour the silicone over the prototype: Slowly pour the mixed silicone into the mold base, starting from the edge of the prototype (not directly on top) to prevent air traps. Fill the base until the silicone covers the prototype by 0.5–1 inch—this ensures the mold is strong enough for repeated use.
- Biarkan Silicone menyembuhkan: Allow the mold to dry at room temperature (20–25°C/68–77°F) untuk 8-12 jam (cure time depends on silicone type—fast-cure silicone can set in 4 jam, while high-durability silicone takes 12 jam).
- Demold the prototype: Sekali sembuh, carefully cut the silicone mold along a pre-marked line (use a sharp utility knife) and remove the master prototype. You’ll now have a hollow silicone mold that matches the shape of your prototype—ready for casting.
Stage 4: Vacuum Infusion – Inject Material into the Silicone Mold
This is the “casting” step, where vacuum pressure ensures the liquid material fills every detail of the mold.
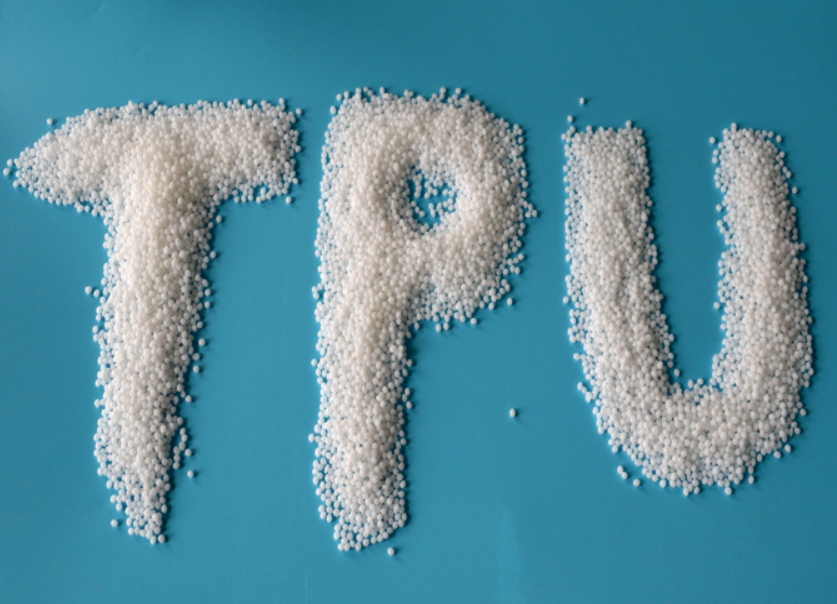
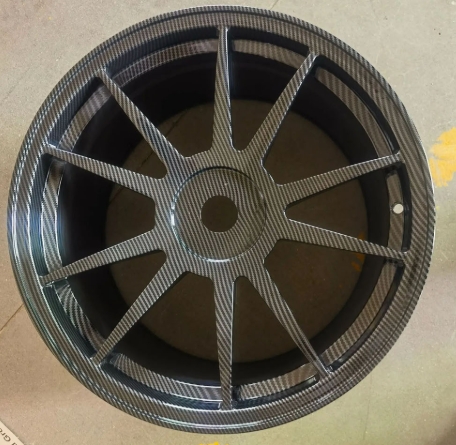
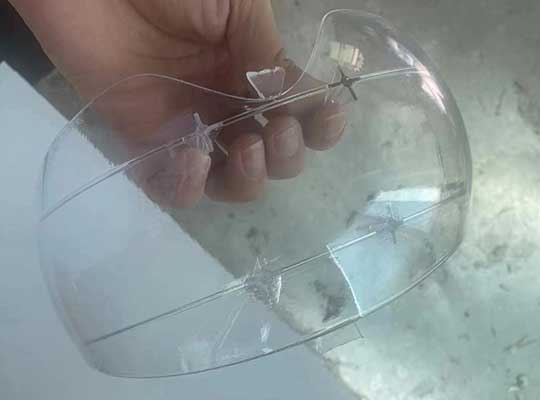
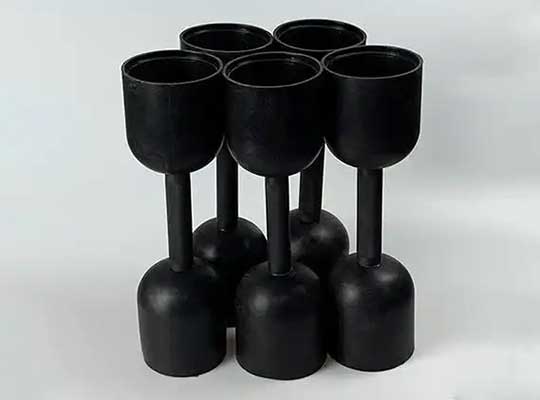
- Prepare the casting material: The most common material is Resin poliuretana (PU resin), which mimics the properties of plastics like ABS, Pc, or rubber. Choose a resin based on your part’s needs (Mis., rigid resin for a phone case, flexible resin for a grip).
- Degas the material: Pour the resin into a container and place it in a vacuum chamber for 5–10 minutes to remove air bubbles—bubbles in the resin cause voids in the final part.
- Load the mold into the vacuum casting machine: Place the silicone mold into the machine’s chamber and secure it. The machine will create a vacuum (biasanya -0.095 MPa pressure) to remove air from the mold’s cavities.
- Inject the resin into the mold: Using the machine’s pressure, push the degassed resin into the mold through a small opening. The vacuum ensures the resin flows into every tiny detail—even intricate features like logos or text.
- Let the resin cure: Remove the mold from the machine and let the resin cure. Cure time varies by resin: 1–2 hours for fast-cure PU, 4–6 hours for high-strength PU.
Stage 5: Demold & Finish the Final Parts
Once the resin is cured, you’ll get your final parts—and add any finishing touches.
- Demold the parts: Gently peel the silicone mold apart to remove the cast parts. Silicone’s flexibility makes this easy—you won’t damage the parts or the mold (a good silicone mold can be used 20–50 times before it wears out).
- Trim excess material: Use scissors or a hobby knife to cut off any “flash” (extra resin that oozed out of the mold’s seams).
- Add surface treatments (pilihan): For a polished look, sand the parts with 400–600 grit sandpaper. You can also spray-paint, silk-screen, or anodize (for metal-like finishes) the parts to match your design.
3. Key Materials for Silicone Vacuum Casting: Silicone Molds & Casting Resins
Choosing the right materials is critical to the process’s success. Below is a breakdown of the most common options:
| Jenis Bahan | Pilihan & Properties | Terbaik untuk | Kos (Per kg) |
| Silicone Molds | 1. Addition-Cure Silicone: Fleksibel, high durability (20–50 uses), low shrinkage (0.1–0.3%). 2. Condensation-Cure Silicone: Cheaper, lower durability (10–20 uses), higher shrinkage (0.5–1%). | 1. Addition-cure: Complex parts or high-volume low runs (30–50 pieces). 2. Condensation-cure: Simple parts or small runs (10-20 keping). | \(25- )40 (addition-cure) \(15- )25 (condensation-cure) |
| Casting Resins | 1. Rigid PU Resin: Hard (Shore D 70–85), mimics ABS/PC—for structural parts. 2. Flexible PU Resin: Soft (Shore A 30–60), mimics rubber—for grips/seals. 3. Transparent PU Resin: Clear, mimics acrylic—for lenses or display parts. | 1. Tegar: Kes telefon, laptop housings. 2. Fleksibel: Remote control grips, O-rings. 3. Telus: Penutup cahaya, tingkap peranti perubatan. | \(18- )30 (rigid) \(22- )35 (fleksibel) \(25- )40 (telus) |
4. Benefits of Silicone Vacuum Casting vs. Other Methods
Silicone vacuum casting shines for low-volume production—but how does it compare to other techniques like 3D printing or injection molding?
| Kaedah | Batch Size Best For | Upfront Cost | Masa utama | Part Detail & Quality |
| Pemutus vakum silikon | 10–500 pieces | Rendah (\(200- )800 for silicone mold) | 3-7 hari | Tinggi (captures fine details; parts feel like production-grade) |
| 3D Percetakan (SLA) | 1–10 pieces | Very low (\(50- )200 setiap bahagian) | 1-3 hari | Tinggi (good detail, but parts are often brittle) |
| Pengacuan suntikan | 1,000+ kepingan | Very high (\(5,000- )20,000 for metal mold) | 2-4 minggu | Very high (consistent, but overkill for small batches) |
Contoh: Sekiranya anda memerlukan 100 phone case prototypes, silicone vacuum casting would cost ~\(1,200 (acuan + Resin) and take 5 hari. Injection molding would cost ~\)8,000 (mold alone) and take 3 weeks—making vacuum casting the far better choice for low volumes.
Perspektif Teknologi Yigu
Di Yigu Technology, we see the silicone Vacuum casting process as a cornerstone for new product development. It’s perfect for clients who need 10–500 high-quality parts—whether for user testing, trade shows, or small-scale sales—without the cost of injection molding. We recommend using addition-cure silicone for molds (it lasts longer, saving money long-term) and rigid PU resin for most consumer electronics parts (it mimics production plastics like ABS). Our team also helps clients optimize their master prototypes—ensuring the silicone mold captures every detail, from texture to logos. For low-volume runs, this process isn’t just a tool—it’s a way to speed up time-to-market while keeping costs in check.
Soalan Lazim
- How many parts can I make from one silicone mold?
It depends on the silicone type: Addition-cure silicone molds last 20–50 uses (ideal for 30–50 pieces), while condensation-cure molds last 10–20 uses (best for 10–15 pieces). Factors like part complexity and handling also matter—gentle demolding (no pulling or tearing) extends the mold’s life.
- Can silicone vacuum casting make parts with different colors or textures?
Ya! You can add pigment to the PU resin before casting (for solid colors) or use a textured master prototype (Mis., a 3D printed part with a matte finish) to transfer texture to the cast parts. For logos or text, you can either include them in the master prototype or add them via silk-screening after casting.
- Is silicone vacuum casting suitable for food-safe or medical parts?
Yes—if you use food-safe or medical-grade materials. Choose FDA-approved silicone for the mold and USP Class VI PU resin for the parts. These materials are non-toxic and meet safety standards for food contact (Mis., small kitchen gadgets) or medical use (Mis., device housings). Always confirm material certifications with your supplier before starting.