If you’ve ever worked with rapid prototyping or small-batch production, you’ve probably encountered acuan silikon. These versatile tools are essential for creating accurate replicas of prototypes, art pieces, and industrial parts. But like any manufacturing process, working with silicone molds comes with its own set of challenges—from short mold lifespans to surface defects. Dalam panduan ini, we’ll walk you through the complete production process, address common problems, and provide practical solutions to help you achieve better results.
Understanding Silicone Molds: Asas dan faedah
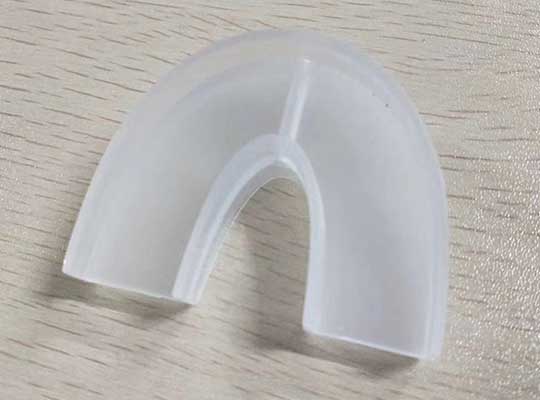
Before diving into the production process, let’s clarify why silicone molds are so popular in manufacturing. Acuan silikon are flexible, heat-resistant tools used to replicate prototypes or existing objects with high precision. They’re particularly valued in rapid molding due to their unique properties:
- Excellent Elasticity: They can capture fine details without damaging delicate prototypes.
- No Draft Angle Required: Unlike rigid molds, silicone molds don’t need a draft angle (a slight slope) to release parts, preserving dimensional accuracy.
- Easy Splitability: They can be poured as a single piece and then cut along premarked lines to remove the original model.
- Keberkesanan kos: Ideal for small production runs (typically 10–30 pieces per mold), making them perfect for testing or limited releases.
Silicone molds are widely used across industries, including toy manufacturing, art reproduction, architectural modeling, and medical device prototyping. Their ability to balance precision and flexibility makes them a go-to choice for both hobbyists and professionals.
Step-by-Step Silicone Mold Production Process
Creating a high-quality silicone mold requires careful preparation and attention to detail. Here’s a breakdown of the standard process:
1. Preparing the Master Mold
The first step is preparing the master mold—the original object you want to replicate.
- Clean and dry the master mold thoroughly to remove dust, minyak, or debris. Any imperfections on the master will appear in the final mold.
- Smooth the surface if needed. For glossy finishes, polish the master; for textured surfaces, ensure patterns are clear and intact.
- Apply a release agent (like petroleum jelly or specialized spray) to help the silicone release from the master. For smooth masters:
- Dip a clean cloth in petroleum jelly and apply evenly.
- Let it sit for 30 minutes to allow absorption.
- Wipe off excess with a dry cloth until the surface shines.
2. Setting Up the Mold Frame
To contain the silicone, you’ll need a frame:
- Use wooden boards or plastic sheets to build a container around the master mold. The frame should be at least 3–4mm larger than the master on all sides.
- Seal gaps with clay or tape to prevent silicone leakage. The clay should form a tight seal without damaging the master’s surface.
- Ensure the master is centered in the frame and secured to prevent shifting during pouring.
3. Mixing the Silicone
Proper mixing is critical for mold quality. Follow these steps:
- Measure mold silicone rubber (typically 500–1000 grams for small molds) into a clean plastic container.
- Add the curing agent at a ratio of 1.5–2.5% by weight. Contohnya, mix 2 grams of curing agent with 100 grams of silicone.
- Stir in an irregular direction to avoid creating air bubbles. Mix thoroughly for 3–5 minutes.
- If the silicone is too thick, add a small amount of silicone diluent (3–5% by volume) and mix well.
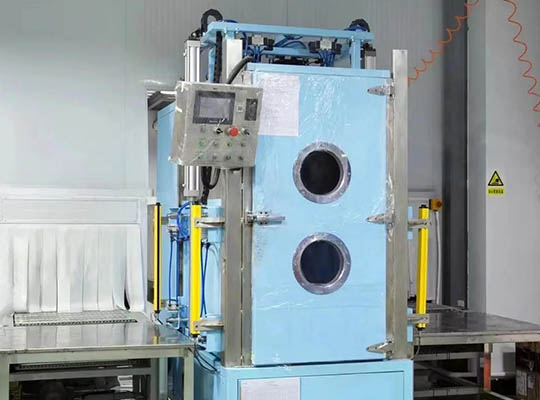
- Degas the mixture di bawah vakum (-0.1Mpa) for 1–3 minutes to remove trapped air. This step is crucial for smooth molds—skip it, and you’ll get bubbles on the surface.
4. Pouring and Curing the Silicone
Now it’s time to create the mold:
- Pour the silicone slowly onto the highest point of the master mold. Let it flow naturally to ensure even coverage.
- Use a paintbrush to spread silicone into hard-to-reach areas (like crevices or intricate details).
- Apply at least three layers of silicone, each about 1mm thick. Wait for each layer to cure before adding the next.
- Embed a layer of gauze or mesh between the second and third layers to strengthen the mold. Avoid fiberglass cloth, which can cause delamination.
- Let the silicone cure for 10–15 hours at room temperature. Full curing takes 24 hours for maximum strength.
5. Finishing the Mold
Sekali sembuh, the mold needs final touches:
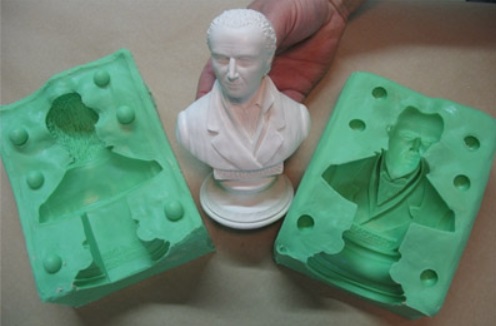
- Remove the frame and carefully cut along the premarked parting line to release the master mold. Use a sharp blade and cut slowly to avoid tearing.
- Clean the mold with mild soap and water to remove any residue.
- Create a support jacket using plaster or fiberglass to prevent the flexible silicone mold from warping during use.
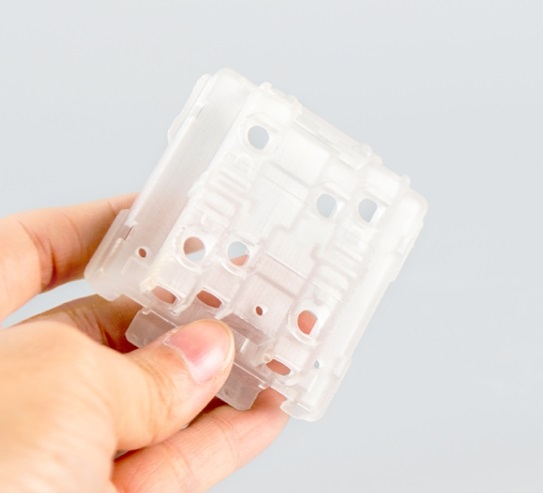
Common Types of Silicone Molds and Their Applications
Silicone molds come in different styles, each suited for specific projects. Here’s how to choose the right type:
| Jenis acuan | Terbaik untuk | Kaedah pengeluaran | Key Advantage |
| Brush-On Mold | Intricate details, large objects | Layered application with brush | Captures fine textures and undercuts |
| Pour-in Mold | Smooth, simple shapes | Silicone poured directly over master | Faster production, minimal labor |
| Split Mold | Complex 3D objects | Two separate halves joined together | Easy removal of large or detailed parts |
| Infusion Mold | Kecil, delicate items | Silicone poured into a sealed frame | Prevents damage to fragile masters |
Contohnya, if you’re replicating a detailed sculpture, a brush-on split mold would work best. For a simple phone case prototype, a pour-in mold is quicker and more efficient.
Troubleshooting Common Silicone Mold Problems
Even experienced manufacturers face issues with silicone molds. Here are solutions to the most frequent problems:
1. Short Mold Lifespan (Low Turnover)
Problem: Your mold breaks or deforms after just a few uses.
Causes:
- Too much silicone oil added to reduce viscosity (destroys molecular structure).
- Using the wrong hardness silicone (high-hardness for small details becomes brittle; low-hardness for large parts warps).
- Poor curing due to incorrect catalyst ratio.
Penyelesaian:
- Match silicone hardness to your project: 20–30 Shore A for small details, 40–50 Shore A for larger parts.
- Limit silicone oil to 5–10% of the mixture.
- Use the recommended catalyst ratio (1.5–2.5%)—don’t overdo it to speed up curing.
2. Mold Burning
Problem: The silicone mold discolors, melts, or develops a sticky surface after casting.
Sebab: Exothermic reaction from resin curing generates heat (up to 180°F/82°C), which damages the mold if left too long.
Penyelesaian:
- Demold resin parts within 3 minutes of curing.
- Use heat-resistant silicone formulated for resin casting.
- Add a cooling step between casts to let the mold temperature drop.
3. Surface Issues: Sticky or Tacky Mold
Problem: The silicone mold remains sticky even after full curing time.
Sebab: Condensation-cure silicone relies on moisture to cure. If the silicone was over-dried during production, it can’t absorb enough moisture from the air.
Penyelesaian:
- Mist the mold lightly with water and let it sit for 24 jam.
- Store silicone in a controlled humidity environment (40–60% humidity) before use.
- Check expiration dates—old silicone may cure improperly.
4. Poor Tensile Strength and Tear Resistance
Problem: The mold tears easily when removing parts.
Sebab: Excessive silicone oil dilutes the mixture, weakening molecular bonds.
Penyelesaian:
- Reduce silicone oil to 5% max, or eliminate it entirely.
- Add a reinforcing layer (gauze or mesh) during production.
- Use a higher-quality silicone with better tear resistance (look for tear strength >20 kN/m).
5. Oily Residue on Mold Surface
Problem: A greasy film appears on the mold, transferring to cast parts.
Sebab: Using cheap mineral oil instead of pure silicone oil (mineral oil doesn’t bond with silicone and leaches out).
Penyelesaian:
- Use only high-purity silicone oil designed for mold making.
- Clean new molds with isopropyl alcohol before first use.
- Avoid low-quality silicone brands that cut corners with additives.
6. Surface Imperfections (Marks, Striations)
Problem: The mold has visible lines, roughness, or uneven texture.
Causes:
- The master mold wasn’t properly polished.
- Release agent was applied unevenly.
- Air bubbles trapped during pouring.
Penyelesaian:
- Polish the master to a smooth finish before molding.
- Apply release agent in thin, even layers.
- Degas silicone thoroughly under vacuum (-0.1Mpa for 7–8 seconds).
Best Practices for Maximizing Silicone Mold Performance
To get the most out of your silicone molds, follow these expert tips:
- Choose the Right Silicone: Match hardness and viscosity to your project. High-detail work needs low-viscosity silicone; large parts need higher hardness.
- Maintain Cleanliness: Habuk, minyak, or debris on the master will ruin the mold. Work in a clean environment and wear gloves.
- Control Curing Conditions: Cure at 70–80°F (21–27°C) with 40–60% humidity for optimal results.
- Store Molds Properly: Keep unused molds in a cool, dry place away from direct sunlight. Dust them with talc to prevent sticking.
- Rotate Molds: If producing multiple parts, alternate between 2–3 molds to prevent overheating and extend lifespan.
Perspektif Teknologi Yigu
Di Yigu Technology, we believe silicone molds are the bridge between prototype and production. Proper mold making combines art and science—choosing the right materials, mastering curing times, and troubleshooting proactively. We recommend investing in high-quality silicone and prioritizing surface preparation. By following precise processes and matching mold type to project needs, manufacturers can achieve consistent, high-quality results with longer mold lifespans.
Soalan Lazim
1. How many parts can a silicone mold typically produce?
Most silicone molds yield 10–30 parts before showing wear. With proper care (correct hardness, minimal oil, and controlled curing), some high-quality molds can produce up to 50 bahagian, especially for simple shapes.
2. Can I reuse a silicone mold after it develops small tears?
Minor tears can be repaired with silicone sealant, but this may affect detail accuracy. For critical parts, replace the mold once tears appear to avoid defects in castings.
3. What’s the difference between condensation-cure and addition-cure silicone molds?
Condensation-cure silicone is cheaper and cures with moisture but may shrink slightly. Addition-cure silicone cures faster with heat, has minimal shrinkage, and is better for high-precision work but costs more. Choose based on your budget and accuracy needs.