If you’re in rapid prototyping, 小型バッチプロダクション, or DIY crafting, you’ve likely heard of silicone mold making—a flexible, cost-effective way to replicate prototypes (like plastic parts, resin crafts, or even metal components). But if you’re new to it, you might wonder: What exactly does the silicone mold making process involve?
このガイドで, we’ll break down the entire process from start to finish, share essential tools, highlight common pitfalls, and include real-world examples. Our goal is to help you create high-precision silicone molds that deliver consistent, high-quality replicas.
1. 初め: What Is Silicone Mold Making?
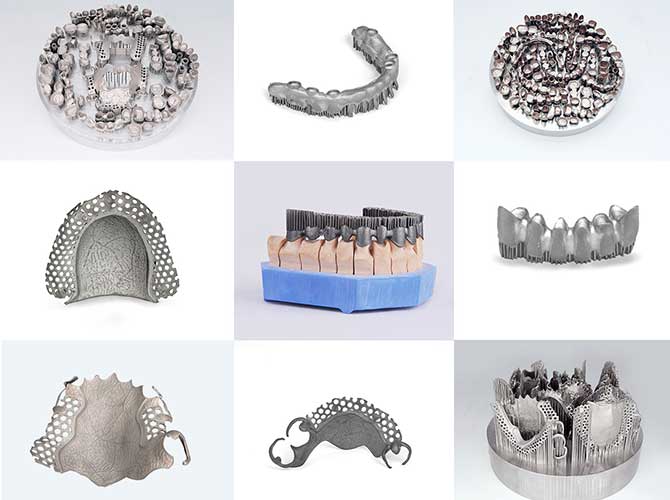
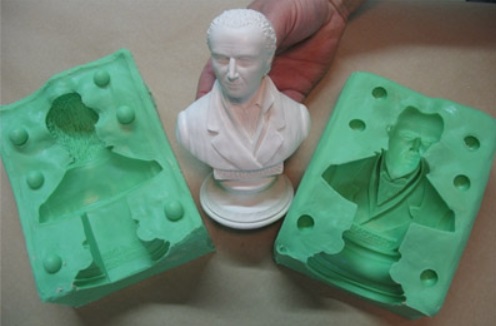
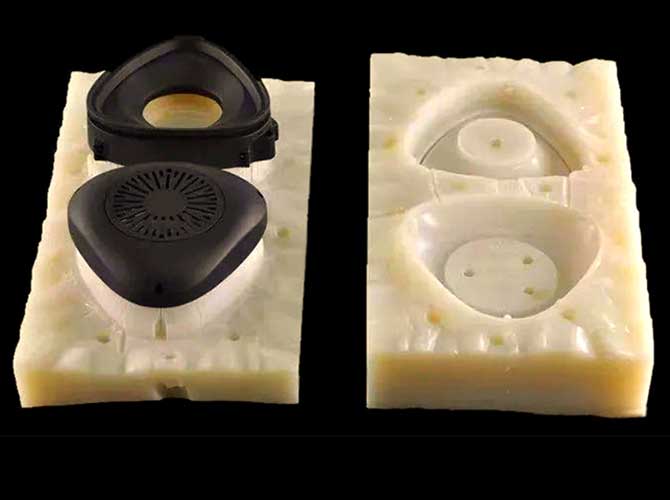
Silicone mold making is a manufacturing process that uses liquid silicone to create a reusable mold (the “silicone mold”) from a master prototype. Once the mold is cured, you can pour casting materials (like resin, polyurethane, or even low-melt metals) into it to produce identical replicas.
Why is this process so popular?
- Flexibility: Silicone molds can capture tiny details (like textures, ロゴ, or small holes) that rigid molds (例えば。, 金属) might miss.
- 費用対効果: It’s 30–50% cheaper than metal mold making, making it ideal for small batches (10–100 replicas).
- スピード: The entire process (from prototype to finished mold) takes 24–48 hours—much faster than traditional mold making (which can take weeks).
注記: This process works best for non-high-temperature applications (silicone typically resists up to 200°C). For high-heat parts (例えば。, engine components), you’ll need industrial-grade silicone.
2. Preparations: 材料 & Tools You’ll Need
Before starting, gather all materials and tools—skipping this step can lead to delays or faulty molds. Below is a detailed table of essentials, with their uses and pro tips:
| Category | Item | Purpose | キーノート & Pro Tips |
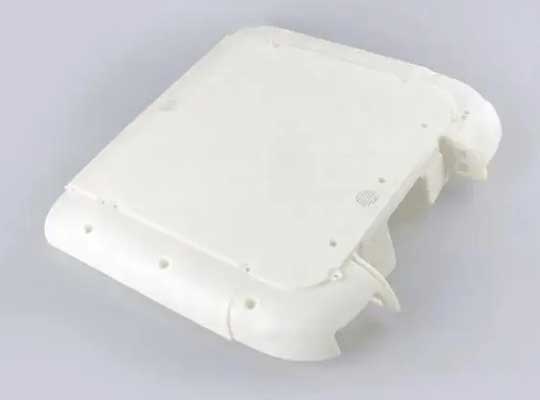
| Core Materials | Master prototype | The “template” for the mold | Use 3D-printed (SLA/CNC) or handcrafted prototypes; ensure it’s clean and smooth. |
| Liquid silicone rubber | Forms the mold itself | Choose “addition-cure” silicone (low shrinkage, <1%) for precision; avoid “condensation-cure” for prototypes. | |
| Silicone curing agent | Hardens the liquid silicone | Mix in a 10:1 比率 (シリコーン:硬化剤) for most brands; check the manufacturer’s instructions. | |
| Mold release agent | Prevents silicone from sticking to the prototype | Use a spray-on or brush-on agent (例えば。, silicone-based); apply 2 thin coats for best results. | |
| ツール | Mixing bowl & stirring rod | Mix silicone and curing agent | Use plastic (not metal) bowls—metal can react with silicone. Stir slowly to avoid bubbles. |
| Plastic container (mold frame) | Holds the prototype and silicone | Choose a container 2–3cm larger than the prototype on all sides; ensure it’s leak-proof. | |
| Support materials (gypsum/fiberglass) | Reinforces the mold frame | Use gypsum for small molds; fiberglass for larger, heavier molds (prevents frame warping). | |
| Utility knife/scalpel | Cuts the cured mold along the parting surface | Use a sharp blade to avoid tearing the silicone. | |
| Vacuum chamber (オプション) | Removes bubbles from mixed silicone | Critical for detailed prototypes; 使用 -0.095MPa pressure for 1–2 minutes. |
3. Step-by-Step Silicone Mold Making Process
The silicone mold making process is linear—each step builds on the last. Follow these 8 steps carefully to avoid mistakes:
ステップ 1: Design the Mold’s Parting Surface
The parting surface is the line where you’ll cut the cured mold to remove the prototype. It’s one of the most important design choices:
- For simple shapes (例えば。, a flat keychain), place the parting surface in the middle (split the mold into two equal halves).
- 複雑な形の場合 (例えば。, a 3D-printed toy with limbs), position the parting surface where it minimizes cutting through details (例えば。, between the body and legs).
例: A jewelry maker designing a mold for a pendant placed the parting surface along the pendant’s edge—this let them cut the mold without damaging the pendant’s engraved pattern.
ステップ 2: Process the Master Prototype
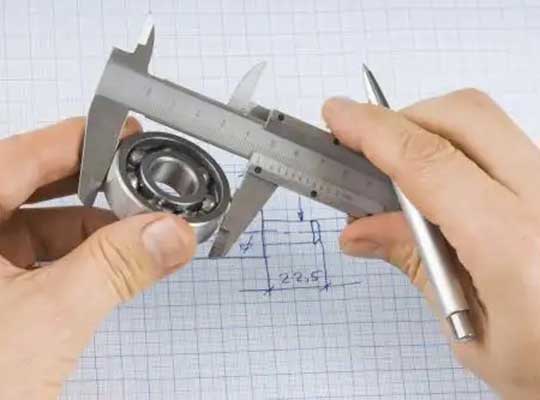
A clean, well-prepped prototype ensures the mold captures every detail:
- Wipe the prototype with a lint-free cloth to remove dust or debris.
- Apply mold release agent evenly over the prototype’s surface. Let it dry for 10–15 minutes (follow the agent’s instructions).
- Double-check for missed spots—if silicone sticks to the prototype, you’ll ruin both the mold and the prototype.
よくある間違い: A hobbyist once skipped the mold release agent for a 3D-printed resin prototype. When they tried to remove the cured silicone, the prototype broke—wasting 8 労働時間.
ステップ 3: Build the Mold Frame
The mold frame holds the prototype and silicone securely:
- Place the prepped prototype in the center of the plastic container.
- 使用 gypsum or fiberglass to reinforce the container’s sides (必要に応じて). For gypsum: Mix it with water (2:1 比率), pour around the container’s edges, and let it cure for 1–2 hours.
- Seal any gaps in the container with tape (例えば。, duct tape) to prevent silicone leakage.
ステップ 4: Mix Silicone & Curing Agent
Proper mixing is key to a uniform, bubble-free mold:
- Pour the liquid silicone into the plastic mixing bowl. Add the curing agent in the recommended ratio (usually 10:1).
- Stir slowly and thoroughly for 3–5 minutes. Scrape the bowl’s bottom and sides—unmixed silicone will stay liquid and ruin the mold.
- Let the mixture sit for 1–2 minutes to let small bubbles rise to the surface (pop them with a toothpick).
ステップ 5: Inject Silicone into the Mold Frame
Pour the silicone carefully to avoid bubbles and ensure full coverage:
- Tilt the mixing bowl and pour the silicone slowly into the mold frame—start at the edge (not directly on the prototype) to avoid displacing the prototype.
- Keep pouring until the silicone covers the prototype by 1–2cm (this ensures all details are captured).
- (Optional) If you have a vacuum chamber, place the mold frame inside and run it for 1–2 minutes to remove trapped bubbles. そうでない場合, gently tap the frame’s sides for 30 seconds—this helps small bubbles rise.
ステップ 6: Cure the Silicone
Curing time depends on the silicone type and temperature—don’t rush this step:
- Room temperature (20–25°C): Most addition-cure silicones take 8–12 hours to fully cure.
- Warm temperature (30–35°C): Curing time shortens to 4–6 hours, but avoid temperatures over 40°C (silicone may shrink unevenly).
ヒントの場合: Check the silicone after half the recommended time—if it’s still sticky, let it cure longer. A fully cured silicone will be firm but flexible.
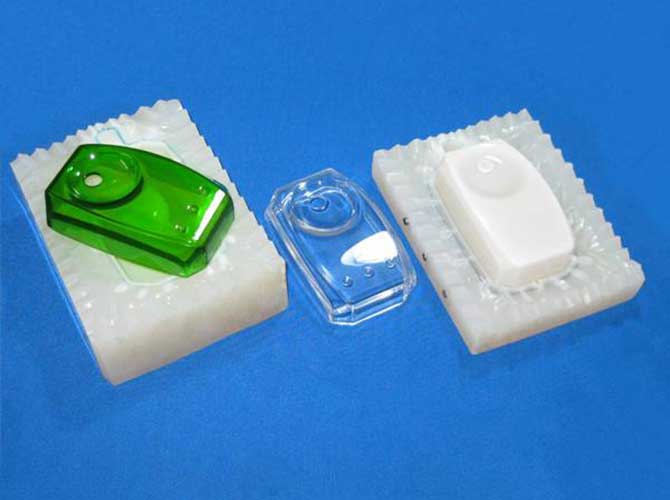
ステップ 7: Demold & Finish the Mold
硬化したら, carefully remove the prototype and prepare the mold for use:
- Use a utility knife to cut the silicone along the pre-designed parting surface. Cut slowly and follow the line—curved cuts can tear the mold.
- Gently pull the two halves of the silicone mold apart. Remove the prototype—if it sticks, use a small plastic tool (not metal) to pry it loose.
- Inspect the mold cavity (the space where the prototype was) for missing details or bubbles. If there are small defects, you can patch them with a tiny amount of mixed silicone (cure for 2 時間).
ステップ 8: Add Gates & Exhaust Ports (For Production)
To use the mold for replicas, add gates (where you pour casting material) そして exhaust ports (where air escapes):
- Cut a small hole (5–8mm diameter) in one edge of the mold—this is the gate.
- Add 1–2 tiny holes (2–3mm diameter) on the opposite side—these are exhaust ports (prevents air bubbles in replicas).
- Test the mold with a small amount of casting material (例えば。, 樹脂) to ensure the gates and ports work.
4. Key Tips to Avoid Common Mistakes
Even experienced makers run into issues—here are 5 tips to keep your process smooth:
- Don’t rush mixing: Unmixed silicone leads to soft spots in the mold. Stir for at least 3 分, even if it feels tedious.
- Control curing temperature: Avoid curing silicone near heaters or windows (temperature swings cause shrinkage). Use a thermometer to keep the room at 20–25°C.
- Choose the right silicone: For detailed prototypes (例えば。, miniatures), use “high-consistency” silicone (thicker, captures fine details). For large parts (例えば。, vases), use “low-consistency” silicone (pours more easily).
- Reinforce large molds: Molds larger than 20cm need fiberglass reinforcement—without it, the mold will warp when you pour heavy casting materials (例えば。, concrete).
- Store molds properly: After use, clean the mold with warm water and mild soap. Store it flat in a sealed plastic bag (away from direct sunlight) to prevent drying out.
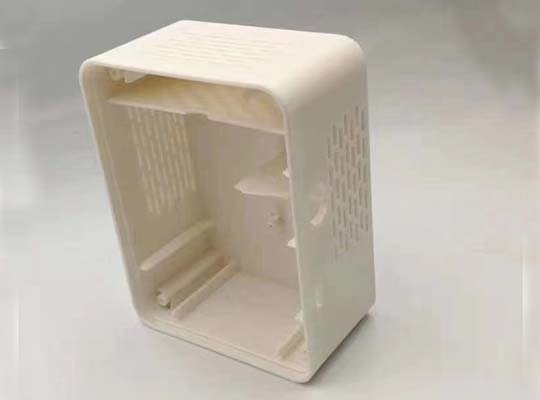
5. 実世界のケーススタディ: Silicone Mold for a Phone Case Prototype
A small electronics startup needed 50 prototypes of a new phone case (made from 3D-printed ABS plastic). Here’s how they used the silicone mold making process:
- プロトタイプ: They used a CNC-machined ABS prototype (滑らかな表面, no defects).
- 材料: 追加硬化シリコン (10:1 比率), plastic mold frame (15x10x5cm), gypsum reinforcement.
- プロセス:
- Applied mold release agent, built the frame, mixed silicone (3 分).
- Poured silicone, のために掃除機 2 分, 22°Cで硬化します 10 時間.
- Cut along the parting surface (middle of the phone case), added a gate and exhaust port.
- 結果: The mold produced 48 high-quality phone case replicas (2 defective due to a small bubble). The startup saved $1,200 compared to metal mold making.
6. Yigu Technology’s Perspective on Silicone Mold Making
Yiguテクノロジーで, 私たちは助けました 300+ クライアント (from startups to large manufacturers) create silicone molds for prototypes. 私たちの経験から, precision in mixing and curing is non-negotiable—even a 1% error in the silicone-curing agent ratio can ruin a mold. We recommend addition-cure silicone for most projects (low shrinkage, 耐久性) and always suggest a vacuum chamber for detailed parts. For clients new to the process, we offer free mold design consultations to help plan parting surfaces and avoid costly mistakes. Silicone mold making is a game-changer for small-batch production—it lets you test designs fast without the high cost of traditional molds.
7. (よくある質問)
Q1: How long can a silicone mold be used?
Most silicone molds last 15–25 uses with proper care. High-quality addition-cure silicone molds can last up to 30 用途, while cheaper condensation-cure molds may only last 10–12 uses. Avoid using harsh casting materials (例えば。, solvent-based resins) as they break down silicone faster.
Q2: Can I make a silicone mold from a flexible prototype (例えば。, rubber)?
はい, but you’ll need a “harder” silicone (Shore A 50–60) to avoid the mold stretching when removing the prototype. また, apply 3 coats of mold release agent (flexible prototypes are more likely to stick).
Q3: What if my silicone mold has bubbles in the cavity?
Small bubbles can be fixed by patching: Mix a tiny amount of silicone (10:1 比率), apply it to the bubble spot, and cure for 2–3 hours. For large bubbles, you’ll need to remake the mold—next time, use a vacuum chamber or tap the frame longer to release air.