If you’re a product engineer or procurement professional working on high-precision prototypes, you know how critical a smooth, accurate outer circular surface is. The CNC cylindrical grinding process of prototypes is the solution—it uses computer numerical control (CNC) to turn raw materials into precise prototypes, ideal for industries like aerospace, 自動車, および医療機器. あなたが知る必要があるすべてを分解しましょう, with real-world examples and data to back it up.
What Is the CNC Cylindrical Grinding Process of Prototypes?
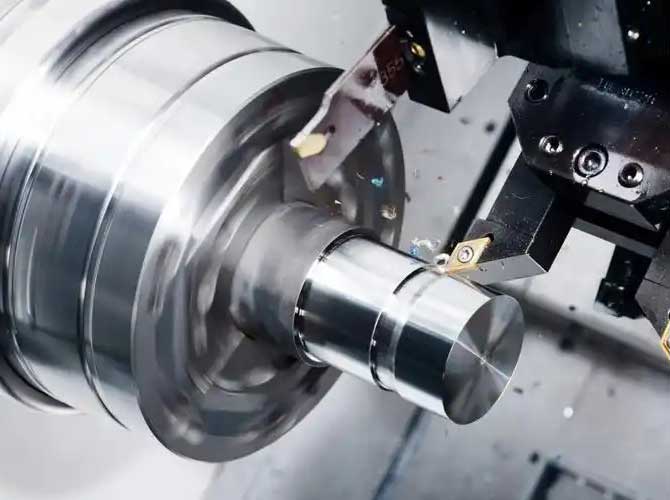
簡単に言えば, the CNC cylindrical grinding process of prototypes is a manufacturing method that uses CNC-controlled machines to grind the outer surface of a workpiece. Unlike manual grinding, it relies on pre-programmed paths to ensure consistency and precision. This process is perfect for prototypes because it can handle small batches (even just 1-5 作品) while meeting tight tolerances—often as low as ±0.001 mm.
例えば, a medical device company needed a prototype for a surgical tool’s stainless steel shaft. Using CNC cylindrical grinding, they achieved a surface roughness of Ra 0.2 μm (well below the required Ra 0.8 μm) and hit the exact diameter of 5.000 mm. Without CNC, manual grinding would have taken 3x longer and failed to meet the tolerance.
Step-by-Step Breakdown of the CNC Cylindrical Grinding Process
プロセスにはあります 5 キーステージ, each critical to getting a high-quality prototype. 自動車部品サプライヤーのケーススタディを使用します (prototyping an aluminum alloy gear hub) to illustrate each step.
1. デザイン & プログラミング
初め, engineers create a 3D model of the prototype (using software like SolidWorks or AutoCAD). それから, they write a CNC program that tells the machine exactly how to move the grinding wheel—including path, スピード, and depth of cut.
- ケースの例: The automotive supplier’s 3D model specified a gear hub with a 20 mm outer diameter and a 50 MMの長さ. The CNC program was coded to grind in 0.05 mm increments to avoid overheating the aluminum.
- Key Tool: Most shops use G-code (the standard CNC programming language) このステップのために.
2. マシンのセットアップ
次, the team prepares the CNC cylindrical grinder. This includes choosing the right grinding wheel and securing the workpiece.
| 成分 | Choice for the Automotive Case | 理由 |
| Grinding Wheel | Aluminum oxide (46 グリット) | Works well with aluminum; 46 grit balances speed and surface smoothness |
| Grinding Parameters | スピード: 1,800 RPM; フィードレート: 5 mm/min | Prevents aluminum from sticking to the wheel |
| ワーククランプ | Chuck with rubber jaws | Holds the aluminum hub securely without scratching its surface |
3. Grinding Processing
Once set up, the machine runs the CNC program. The grinding wheel moves along the workpiece’s outer surface, removing excess material bit by bit.
In the automotive case, the machine took 12 minutes to grind one hub—compared to 45 minutes with manual grinding. The program ensured the wheel stayed on path, so every prototype had the same 20 mm直径 (no variation).
4. 監視 & 調整
Operators don’t just hit “start” and walk away. They monitor two key things:
- Grinding Wheel Wear: If the wheel gets dull, it can leave scratches. In the automotive case, the operator checked the wheel every 3 prototypes and replaced it after 10 用途.
- Workpiece Quality: They used a digital caliper to measure diameter and a surface roughness tester to check Ra values. When one hub showed Ra 0.4 μm (above the target 0.3 μm), they adjusted the feed rate to 4.5 mm/min—fixing the issue immediately.
5. 治療後
After grinding, the prototype needs final touches:
- クリーニング: The hub was rinsed with a water-based coolant to remove aluminum chips.
- 検査: 100% of prototypes were checked for diameter, 長さ, and surface roughness.
- 仕上げ: The supplier added a light polish to the hub’s edges (per the design) to prevent sharpness.
Why Error Control Matters in CNC Cylindrical Grinding
Even small errors can ruin a prototype. これがトップです 3 error sources and how to fix them—with data from a aerospace prototype project:
| エラーソース | インパクト | 解決 |
| 工作機械の精度 | a 0.002 mm error in the machine’s axis | Calibrate the machine monthly (reduced errors to 0.0005 mm in the project) |
| Grinding Wheel Balance | Unbalanced wheels cause vibration (ra 0.6 μm) | Use a wheel balancing tool before each run (Ra dropped to 0.2 μm) |
| ワーククランプ | Loose clamps lead to diameter variation | Use torque wrenches to secure the workpiece (variation went from ±0.003 mm to ±0.001 mm) |
Yigu Technology’s Take on CNC Cylindrical Grinding Prototypes
Yiguテクノロジーで, サポートしました 500 product teams with CNC cylindrical grinding prototypes. We believe this process is a game-changer for fast, precise product development—especially for industries where tolerances can’t be compromised. Our team prioritizes pre-process simulations (to catch programming errors early) and uses high-grade grinding wheels to cut post-treatment time by 30%. 調達の専門家向け, this means faster lead times (いつもの 3-5 日) and lower rework costs.
よくある質問
- Q: What materials work best for CNC cylindrical grinding prototypes?
a: Most metals (アルミニウム, ステンレス鋼, チタン) and some hard plastics (like PEEK) work well. より柔らかい素材 (例えば。, 銅) may need slower feed rates to avoid deformation.
- Q: How long does it take to make a CNC cylindrical grinding prototype?
a: It depends on the part size and complexity, but most prototypes are ready in 2-7 日. 単純な部品 (例えば。, a 10 mm diameter shaft) can be done in 2 日.
- Q: What’s the difference between CNC cylindrical grinding and centerless grinding for prototypes?
a: CNC cylindrical grinding uses clamps to hold the workpiece (better for parts with specific lengths), while centerless grinding doesn’t (faster for small, 単純な部品). For prototypes with tight tolerances, CNC cylindrical grinding is more reliable.
