Se ti sei mai chiesto quanto siano complesse le forme come gli ingranaggi, spline, oppure i profili personalizzati vengono tagliati con precisione nel metallo o in altri materiali, the answer often lies in form cutter milling. Al suo centro, la fresatura con fresa a forma è un processo di lavorazione specializzato in cui un utensile da taglio dalla forma personalizzata (chiamato taglierina del modulo) rimuove materiale per creare uno specifico, pre-determined contour on a workpiece. Unlike standard end mills that cut simple slots or flat surfaces, form cutters are engineered to match the exact profile needed—so the final part shape directly mirrors the cutter’s geometry. This makes it ideal for producing parts with intricate, repeatable shapes that would be difficult or time-consuming to achieve with other methods.
How Does Form Cutter Milling Work?
To understand form cutter milling, let’s break down the process step by step. Primo, IL form cutter is designed and manufactured to have the inverse of the desired workpiece profile. Per esempio, if you need a gear with 20 teeth, the cutter will have 20 corresponding grooves that match the gear’s tooth spacing and shape.
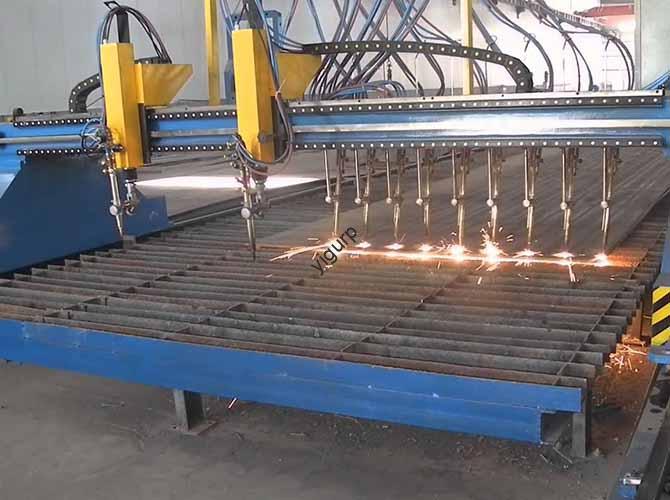
Prossimo, the cutter is mounted on a milling machine—typically a vertical or horizontal mill—and the workpiece is secured in a fixture to ensure stability. As the machine runs, two key motions occur: the cutter rotates at high speed (providing the cutting action) and either the cutter or the workpiece moves linearly (to feed material into the cutter). The form cutter’s unique shape then shears away excess material, leaving behind the exact profile it was designed for.
A real-world example helps illustrate this. Let’s say an automotive parts manufacturer needs to produce 500 drive shaft splines (lungo, ridged profiles that connect components). Using a form cutter mill, they can:
- Design a cutter with the spline’s exact ridge and groove dimensions.
- Load a metal rod (il pezzo) into the mill.
- Run the machine to cut the splines in one pass (or a few passes, depending on material hardness).
- Achieve consistent spline shapes across all 500 parts—something that would be nearly impossible with manual grinding or standard milling tools.
Key to this process is velocità di taglio E velocità di avanzamento, which vary based on material. Ad esempio, cutting aluminum (a soft metal) might use a speed of 1,500–3,000 surface feet per minute (SFM) and a feed rate of 5–15 inches per minute (IPM), while stainless steel (Più forte) requires slower speeds (300–800 SFM) and lower feed rates (2–8 IPM) to prevent tool wear.
Common Types of Form Cutters and Their Applications
Not all form cutters are the same—each type is tailored to specific profiles and industries. Below is a breakdown of the most widely used form cutters, their designs, and where they’re applied.
| Type of Form Cutter | Design Features | Typical Applications |
| Gear Cutters | Teeth-shaped grooves (involute or cycloidal profile) | Ingranaggi automobilistici, riduttori industriali, bicycle gears |
| Spline Cutters | Lungo, parallel ridges (internal or external) | Drive shafts, assi, power transmission components |
| Thread Mills | Helical or straight thread profiles | Creating internal/external threads on bolts, noci, or pipe fittings |
| Contour Cutters | Custom curved or angular shapes (per esempio., rounded edges, V-grooves) | Componenti aerospaziali (longheroni alari), ferramenta per mobili, dispositivi medici |
| Dovetail Cutters | Tapered, trapezoidal profile | Machine tool slides, guide dei cassetti, precision fixtures |
Per esempio, a medical device manufacturer making orthopedic implants (like hip stems) might use a contour form cutter to create the curved, ergonomic shape that fits into the human body. The cutter’s custom design ensures each implant has the exact same contour, which is critical for patient safety and implant performance.
Key Factors to Consider When Choosing a Form Cutter
Selecting the right form cutter can make or break your milling project. Here are the critical factors to evaluate, based on industry best practices and hands-on experience:
1. Compatibilità dei materiali
The cutter’s material must be harder than the workpiece to avoid premature wear. Common cutter materials include:
- High-Speed Steel (HSS): Affordable and versatile for cutting soft metals (alluminio, ottone) e plastica. Ideal for low-volume projects.
- Carburo: Harder and more heat-resistant than HSS, making it suitable for hard metals (acciaio, titanio) e produzione in grandi volumi. Carbide cutters can last 5–10 times longer than HSS in demanding applications.
- Cermet: A hybrid of ceramic and metal, offering even better heat resistance than carbide. Used for high-speed milling of stainless steel or superalloys (per esempio., Inconel in aerospace).
Caso di studio: A heavy equipment manufacturer switched from HSS to carbide form cutters for milling steel excavator teeth. They reduced tool changes by 70% and cut production time per part by 25%—a significant cost savings over six months.
2. Cutter Geometry
The cutter’s geometry (tooth count, helix angle, clearance angle) directly impacts cutting performance:
- Tooth Count: More teeth mean a smoother finish but slower material removal (since each tooth takes a smaller chip). Fewer teeth (per esempio., 2–4) are better for roughing cuts (removing large amounts of material quickly).
- Helix Angle: A higher helix angle (30–45 gradi) reduces vibration and improves surface finish, while a lower angle (10–20 degrees) is more stable for heavy cuts.
- Clearance Angle: The angle between the cutter’s flank and the workpiece. A 5–10 degree clearance angle prevents rubbing (which causes heat and wear) and ensures clean cuts.
3. Milling Machine Compatibility
Not all form cutters work with every mill. Check:
- Shank Size: The cutter’s shank (the part that fits into the mill) must match the mill’s spindle size (per esempio., ½-inch, ¾-inch, or metric sizes).
- Cutting Direction: Some cutters are designed for clockwise rotation only, while others are bidirectional. Using the wrong direction can damage the cutter or workpiece.
4. Volume di produzione
For low-volume projects (per esempio., 10–50 parti), a standard off-the-shelf form cutter may suffice. For high-volume (1,000+ parti) or custom profiles, UN custom-manufactured form cutter is worth the investment—it reduces cycle time and ensures consistency.
Step-by-Step Guide to Setting Up a Form Cutter Milling Operation
Setting up form cutter milling requires precision, but following these steps will help you avoid mistakes and achieve optimal results. This guide is based on best practices from CNC machinists with 10+ anni di esperienza.
1. Prepare the Workpiece and Fixture
- Clean the Workpiece: Remove any oil, ruggine, or debris from the workpiece surface—contaminants can cause uneven cuts or tool damage.
- Secure the Workpiece: Use a rigid fixture (per esempio., a vice, clamp, or custom jig) to hold the workpiece in place. The fixture should minimize vibration; even small movements can ruin the profile.
- Align the Workpiece: Use a dial indicator or laser alignment tool to ensure the workpiece is parallel to the mill’s table. This ensures the cutter cuts evenly across the surface.
2. Select and Install the Form Cutter
- Inspect the Cutter: Check for chips, crepe, or dull edges. A damaged cutter will produce poor-quality parts. If the cutter is new, remove any protective coating (per esempio., oil or plastic) prima dell'uso.
- Install the Cutter: Insert the cutter’s shank into the mill’s spindle and tighten it securely (use a collet or chuck that matches the shank size). Use a torque wrench to avoid over-tightening (which can bend the shank).
- Set Cutter Height: Adjust the cutter’s height so it touches the top of the workpiece (use a feeler gauge or Z-axis touch probe for accuracy). Mark this position as the “zero point” for the Z-axis.
3. Configure Milling Parameters
- Cutting Speed (SFM): Refer to the cutter manufacturer’s guidelines. Per esempio:
- HSS cutter on aluminum: 1,500–2,500 SFM
- Carbide cutter on steel: 500–1,000 SFM
- Tasso di avanzamento (IPM): Calculate using the formula: Feed Rate = Cutter Teeth × RPM × Chip Load. Chip load (the amount of material each tooth removes per revolution) varia in base al materiale, ad es., 0.001–0.003 inches per tooth for aluminum, 0.0005–0.0015 inches per tooth for steel.
- Depth of Cut: For roughing cuts, take 0.1–0.2 inches per pass. For finishing cuts (to get the final profile), take 0.01–0.05 inches per pass.
4. Test and Run the Operation
- Dry Run: Run the mill without cutting fluid (if using) to check the cutter’s path. Ensure it doesn’t hit the fixture or workpiece.
- First Cut: Make a test cut on a scrap piece of the same material. Inspect the profile with a caliper or micrometer to confirm it matches the desired dimensions.
- Adjust as Needed: If the profile is too shallow, increase the Z-axis depth. If the finish is rough, slow the feed rate or increase the cutting speed (within manufacturer limits).
- Full Production: Once the test cut is successful, start production. Check every 10–20 parts to ensure consistency—tool wear can cause profile drift over time.
Common Challenges in Form Cutter Milling and How to Solve Them
Even experienced machinists face issues with form cutter milling. Below are the most common problems, their causes, and proven solutions.
1. Poor Surface Finish (Rough or Chipped Edges)
- Cause: Dull cutter, too high feed rate, insufficient cutting fluid, or workpiece vibration.
- Soluzioni:
- Sharpen or replace the cutter (use a professional sharpening service for carbide cutters).
- Reduce the feed rate by 10–20% (slower feed = smoother finish).
- Use the right cutting fluid: Oil-based fluids for ferrous metals (acciaio), water-based for non-ferrous (alluminio).
- Add vibration dampeners to the fixture or mill table.
2. Cutter Wear (Dulling or Chipping)
- Cause: Cutting speed too high, workpiece material harder than cutter, or lack of lubrication.
- Soluzioni:
- Lower the cutting speed (follow manufacturer’s SFM guidelines).
- Switch to a harder cutter material (per esempio., from HSS to carbide).
- Increase the flow of cutting fluid to cool the cutter and reduce friction.
3. Inconsistent Profile Dimensions
- Cause: Workpiece movement, incorrect cutter height, or worn mill components (per esempio., spindle bearings).
- Soluzioni:
- Tighten the fixture clamps (but don’t over-tighten—this can deform the workpiece).
- Recheck the cutter height with a touch probe.
- Inspect the mill’s spindle for play (worn bearings may need replacement).
4. Tool Chatter (Vibration During Cutting)
- Cause: Long cutter overhang (cutter extends too far from the spindle), loose spindle, or unbalanced workpiece.
- Soluzioni:
- Use a shorter cutter or a stubby shank to reduce overhang.
- Tighten the spindle collet/chuck.
- Add weights to the workpiece (se necessario) to balance it.
Yigu Technology’s Perspective on Form Cutter Milling
Alla tecnologia Yigu, we’ve seen firsthand how form cutter milling transforms manufacturing—especially for industries needing precision and consistency. In our work with automotive, aerospaziale, and medical clients, we’ve found that custom form cutters are often the key to reducing production time while improving part quality. Per esempio, a client in the aerospace sector was struggling to produce turbine blade profiles with standard tools; by switching to our custom carbide form cutters, they cut cycle time by 30% and reduced defect rates from 8% to less than 1%.
We also believe that tool maintenance is just as important as tool selection. Many manufacturers overlook sharpening or proper lubrication, leading to premature tool failure and higher costs. Our team recommends regular cutter inspections (after every 500–1,000 parts) and using high-quality cutting fluids to extend tool life. As manufacturing trends shift toward smaller batch sizes and more complex parts, form cutter milling will only become more critical—and investing in the right tools and processes will be essential for staying competitive.
FAQ About Form Cutter Milling
1. Can form cutter milling be used for non-metal materials?
SÌ! Form cutters work with plastics (per esempio., ABS, nylon), legna, e compositi (per esempio., fibra di carbonio) as well as metals. Per i non metalli, HSS cutters are often sufficient (since these materials are softer), and lower cutting speeds (500–1,500 SFM) help prevent melting or splintering.
2. How long does a form cutter last?
Dipende dal materiale, cutter type, and usage. HSS cutters typically last 100–500 parts when cutting soft metals, while carbide cutters can last 1,000–5,000 parts (o più) per metalli duri. Regular sharpening can extend a cutter’s life by 2–3 times.
3. Is form cutter milling more expensive than standard milling?
Initial costs are higher—custom form cutters can cost \(100–)500 (o più) a seconda della complessità, rispetto a \(20–)100 for standard end mills. Tuttavia, form cutter milling reduces labor time (fewer passes needed) and defect rates, so it’s often more cost-effective for high-volume or complex parts.
4. Can I sharpen a form cutter myself?
For simple HSS cutters (per esempio., basic contour cutters), you can use a bench grinder with a diamond wheel. But for complex profiles (per esempio., gear or spline cutters), professional sharpening is recommended—this ensures the profile remains accurate. Carbide cutters require specialized equipment (per esempio., CNC sharpeners) per evitare fessurazioni.
5. What’s the difference between form cutter milling and broaching?
Both processes create custom profiles, but broaching uses a long, multi-tooth tool that pushes or pulls through the workpiece (good for internal profiles like keyways). Form cutter milling uses a rotating tool and is better for external profiles (per esempio., ingranaggi) or large workpieces that can’t fit in a broaching machine.