Quando si sviluppa un massaggiatore (come i massaggiatori a rulli, massaggiatori a vibrazione, o massaggiatori ad aria compressa), il processo di prototipo determina direttamente se il prodotto può soddisfare le richieste di comfort degli utenti (come la vestibilità della testa e della pelle del massaggio) e funzionalità (come vibrazione stabile o controllo della pressione). Tra tutti i metodi di prototipazione, IL CNC machining massager prototype process stands out for its ability to replicate complex structures (per esempio., transmission mechanisms, ergonomic shells)—but what makes this process a top choice for massager R&D? This article breaks down the core stages, vantaggi, and key considerations of this CNC process to solve common development challenges.
1. Core Advantages of the CNC Machining Massager Prototype Process
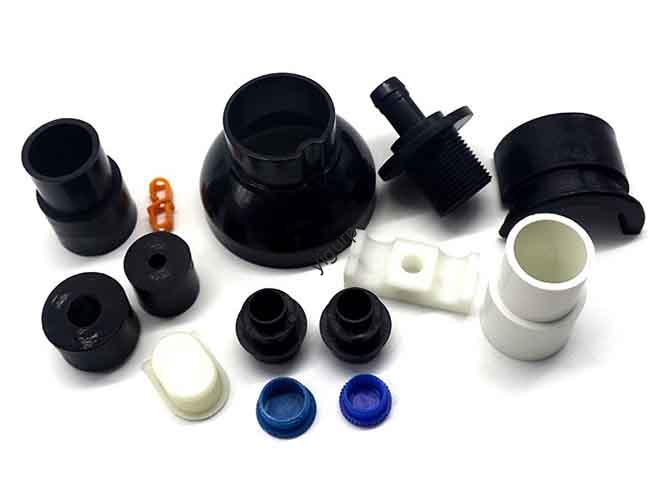
The CNC process addresses unique demands of massagers (per esempio., flexible massage heads, low-noise transmission). Below are its four irreplaceable advantages:
| Advantage Category | Specific Performance | Value for Massagers |
| Complex Structure Machining | Handles curved massage heads, gear transmission systems, and thin-walled shells (<1.5mm) that 3D printing struggles with. | Enables integrated machining of roller massage head shafts (coaxiality <0.05mm) and air-pressure bag grooves (ensuring uniform pressure distribution). |
| Multi-Material Compatibility | Processes plastics (ABS, computer, POM), metalli (lega di alluminio, acciaio inossidabile), and supports silicone molding (via CNC-machined metal molds). | – ABS/PC for lightweight, impact-resistant shells.- Aluminum alloy for low-noise gear brackets.- Stainless steel for durable roller shafts.- Silicone (molded via CNC molds) for skin-friendly massage heads. |
| High-Precision Control | Dimensional tolerance controlled within ±0,05 mm, accurately reproducing massage head spacing, button positions, and motor slots. | Ensures massage head vibration amplitude deviation ≤0.1mm (avoiding uneven massage intensity) and gear meshing gap ≤0.03mm (reducing noise). |
| Rapid Functional Validation | Machines assembly structures (snaps, screw holes, bearing seats) for immediate prototype assembly—no extra post-processing needed to fit motors or batteries. | Cuts R&D time by 30%: Test massage mode switching, vibration frequency, and pressure stability right after machining. |
2. Step-by-Step Breakdown of the CNC Machining Massager Prototype Process
The CNC process follows a linear, repeatable workflow tailored to massagers. It consists of 8 key stages:
- 3D Model Design & Component Splitting
Use CAD software (SolidWorks/UG) to design all components, focusing on:
- Shell: Ergonomic curve (fits 95% of adult body contours, per esempio., neck, back) with anti-slip grips.
- Massage Head: Customized by type—roller (precision cylindrical surface), vibrator (flat fixing groove), or air-pressure bag (flexible cavity).
- Internal Structure: Layout of motors, ingranaggi, circuit boards, and battery compartments (ensuring 0.1–0.3mm assembly clearance).
Split complex models into machinable parts (upper shell, lower shell, massage head bracket) for separate processing.
- Data Preparation & Tool Path Planning
- Import the 3D model into CAM software (Mastercam/PowerMill) to set the machining coordinate system.
- Plan tool paths:
- Roughing: Φ10mm flat-bottom cutter (remove 90% excess material, leave 0.3mm allowance).
- Finitura: Φ2mm ball nose cutter for shell curves; Φ0.5mm engraving tool for logo grooves/massage head slots.
- Special machining: Use long-edge tools for deep battery compartments or electrical discharge machining (Elettroerosione) for small gear holes.
- Generate G-code and simulate paths to avoid tool collisions (critical for thin-walled parts).
- Selezione dei materiali & Prep
Choose materials based on component functions, then pretreat blanks:
| Component Type | Recommended Material | Pretreatment & Key Reason |
| Shell/Grip | ABS/PC | Cut into 150×100×50mm blanks; clean surface to remove impurities (ensuring smooth spraying). |
| Massage Head (Roller) | Acciaio inossidabile 304 | Anneal to reduce hardness; cut into Φ20×50mm cylinders (for rust resistance and smooth rotation). |
| Gear/Bracket | Aluminum Alloy 6061 | Cut into 80×80×30mm blanks; deburr edges (for low-noise gear meshing). |
| Silicone Massage Head | Silicone (molded via CNC mold) | Machine a metal mold (lega di alluminio) first; then pour and vulcanize silicone (for skin-friendly flexibility). |
- Clamping & Positioning
- Large parts (conchiglie): Fix with vacuum adsorption platforms (avoids deformation from fixture pressure).
- Small parts (ingranaggi, massage heads): Clamp with custom fixtures (align to machining axes for coaxiality).
- Use laser edge finders to set coordinates (ensures ±0.01mm positioning accuracy).
- Rough Machining
Prioritize large surfaces (shell exteriors, battery compartment bottoms) with high feed rates (120mm/min) to quickly shape parts, protecting delicate components like gear teeth.
- Finitura
Focus on user-critical details:
- Machine shell curves to Ra0.8 surface roughness (for comfortable holding).
- Cut massage head slots (depth 5mm ±0.02mm) and gear meshing surfaces (tolerance ±0.03mm).
- Drill heat dissipation holes (Φ3mm ±0.05mm) for motors (preventing overheating).
- Post-elaborazione
- Sbavatura: Use 400-grit sandpaper to remove knife marks from shell edges and massage head slots.
- Trattamento superficiale:
- Plastic parts: Spray matte finish (anti-fingerprint) or soft-touch coating (for grip comfort).
- Metal parts: Anodize gears/brackets (anti-corrosion); polish roller massage heads (Ra0.4 for smooth skin contact).
- Silicone parts: Secondary vulcanization (120°C for 2 ore) to improve elasticity and temperature resistance.
- Assemblea & Test funzionali
| Test Type | Scopo | Pass Criteria for Massagers |
| Massage Performance Test | Verify intensity uniformity and mode switching. | Vibration amplitude deviation ≤0.1mm; 5+ modes switch smoothly (per esempio., low/medium/high). |
| Noise Test | Ensure quiet operation (avoiding user disturbance). | Noise <60dB during high-intensity massage (quieter than a household fan). |
| Durability Test | Check component stability under long-term use. | No gear wear or massage head loosening after 100 hours of continuous operation. |
- Assemble components: Shell + massage head + motor + ingranaggi + battery (use snaps/screws for easy disassembly).
- Conduct critical tests (see table below) to validate performance:
3. How Does the CNC Process Compare to Traditional Prototyping Methods?
The CNC process outperforms 3D printing and silicone duplication for massagers. Here’s a direct comparison:
| Evaluation Metric | CNC Machining Process | 3D Stampa | Silicone Duplication |
| Precisione | ±0,05 mm (ideal for gears/massage heads) | ±0.1–0.3mm (risk of uneven massage intensity or gear jamming) | ±0.2–0.5mm (poor for functional parts like transmission systems) |
| Material Suitability | Metalli + plastica + silicone (via molds) (supports skin-friendly, parti durevoli) | Only plastic filaments (can’t replicate metal gears or silicone massage heads) | Epoxy/resin (no metal compatibility; silicone parts lack elasticity) |
| Surface Quality | Liscio, deburred edges (Ra0.4–Ra0.8) for comfort | Layered texture (requires extra sanding; rough grips cause discomfort) | Smooth but lacks fine details (can’t replicate anti-slip patterns or gear teeth) |
| Cost Efficiency (10+ Units) | Lower per-unit cost (reusable G-codes/molds) | Higher (rifiuti materiali + post-processing for functionality) | Higher (silicone molds degrade after 5–8 uses) |
4. Key Precautions for the CNC Process
To avoid common flaws (per esempio., gear noise, massage head loosening), follow these three critical steps:
- Thin-Wall & Gear Protection
Use low cutting force (≤250N) and high speed (10,000 giri/min) when machining thin-walled shells (<1.5mm) to prevent deformation. For gears, use EDM for small holes (Φ2mm) to ensure tooth accuracy (avoiding meshing noise).
- Silicone Mold Machining
When making silicone massage heads, machine the aluminum alloy mold with ±0.02mm tolerance (ensuring silicone parts match design dimensions). After molding, trim flash with a sharp knife (avoiding damage to flexible surfaces).
- Assembly Clearance Calibration
After machining, use a feeler gauge to check motor-bracket clearance (0.1mm ±0.02mm). Too tight causes vibration; too loose leads to noise. Adjust via secondary grinding if needed.
5. Yigu Technology’s Perspective on the CNC Machining Massager Prototype Process
Alla tecnologia Yigu, we believe this CNC process is the backbone of reliable massager R&D. Its ±0.05mm precision solves two core pain points: massage head uniformity (critical for user comfort) and low-noise transmission—issues 3D printing can’t fix. Per esempio, a client’s neck massager prototype used our CNC-machined aluminum alloy gears and silicone massage heads: it passed 100-hour durability tests, had noise <55dB, and reduced R&D time by 25%. We recommend combining CNC (for shells/gears) with 3D printing (for non-functional decor) to balance cost. Ultimately, this process validates user-centric details early, cutting mass-production risks.
Domande frequenti
- How long does the CNC machining massager prototype process take?
It takes 8–15 days: simple prototypes (basic vibration massager) take 8–10 days; complex designs (multi-roller neck massager with gears) take 12–15 days (including silicone molding and testing).
- What’s the cost range for a prototype using this process?
The cost ranges from 800 A 4,000 yuan per unit: plastic-only prototypes (ABS shell + vibrator) cost 800–1,800 yuan; metal-silicone prototypes (stainless steel rollers + silicone heads) cost 2,000–4,000 yuan (due to mold and material costs).
- Can this process make customized massage heads (per esempio., for facial/foot massagers)?
Yes—we use 5-axis CNC machines to make custom massage heads: facial (small Φ8mm rollers with soft silicone coating) or foot (large Φ30mm textured rollers). The process also supports machining of curved brackets to fit specific body parts.