Se ti occupi di progettazione del prodotto, ingegneria, o produzione in piccoli lotti, you’ve probably heard the term colata sotto vuoto thrown around. Ma cosa significa in realtà? È la scelta giusta per i tuoi prototipi o parti a basso volume?
In questa guida, analizzeremo esattamente cos'è la fusione sotto vuoto, seguire il suo processo passo dopo passo, evidenziarne i principali vantaggi, and share real-world examples. Our goal is to help you decide if this method fits your project’s needs—whether you’re testing a new product design or making 50–100 custom parts.
1. What Exactly Does Vacuum Casting Mean?
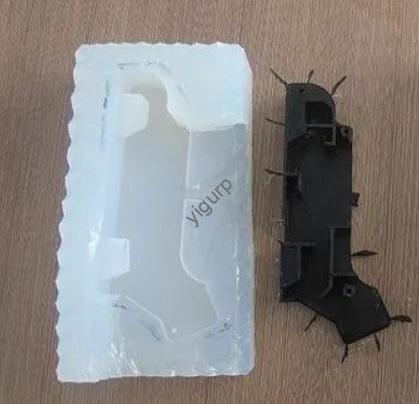
Al suo centro, colata sotto vuoto (chiamata anche replicazione del vuoto) is a manufacturing process that uses a vacuum environment to produce high-precision prototypes or small batches of plastic parts. Unlike traditional methods like injection molding (which requires expensive, time-consuming metal molds), vacuum casting relies on flexible silicone molds to replicate details from a master prototype.
Here’s the key idea: By removing air from the process (via a vacuum), you eliminate bubbles in both the mold and the final part—ensuring crisp details, superfici lisce, e qualità costante. It’s most commonly used in the early stages of product design when you need to test complex designs quickly, without the cost or delay of traditional tooling.
Quick Fact: Vacuum casting is ideal for batches of 10–100 parts. Per volumi maggiori (500+), injection molding becomes more cost-effective—but vacuum casting shines for prototyping and small runs.
2. The Step-by-Step Vacuum Casting Process
Vacuum casting follows a straightforward, 4-step workflow. Each step is critical to achieving accurate, parti di alta qualità. Let’s break them down with details (like time and materials) to make it actionable:
Fare un passo 1: Create the Master Prototype
Primo, you need a “template” (called a master prototype) that matches your desired final part. This prototype is made using precise methods like:
- Lavorazione CNC: Ideale per rigidi, parti di alta precisione (per esempio., metal or hard plastic components).
- SLA 3D printing: Perfect for complex shapes with fine details (per esempio., intricate electronics housings).
- Handcrafting: Rare today, but used for simple, low-precision parts (per esempio., basic toy components).
Pro Tip: The master prototype must be clean and smooth—any scratches or dust will show up in the final parts. Wipe it with a lint-free cloth before moving to the next step.
Fare un passo 2: Make the Silicone Mold (Under Vacuum)
Prossimo, you create a flexible stampo in silicone from the master prototype. Here’s how:
- Place the master prototype in a leak-proof mold frame (usually plastic or aluminum).
- Mix liquid silicone rubber (addition-cure silicone is best for low shrinkage, <1%) with a curing agent (typically a 10:1 ratio).
- Pour the silicone into the frame—inside a vacuum chamber (pressione: -0.095MPa to -0.1MPa). The vacuum removes air bubbles that would ruin the mold’s details.
- Let the silicone cure. At room temperature (20–25°C), this takes 8–12 hours; with heat (30–35°C), it shortens to 4–6 hours.
Esempio: A startup making a smartwatch case used an SLA 3D-printed master prototype. They poured addition-cure silicone into a plastic frame, vacuumed it for 2 minuti, and cured it at 22°C overnight. The result was a mold that captured every detail of the watch’s buttons and texture.
Fare un passo 3: Cast the Final Parts (Under Vacuum)
Once the silicone mold is cured, you remove the master prototype (the mold now has a cavity matching the prototype). Poi:
- Mix your chosen casting material (per esempio., PU resin, ABS, or PC—more on this later).
- Pour the liquid material into the silicone mold—again, under vacuum (this prevents bubbles in the final part).
- Let the material cure. Curing time depends on the material:
- PU resin: 2–4 hours at room temperature.
- ABS: 4–6 ore (may need mild heat, 40–50°C).
Fare un passo 4: Demold and Finish (Se necessario)
Finalmente, gently peel the silicone mold away from the cured part. Most parts are ready to use immediately, but you can add small finishes like:
- Levigatura: Smooth rough edges (use 400–600 grit sandpaper).
- Pittura: Match brand colors (use spray paint designed for plastic).
- Perforazione: Add small holes for screws or connectors.
3. Key Advantages of Vacuum Casting (contro. Traditional Methods)
Why choose vacuum casting over injection molding or 3D printing? Let’s compare it to two common alternatives using a table—with hard data to back up the benefits:
| Vantaggio | Colata sottovuoto | Stampaggio ad iniezione | 3D Stampa (FDM/SLA) |
| Costo | Basso (\(500–)2,000 per mold) | Alto (\(10,000–)50,000 per mold) | Medio (\(100–)500 per parte) |
| Tempi di consegna | Veloce (3–5 days total) | Lento (2–4 weeks for mold) | Molto veloce (1–2 days per part) |
| Batch Size | Ideal for 10–100 parts | Ideale per 500+ parti | Ideal for 1–10 parts |
| Precisione | Alto (±0.1mm–±0.2mm) | Very high (±0,05 mm) | Medio (±0.1mm–±0.3mm) |
| Detail Capture | Eccellente (captures textures/logos) | Eccellente | Bene (SLA) / Giusto (FDM) |
Chiave da asporto: Vacuum casting hits the “sweet spot” for prototyping and small batches—it’s cheaper than injection molding, more consistent than 3D printing for multiple parts, and fast enough to keep your design timeline on track.
4. Common Materials Used in Vacuum Casting
The choice of casting material depends on your part’s purpose (per esempio., flessibilità, resistenza al calore). Here are the most popular options, with their uses and properties:
| Materiale | Proprietà chiave | Ideale per | Example Parts |
| PU Resin | Flessibile (Shore A 30–90), basso costo | Alloggiamenti, impugnature, soft components | Custodie per telefoni, telecomandi |
| ABS | Rigido, resistente agli urti | Parti strutturali, elettronica | Cornici per laptop, componenti di giocattoli |
| computer (Policarbonato) | Resistente al calore (fino a 130°C), trasparente | Parti ad alta temperatura, clear components | Coperture leggere, medical device parts |
| PA (Nylon) | Resistente all'usura, resistente agli agenti chimici | Ingranaggi, elementi di fissaggio | Piccoli ingranaggi, screw holders |
Pro Tip: For most prototypes, PU resin is the best starting point—it’s affordable, easy to work with, and comes in a range of flexibilities.
5. Real-World Case Study: Vacuum Casting in Action
Let’s look at how a small electronics company used vacuum casting to test a new wireless earbud design:
Project Goal
Create 50 functional earbud prototypes to test fit, sound quality, and user comfort.
Processo
- Master Prototype: Used SLA 3D printing to make a detailed earbud prototype (included the speaker cavity and charging port).
- Stampo in silicone: Poured addition-cure silicone into a mold frame, vacuumed for 2 minuti, cured at 22°C for 10 ore.
- Colata: Used flexible PU resin (Riva A 50) to pour 50 parts—vacuumed each pour to avoid bubbles, cured for 3 ore.
- Finitura: Sanded small rough edges and added a matte paint to match the brand’s design.
Risultato
- Tutto 50 prototypes were consistent (no bubbles or defects).
- The company tested the prototypes with 100 users—feedback led to a small tweak in the earbud’s shape.
- Total cost: \(1,200 (contro. \)15,000 for an injection mold).
- Time to finish: 4 giorni (contro. 3 settimane per lo stampaggio a iniezione).
6. Yigu Technology’s Perspective on Vacuum Casting
Alla tecnologia Yigu, we’ve supported over 400 clienti (from startups to automotive brands) with vacuum casting projects. From our experience, vacuum casting is the most reliable method for turning prototype designs into physical parts quickly. We always recommend using addition-cure silicone for molds (it reduces shrinkage to <1%) and PU resin for most prototypes (it balances cost and performance). For clients needing high-heat parts, we suggest PC or PA materials. The biggest mistake we see? Skipping the vacuum step—this leads to bubbles and wasted parts. Vacuum casting isn’t just a “quick fix”; it’s a strategic tool to validate designs before investing in expensive production tooling.
7. (Domande frequenti)
Q1: Can vacuum casting be used for metal parts?
No—vacuum casting is designed for plastic and resin parts. Per prototipi in metallo, you’ll need methods like investment casting or CNC machining. Tuttavia, you can use vacuum-cast parts as templates for metal casting (per esempio., making a silicone mold of a plastic part to use in investment casting).
Q2: Quanto dura uno stampo in silicone nella fusione sottovuoto?
A high-quality addition-cure silicone mold lasts 15–25 uses with proper care. To extend its life: clean it with warm water after each use, store it flat in a sealed bag, and avoid using harsh chemicals (per esempio., strong solvents) that break down silicone.
Q3: Is vacuum casting accurate enough for medical devices?
Yes—if you use the right materials and process. Prototipi di dispositivi medici (per esempio., syringe parts) often use PC or medical-grade PU resin, with vacuum casting achieving ±0.1mm accuracy. Just ensure the materials meet medical standards (per esempio., ISO 10993 per la biocompatibilità).