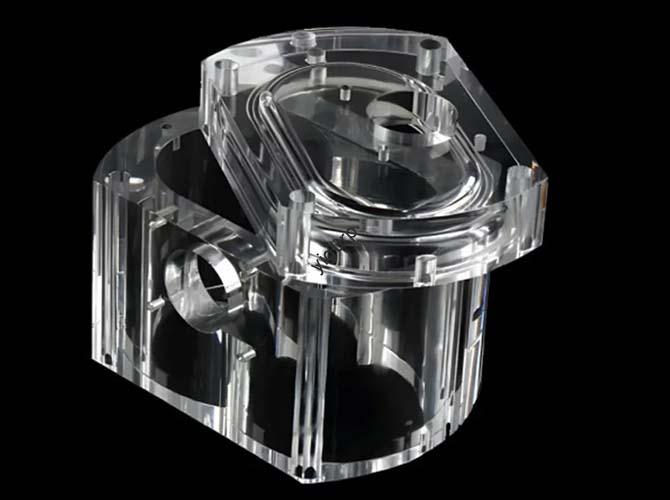
Acrilico (polimetilmetacrilato, PMMA) i prototipi sono ampiamente utilizzati in settori come l'elettronica, beni di consumo, and medical devices—valued for their trasparenza, natura leggera, e aspetto elegante. Tuttavia, le proprietà uniche dell’acrilico (like high thermal expansion and low durezza) make it tricky to machine with Torni a fantina mobile; un parametro o una scelta di strumento sbagliata possono rovinare un prototipo (per esempio., melting edges or scratches on transparent surfaces). Torni a fantina mobile, with their precision and multi-functionality, can produce high-quality acrylic prototypes—if you follow key precautions. This guide breaks down critical steps to avoid common pitfalls, from material handling to post-processing.
1. Material Characteristics of Acrylic: Know Its “Weak Spots”
Acrylic’s behavior during lavorazione is very different from metals like aluminum or copper. Understanding its core properties helps you adjust processes to prevent damage.
Key Acrylic Properties & Machining Implications
| Property | Descrizione | Machining Precaution |
| Thermal expansion | Coefficient (70–90 × 10⁻⁶/°C) 5x higher than steel | Even small heat buildup (from cutting) causes warping. Use low cutting speeds and high coolant flow. |
| Hardness | 20–25 HRC (soft, like lead) | Prone to scratches—avoid contact with rough tools or surfaces; use plastic-safe handling gloves. |
| Transparency | 92% light transmittance (better than glass) | Any surface defect (graffi, melt marks) is visible. Prioritize finitura superficiale over speed. |
| Chemical resistance | Resists water, alcohols, but reacts with solvents (acetone, gasoline) | Don’t use solvent-based coolants—opt for water-soluble or air-cooling systems. |
| Brittleness | Breaks easily under uneven pressure (per esempio., tight clamping) | Use gentle holding force; avoid thin walls (<1 mm) in prototype design (prone to cracking). |
Esempio: A manufacturer tried machining an acrylic lens prototype with the same parameters as aluminum (high cutting speed: 2,000 giri/min). The acrylic melted at the edges (due to heat buildup) and lost transparency—wasting 10 prototype blanks. By slowing the speed to 800 rpm and adding air cooling, they produced defect-free lenses.
2. Tool Selection for Swiss-Type Lathe: Avoid Scratches and Melting
The right tool prevents two big acrylic machining issues: graffi (from dull tools) and melting (from high-friction tools). Focus on tool material, geometry, and coating.
Recommended Tools for Acrylic Prototypes
| Tool Type | Materiale | Geometry | Ideale per | Advantage |
| Turning Tools | Carbide (grade K10-K20) | Sharp, positive rake angle (15–20°) | Outer diameter turning (per esempio., acrylic tubes) | Low friction; reduces heat buildup vs. acciaio rapido (HSS). |
| Milling Tools | Diamond-coated carbide | 2-flute, ball-end | 3D features (per esempio., curved edges on acrylic phone cases) | Ultra-smooth cuts; diamond coating avoids scratching. |
| Drilling Tools | Solid carbide | 135° point angle, polished flutes | Hole making (per esempio., mounting holes in acrylic panels) | Polished flutes prevent chip buildup (which causes scratches). |
| Parting Tools | HSS (acciaio rapido) | Thin blade (width = 1x part diameter) | Cutting finished prototypes from bar stock | HSS is more flexible than carbide—reduces cracking when parting. |
Avoid These Tools:
- Uncoated HSS tools: High friction leads to melting.
- Rough-ground tools: Even tiny tool marks transfer to acrylic’s surface.
- Multi-flute (3+ flutes) milling tools: Trap chips, causing scratches and heat buildup.
3. Machine Setup and Calibration: Ensure Precision Without Damage
Swiss-type lathe setup for acrylic is all about “gentle precision”—calibrate to avoid excessive force or vibration, which can crack or scratch the material.
Step-by-Step Setup Precautions
- Lathe alignment: Verify spindle and guide bushing alignment with a laser interferometer. Misalignment (even 0.01 mm) causes uneven cutting, leading to acrylic cracking. Target alignment accuracy: ±0.002 mm.
- Spindle speed setting: Start low—800–1,200 rpm (contro. 1,500+ rpm for metals). High speeds generate too much heat; low speeds reduce friction. For small acrylic parts (≤5 mm diameter), use 600–800 rpm.
- Tool holder positioning: Mount tools to minimize overhang (≤15 mm). Long overhang causes tool vibration, leaving wavy marks on acrylic surfaces.
- Chuck and collet adjustment: Use a collet (instead of a 3-jaw chuck) for cylindrical acrylic parts. Collets distribute pressure evenly—chucks often apply too much force, causing acrylic to crack. Choose a collet diameter 0.1 mm larger than the acrylic bar stock.
- Machine accuracy verification: Test with a scrap acrylic blank before machining prototypes. Cut a simple 10 mm diameter cylinder and check for roundness (use a micrometer) and surface scratches. Adjust alignment if needed.
Pro Tip: Disable the lathe’s “rapid traverse” feature when moving tools near acrylic. Rapid moves (veloce, non-cutting motion) can cause accidental tool contact—scratching or breaking the prototype.
4. Cutting Parameters Optimization: Balance Speed and Quality
Acrylic’s low heat resistance means cutting parameters must prioritize heat reduction over speed. Even small adjustments (per esempio., 0.01 mm/rev feed rate) can mean the difference between a perfect prototype and a melted one.
Optimized Cutting Parameters for Acrylic
| Operazione | Cutting Speed (giri/min) | Feed Rate (mm/rev) | Depth of Cut (mm) | Key Tip |
| Rough Turning | 800–1,000 | 0.01–0.015 | 0.2–0.3 | Remove material in small increments to avoid heat buildup. |
| Finish Turning | 1,000–1,200 | 0.005–0.01 | 0.05–0.1 | Slow feed rate for smooth surfaces; use a sharp carbide tool. |
| Milling (Slots) | 900–1,100 | 0.008–0.012 | 0.1–0.2 | Use climb milling (tool rotates with the workpiece) per ridurre l'attrito. |
| Drilling (≤3 mm Holes) | 700–900 | 0.005–0.008 | Full hole depth (per esempio., 5 mm for 5 mm hole) | Pause every 1 mm to clear chips—prevents scratches inside holes. |
| Parting | 600–800 | 0.005–0.008 | 0.1 (per pass) | Make multiple shallow passes instead of one deep cut—avoids cracking. |
Tool Path Planning for Acrylic
- Utilizzo contour-parallel tool paths (follows the part’s shape) for finish cuts—avoids sudden direction changes (which cause vibration).
- For complex 3D acrylic prototypes (per esempio., curved display frames), use CAM software (Mastercam, Fusion 360) to simulate tool paths first. Look for areas where the tool might dwell (stay in one spot)—dwell time causes heat buildup and melting.
5. Clamping and Holding Methods: Avoid Cracking and Deformation
Acrylic’s brittleness means clamping too tight breaks it; clamping too loose causes vibration (leading to poor surface finish). The goal is even, gentle pressure.
Recommended Holding Methods by Prototype Type
| Prototype Type | Holding Method | Setup Tips |
| Cylindrical (per esempio., acrylic tubes) | Collet (rubber-lined) | Choose a collet 0.1 mm larger than the prototype; tighten until the part doesn’t move (≈20–30 N force—test with a force gauge). |
| Flat (per esempio., acrylic panels) | Vise (soft jaws, rubber-coated) | Use two jaws to distribute pressure; place rubber pads between the vise and acrylic to prevent scratches. |
| Small (≤3 mm diameter, per esempio., sensor covers) | Vacuum chuck | Uses suction (instead of mechanical pressure) to hold the part. Ideal for delicate acrylic—no clamping marks. |
| Complex (per esempio., acrylic enclosures with cutouts) | Custom fixture (3Stampato D, PLA) | 3D-print a fixture that matches the prototype’s shape; use low-tack adhesive (removable, no residue) to secure the part. |
Avoid:
- 3-jaw chucks for small acrylic parts: Uneven pressure causes cracking.
- Over-tightening: A good rule—if you can twist the prototype with your finger, it’s too loose; if you hear a “click,” it’s too tight.
6. Surface Finish and Quality Control: Keep Acrylic Transparent and Smooth
Acrylic prototypes’ value lies in their appearance—rugosità superficiale (Ra) above 0.2 μm or scratches make them unusable for applications like displays or lenses. Rigorous quality control catches issues early.
Quality Control Checklist
| Aspect | Inspection Method | Acceptable Standard | Fix for Defects |
| Rugosità superficiale | Surface roughness meter | Ra ≤0.1 μm (for transparent parts); Ra ≤0.4 μm (for non-transparent) | Re-cut with a diamond-coated tool; polish with 1,000-grit sandpaper (wet-sanding). |
| Dimensional accuracy | Digital caliper (accuracy ±0.001 mm); CMM for complex parts | Tolerance: ±0.02–±0.05 mm (acrylic shrinks slightly after machining) | Adjust cutting depth by +0.01 mm for the next prototype. |
| Tolerance control | Pin gauges (per i buchi); thread gauges (for threaded parts) | Hole tolerance: +0.01–+0.03 mm (acrylic expands in humid environments) | Enlarge holes by 0.01 mm if they’re too tight. |
| Edge finishing | Visual inspection (under natural light) | No melt marks, sbavature, or cracks | Deburr with a plastic file (not metal—scratches); use a heat gun (low setting: 60–80°C) to smooth melted edges. |
| Defect inspection | Polarized light (reveals internal stress cracks) | No visible stress lines | Reduce cutting speed by 100 giri/min; use a more flexible holding method. |
Esempio: A team inspected an acrylic lens prototype and found Ra = 0.8 µm (too rough). They switched to a diamond-coated turning tool, reduced feed rate to 0.005 mm/rev, and achieved Ra = 0.08 μm—perfect for a transparent lens.
7. Safety Considerations During Processing: Protect Yourself and the Machine
Acrylic machining creates unique safety hazards—fine acrylic dust (respirable) and sharp plastic chips. Follow these precautions to stay safe.
Safety Checklist
- Personal Protective Equipment (PPE):
- Safety glasses (impact-resistant): Protect eyes from flying acrylic chips.
- N95 mask or respirator: Acrylic dust irritates the lungs—use a dust extraction system (see below) and wear a mask.
- Nitrile gloves: Prevent scratches on acrylic and protect hands from sharp tools.
- Machine guarding: Install a transparent guard around the lathe’s cutting area. Acrylic chips are sharp and can fly up to 2 metri.
- Dust extraction: Use a high-powered vacuum (≥1,200 W) with a HEPA filter. Position the nozzle 5–10 mm from the cutting area to capture 90% of acrylic dust.
- Noise control: Swiss-type lathes for acrylic run at low speeds (quiet), but use earplugs if machining for >2 hours (noise ≥65 dB).
- Emergency stop procedures: Test the lathe’s emergency stop button daily. If acrylic melts (smoke or strong odor), hit stop immediately—acrylic fumes are irritating.
Pro Tip: Don’t use compressed air to blow away acrylic dust—it spreads the dust into the air (worse for breathing). Always use a vacuum.
8. Post-Processing and Inspection: Final Touches for Perfect Prototypes
Acrylic prototypes need gentle post-processing to enhance appearance without damage. Skip harsh methods (per esempio., sandblasting) that ruin transparency.
Post-Processing Steps
- Sbavatura: Use a plastic deburring tool or 500-grit wet sandpaper. Sand in one direction (not circular) to avoid scratches. For small burrs, use a cotton swab dipped in isopropyl alcohol (cleans and softens burrs).
- Lucidatura: For transparent prototypes, polish with a buffing wheel (cotton, not wool) and acrylic polish (per esempio., Novus Plastic Polish). Run the wheel at 1,000 giri/min (low speed) to avoid heat.
- Dimensional measurement: Re-check dimensions after post-processing—polishing can reduce diameter by 0.01–0.02 mm. Ensure they still meet design specs.
- Visual inspection: Hold the prototype at a 45° angle to natural light. Check for scratches, polish marks, or cloudiness. If cloudiness occurs, re-polish with 1,500-grit sandpaper first.
- Quality documentation: Record machining parameters (velocità, feed rate), tool type, and inspection results. This helps replicate success for future acrylic prototype batches.
Avoid:
- Solvent-based polishes: They can cloud acrylic (per esempio., acetone-based products).
- High-heat polishing: Temperatures above 100°C melt acrylic’s surface.
Yigu Technology’s View
Alla tecnologia Yigu, we know acrylic prototype success hinges on “gentle precision.” We use rubber-lined collets and vacuum chucks to avoid damage, pair carbide tools with diamond coatings for smooth finishes, and set spindle speeds to 800–1,000 rpm. Our CAM simulations flag heat-prone tool paths, cutting defects by 40%. For quality control, we use polarized light to catch stress cracks early. We don’t just machine acrylic prototypes—we preserve their transparency and appearance, helping clients turn designs into market-ready samples fast.
FAQs
- Q: Why does my acrylic prototype have white, cloudy edges after machining?
UN: Cloudiness is from heat buildup (melting). Fix it by reducing cutting speed (by 100–200 rpm), increasing coolant flow, or using air cooling. Post-polish with acrylic polish to restore transparency.
- Q: Can I use a 3-jaw chuck to hold an acrylic prototype?
UN: Only for large acrylic parts (>10 mm diameter). For smaller parts, 3-jaw chucks apply uneven pressure—use a collet or vacuum chuck instead. If you must use a chuck, line the jaws with rubber and tighten gently.
- Q: How do I remove scratches from a transparent acrylic prototype?
UN: For light scratches: Use 1,000-grit wet sandpaper (sand in one direction), then polish with acrylic polish. For deep scratches: Start with 600-grit sandpaper (wet), progress to 1,500-grit, then polish—this levels the surface without worsening transparency.