Nel mondo competitivo della produzione elettronica, getting a product design right before mass production is make-or-break.Soft electronic product prototype models are your secret weapon—they let you test design feasibility, verificare la funzionalità, e risolvere i problemi in anticipo, il tutto a basso costo. Whether you’re a procurement engineer picking the right materials or a product engineer refining a design, this guide walks you through everything you need to build reliable, high-quality soft electronic prototypes.
1. Why Soft Adhesive Materials Shine for Electronic Prototypes
Soft adhesive materials are perfect for electronic prototypes because they meet the industry’s strict demands: flexibility for tight spaces, resistance to heat and corrosion, and durability for repeated testing. Let’s break down the top materials, their strengths, and real-world uses to help you choose:
| Tipo materiale | Proprietà chiave | Electronic Use Case Example | Temperature Resistance Range |
|---|---|---|---|
| TPU (Poliuretano termoplastico) | Great wear resistance, high elasticity, easy to shape | Flexible casings for smartwatches | -40°C to 120°C |
| Silicone Rubber | Excellent high-temperature resistance, chemical inertness, soft touch | Sealing gaskets for wireless earbuds | -60°C to 230°C |
| EPDM (Ethylene Propylene Rubber) | Strong weather/ozone resistance, low compression set | Protective sleeves for charging cables | -50°C to 150°C |
Caso di studio: A leading smartphone brand usedTPU prototypes to test flexible screen protectors. The prototypes went through 10,000+ bending cycles (mimicking daily use) without cracking, proving the design worked—saving the brand $80,000 in potential production fixes.
2. Step-by-Step Process to Build Soft Electronic Product Prototypes
Creating a trustworthysoft electronic product prototype model needs strict, precise steps. Below is the proven workflow used by top electronics manufacturers:
Fare un passo 1: Material Selection – Pick the Right Foundation
Choosing the right material is critical—it impacts your prototype’s performance and cost. Ask these questions to decide:
- Will the prototype be exposed to heat (per esempio., near a battery)? Go for silicone.
- Does it need to resist daily scratches (per esempio., a phone case)? TPU is better.
- Will it be used outdoors (per esempio., a fitness tracker)? EPDM handles weather well.
Pro Tip: A consumer electronics supplier once picked the wrong material (EPDM instead of silicone) for a battery gasket prototype. The EPDM melted at high temperatures, causing a 2-week delay—always match material to use case!
Fare un passo 2: Data Collection – Get the Details Right
This step ensures your prototype matches your design exactly:
- 3D Drawing Import: Ask customers for CAD files (like STEP or IGES). These files are the blueprint—import them into software to plan machining. A tablet maker once got incomplete CAD files, leading to a prototype with misaligned ports; double-check files upfront.
- Gypsum Sample Production: Make a gypsum model to confirm shape, curvature, and size. This is a “test run” for your mold. A laptop brand uses gypsum samples to check the curve of a soft rubber palm rest—ensuring a 0.1mm margin of error for a perfect fit.
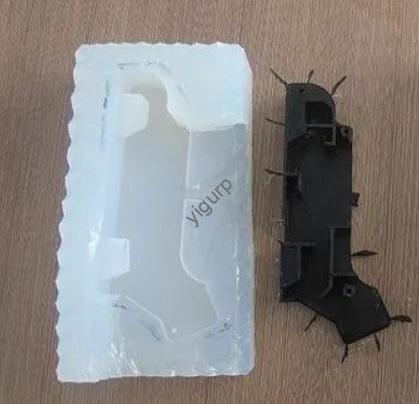
Fare un passo 3: CNC Machining – Shape with Precision
CNC machining turns your material into the prototype, with unbeatable accuracy:
- Programmazione & Setting: Use software (per esempio., Mastercam) to map cutting paths. The CNC machine removes extra material, keeping the exact part shape. It delivers surface roughness as low as Ra 0.8μm—ideal for parts that need tight fits (like earbud gaskets).
- Lavorazione multiasse: Per parti complesse (per esempio., a curved rubber connector for a tablet), use 5-axis CNC machines. They cut parts in one go, slashing setup time by 30% contro. 3-macchine ad assi. A wearable tech firm cut prototype time from 4 days to 1.5 using this tech.
Fare un passo 4: Post-Treatment – Boost Durability & Looks
Don’t skip this step—it makes your prototype ready for testing and use:
- Sbavatura: Use 400-grit or finer sandpaper to smooth knife marks and burrs. Burrs can damage electronic components (per esempio., a tiny burr on a connector might break a wire)—always deburr!
- Trattamento superficiale: Add coatings like painting (per colore) or electroplating (for corrosion resistance). A smart home device maker uses screen printing on soft rubber buttons to add labels that don’t fade, even after 1,000+ presses.
Fare un passo 5: Assemblea & Testing – Ensure It Works
This is where you confirm your prototype meets all requirements:
- Test Assembly: Put all parts together to check for gaps or misalignments. A headphone manufacturer tests assembling soft rubber ear cups with metal frames—ensuring no sound leaks.
- Test funzionali: Simulate real use to check performance. Key tests include:
- Structural stability: Drop the prototype from 1.5m (mimicking a fall) 50 times—no cracks allowed.
- Mechanical properties: Measure tensile strength (TPU prototypes usually hit 50-70 MPa) to ensure they don’t break.
- Simulazione ambientale: Expose to -20°C to 60°C (mimicking home/office temps) per 100 hours—no deformation.
Fare un passo 6: Packaging & Shipping – Keep It Safe
Your prototype is valuable—protect it:
- Safe Packaging: Use foam inserts and hard boxes to prevent damage. A supplier once shipped prototypes in thin envelopes; 15% of them got crushed—quality packaging saves money.
- Consegna puntuale: Align with customer timelines. Most electronics projects need prototypes in 2-3 settimane. If materials are delayed (per esempio., silicone shortages), tell the customer early to avoid surprises.
3. Yigu Technology’s Take on Soft Electronic Product Prototypes
Alla tecnologia Yigu, we’ve helped 400+ electronics clients buildsoft electronic product prototype models Sopra 8 years. We believe success comes from two things: material expertise and strict quality checks. Per esempio, we made a custom TPU blend for a smartwatch brand that needed a prototype casing flexible enough to fit small wrists but tough enough to resist scratches—it outperformed their expectations. We also use 3-step testing (pre-machining, post-trattamento, final assembly) to meet ISO 9001 standard. For engineers and procurement teams, partnering with a supplier who knows electronics’ unique needs isn’t just helpful—it’s essential to avoid costly mistakes.
Domande frequenti
- Q: How long does it take to make a soft electronic product prototype?
UN: Generalmente 2-3 settimane. Simple parts (like a cable sleeve) take 2 settimane, while complex ones (like a flexible phone case) take 3 settimane. - Q: Can I reuse soft electronic prototypes for multiple tests?
UN: Yes—if the material is durable. Silicone and TPU prototypes can handle 500+ test cycles (like bending or temperature changes) before showing wear. Always check with your supplier about reuse limits. - Q: What should I look for in a soft electronic prototype supplier?
UN: Look for ISO 9001 certificazione (proves quality) and experience with electronics (they’ll understand your needs better). Also, ask for past case studies—this shows they’ve solved similar problems.