Nel mondo competitivo dello sviluppo prodotto, il tempo è denaro. Se hai mai avuto problemi con lunghi tempi di attesa per gli utensili tradizionali o costi elevati per la produzione in piccoli lotti, ILrapid tooling process è la tua soluzione. Questa efficiente tecnica di produzione colma il divario tra la progettazione del prototipo e i prodotti finiti, aiutare i team a verificare rapidamente le idee e ad arrivare prima sul mercato. Let’s break down how it works, i suoi principali vantaggi, and when to use it.
1. What Is the Rapid Tooling Process?
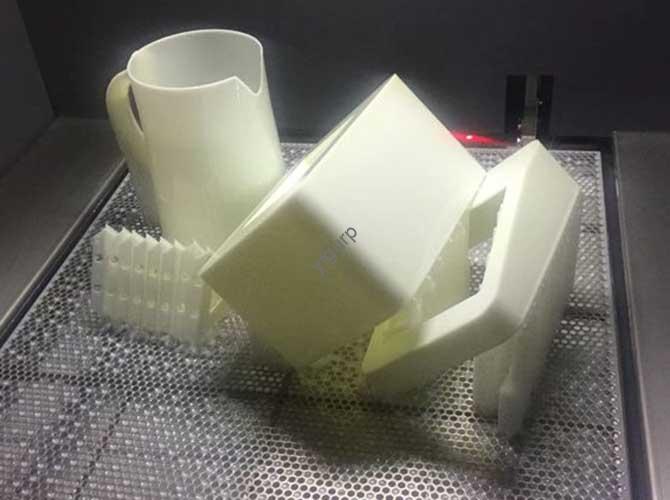
In poche parole, attrezzaggio rapido is a set of manufacturing methods designed to create tooling (stampi, muore, ecc.) quickly and cost-effectively—without the long lead times of traditional tooling. Unlike conventional processes that can take months to make molds, rapid tooling cuts this time to weeks (o anche giorni).
Think of it as “fast-track tooling”: instead of building a tool from scratch with slow, manual steps, it uses modern tech (like 3D printing or CNC machining) to streamline the process. It’s perfect for theearly stages of product development—when you need to test designs, make adjustments, or produce small batches (usually 10–1,000 units) before full-scale production.
2. When Should You Use Rapid Tooling?
Not sure if rapid tooling fits your project? The table below highlights the top scenarios where it delivers the most value:
| Scenario | Why Rapid Tooling Works | Esempio del mondo reale |
|---|---|---|
| Product Design Verification | Tests if your design is feasible before big investments | A startup making 50 plastic prototypes of a new water bottle to check fit and function |
| Produzione in piccoli lotti | Avoids high costs of traditional tooling for low volumes | A electronics brand producing 200 custom phone cases for a limited-edition launch |
| Design Iteration | Lets you tweak designs fast without redoing tooling | A toy company revising a doll’s arm shape and making 100 new prototypes in 2 settimane |
| Emergency Production | Fills gaps when traditional tooling is delayed | A medical device maker using rapid tooling to make 50 replacement parts for a urgent order |
3. Step-by-Step Rapid Tooling Workflow
The rapid tooling process follows a clear, linear path—from design to finished product. Below is a detailed timeline to show how each phase fits together:
Phase 1: Progetto & Ottimizzazione (1–3 Days)
This is where you lay the groundwork for successful tooling.
- 3Modellazione D: Use professional CAD software (per esempio., SolidWorks, AutoCAD) to create a detailed 3D model of your product. This model is the “blueprint” for everything next.
- Analysis & Ottimizzazione: Run structural simulations (per esempio., prove di stress) on the 3D model. Fix flaws (like weak spots) to ensure the design works for mold manufacturing.
Phase 2: Preparazione dello stampo (3–7 Days)
Now you’ll create the tool (muffa) itself—this is where rapid tooling saves the most time.
| Fare un passo | Key Actions |
|---|---|
| Selezione dei materiali | Pick the right mold material (silicone for flexibility, metal for durability) based on your product (per esempio., plastic vs. gomma). |
| Mold Base Creation | Make the mold’s base usingLavorazione CNC (per precisione) O3Stampa D (for speed). This base holds the mold’s shape. |
| Master Mold Making (If Using Silicone) | For silicone molds, first make a precise master mold (via 3D printing or CNC) — this is the “template” for the final silicone mold. |
| Silicone Depositing | Pour liquid silicone over the master mold. Let it cure (usually 6–24 hours) to form a flexible, reusable mold. |
Phase 3: Stampaggio ad iniezione & Produzione (2–5 Days)
With the mold ready, it’s time to make the finished products.
- Mold Assembly: Attach the mold to an injection molding machine. Make sure it’s secured tightly to avoid leaks.
- Raw Material Prep: Gather the materials for your product (per esempio., pellet di plastica, resin powders). Melt them down into a liquid state.
- Parameter Setting: Adjust the injection molding machine’s key settings: temperatura (180–250°C for plastic), pressione (500–2,000 psi), and cooling time (10–30 secondi).
- Iniezione & Curare: Inject the molten material into the mold. Let it cool and harden, then remove the finished part.
Phase 4: Post-trattamento & Controllo qualità (1–2 Days)
Finish the products to meet your standards.
- Sbavatura: Use a blade or sandpaper to remove small flaws (sbavature, flash) from the edges of the part.
- Levigatura & Pittura: Sand the surface for smoothness, then paint it (se necessario) per migliorare l'aspetto.
- Ispezione di qualità:
- Dimensional Check: Use calipers or 3D scanners to ensure the part’s size matches the original 3D model.
- Test funzionali: Test how the part works (per esempio., if it’s a hinge, check if it opens and closes smoothly).
4. Rapid Tooling vs. Traditional Tooling: A Quick Comparison
How does rapid tooling stack up against the conventional method? Let’s break down the key differences:
| Fattore | Attrezzaggio rapido | Traditional Tooling |
|---|---|---|
| Tempi di consegna | 1–4 settimane | 2–6 mesi |
| Costo (for Small Batches) | Basso (no expensive manual labor) | Alto (requires skilled labor and long setup) |
| Batch Size Ideal For | 10–1.000 unità | 10,000+ unità |
| Flessibilità | Alto (easy to tweak designs) | Basso (hard to change once tooling is made) |
| Tech Used | 3Stampa D, Lavorazione CNC | Manual machining, Elettroerosione (Lavorazione ad elettroerosione) |
5. Yigu Technology’s Take on Rapid Tooling
Alla tecnologia Yigu, we’ve leveragedrapid tooling process per aiutare 300+ clients cut product development time by 40% on average. It’s a game-changer for startups and SMEs—letting them test ideas without risky, big investments. We often combine silicone molds (per la flessibilità) and CNC machining (per precisione) to tailor solutions. For clients in consumer goods and medical devices, it’s not just about speed; it’s about getting high-quality parts that meet industry standards fast. Rapid tooling isn’t just a process—it’s how we help our clients stay ahead in a fast-moving market.
Domande frequenti
Q1: How long does a rapid tooling mold last?
Dipende dal materiale: silicone molds last 10–50 uses (great for small batches), while metal rapid tooling molds can last 1,000–10,000 uses (better for repeated production).
Q2: Can rapid tooling make parts as strong as traditional tooling?
SÌ! If you use high-quality materials (like engineering-grade plastic or metal), rapid tooling parts match the strength of traditional ones. The key is choosing the right material for your product’s use case.
Q3: Is rapid tooling only for plastic parts?
No—you can use it for a range of materials, including rubber, resina, and even some metals (come l'alluminio). It’s versatile enough for products from toys to medical devices.