IL plastic aerospace prototype model processing process is a high-precision manufacturing workflow tailored for the aerospace industry. Verifica la fattibilità del progetto, verifica la funzionalità, e fornisce dati critici per la produzione di massa, il tutto rispettando i rigorosi standard del settore in termini di precisione e affidabilità. Questa guida analizza ogni fase del processo, with real-world examples and data to help you navigate every stage successfully.
1. Selezione dei materiali: Pick the Right Plastic for Aerospace Needs
Choosing the correct plastic is the first and most critical step in the plastic aerospace prototype model processing process. Aerospace prototypes demand materials that balance mechanical strength, resistenza alla temperatura, e lavorabilità.
Common Materials for Plastic Aerospace Prototypes
| Material Name | Proprietà chiave | Ideal Aerospace Applications | Machining Ease | Costo (Al kg) |
| ABS (Acrilonitrile-Butadiene-Stirene) | Good transparency, facile da lavorare, moderate impact resistance | Internal component prototypes (per esempio., parti del cruscotto) | Alto | \(18–)28 |
| computer (Policarbonato) | Eccellente resistenza agli urti, high-temperature tolerance (fino a 130°C), rigido | Engine compartment prototypes (per esempio., heat-resistant covers) | Medio | \(25–)35 |
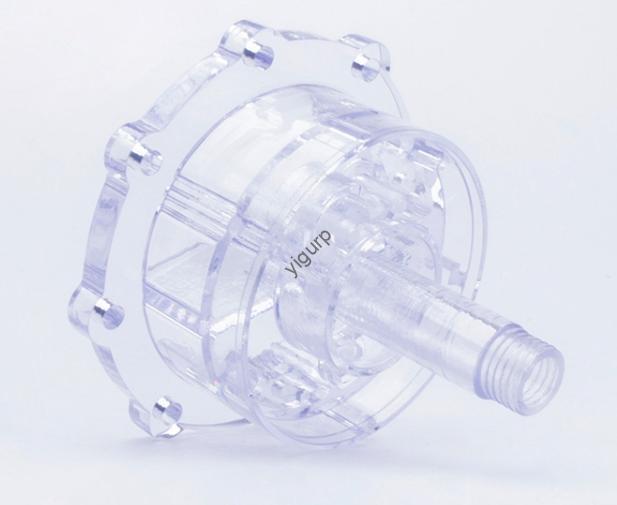
| PMMA (Acrilico) | High transparency (92% trasmissione della luce), good scratch resistance | Optical component prototypes (per esempio., window mockups) | Medio | \(22–)32 |
| PP (Polipropilene) | Resistente all'usura, acid/alkali resistant, leggero | Fluid system prototypes (per esempio., fuel line mockups) | Alto | \(15–)25 |
| Nylon | Elevata resistenza alla trazione, resistente all'usura, flessibile | Moving part prototypes (per esempio., hinge components) | Basso | \(35–)45 |
| POM (Poliossimetilene) | Excellent dimensional stability, basso attrito, high mechanical strength | Precision component prototypes (per esempio., gear mockups) | Medio | \(30–)40 |
Suggerimenti per la selezione
Quando si scelgono i materiali, prioritize four key factors:
- Proprietà meccaniche: Ensure the material can withstand aerospace-related stresses (per esempio., vibrazione, pressione).
- Resistenza alle alte temperature: Opt for plastics like PC if the prototype will be exposed to high heat.
- Resistenza alla corrosione: Use PP or nylon for prototypes in contact with fluids or chemicals.
- Biocompatibilità: For prototypes used in cabin interiors, select materials that meet low-toxicity standards.
Caso: An aerospace manufacturer needed a prototype for a cabin window cover. They chose PMMA for its 92% trasparenza (matching real window optics) e resistenza ai graffi. The prototype successfully mimicked the final product’s appearance and durability during testing.
2. Data Collection: Lay the Groundwork for Precision
Accurate data collection ensures the prototype matches the original design. This step in the plastic aerospace prototype model processing process involves gathering and verifying design files and creating physical samples for confirmation.
Key Data Collection Steps
- Import 3D Drawing Files: Request 3D CAD files (per esempio., FARE UN PASSO, IGES formats) from the client. These files are the blueprint for machining—import them into computer-aided manufacturing (CAMMA) software to prepare for programming. Per esempio, a prototype of an aerospace sensor housing required a STEP file with 0.02mm dimensional tolerances to ensure component fit.
- Create Gypsum Samples: Use the 3D files to make a gypsum sample. Gypsum is easy to shape and low-cost, making it ideal for verifying:
- Shape Accuracy: Does the sample match the design’s contours?
- Curvature Consistency: Are curved surfaces smooth and uniform?
- Standard Compliance: Does the sample meet aerospace size standards?
Why Gypsum Samples Matter: A team working on a rocket engine bracket prototype discovered a 0.5mm curvature error in the gypsum sample. They corrected the CAD file before machining plastic—avoiding a $2,000 waste of high-grade PC material.
3. Lavorazione CNC: Turn Plastic into Precision Prototypes
CNC machining is the core of the plastic aerospace prototype model processing process. It uses computer-controlled tools to cut plastic into the desired shape with high accuracy.
CNC Machining Workflow
- Programming and Setup:
- Use CAM software to generate toolpaths—these dictate where the cutting tool moves to remove excess plastic.
- Set cutting parameters: Adjust spindle speed (per esempio., 3,000 RPM for ABS, 2,500 RPM for PC) e velocità di avanzamento (per esempio., 400 mm/min for soft plastics, 300 mm/min for rigid plastics) in base al materiale.
- Lavorazione multiasse: For complex aerospace parts (per esempio., curved engine components), use 5-axis CNC machines. These machines can access all sides of the plastic, eliminating the need for multiple setups and improving precision by up to 30% compared to 3-axis machines.
Esempio: A manufacturer machined a PC prototype for an aerospace valve body using a 5-asse CNC macchina. The toolpath was programmed to cut internal channels (0.5mm di larghezza) and external curves—resulting in a prototype with ±0.01mm accuracy, meeting aerospace standards.
4. Post-elaborazione: Enhance Appearance and Durability
Post-processing improves the prototype’s look and performance, ensuring it meets aerospace aesthetic and functional requirements.
Passaggi di post-elaborazione
- Sbavatura: Use 400-grit sandpaper or a deburring tool to remove sharp edges and tool marks. This is critical for prototypes that will be handled during testing (per esempio., control panel mockups) to prevent injury.
- Trattamento superficiale:
- Pittura: Apply aerospace-grade paint (per esempio., heat-resistant enamel) to match the final product’s color and protect against corrosion.
- Serigrafia: Add labels (per esempio., numeri di parte, safety warnings) per chiarezza.
- Galvanotecnica: For prototypes needing conductivity (per esempio., electrical component housings), apply a thin metal coating (per esempio., nichel) to the surface.
5. Assembly Testing: Verify Functionality and Fit
Assembly testing ensures the prototype works as intended and integrates with other aerospace components.
Testing Steps
- Test Assembly: Assemble all prototype parts to check:
- Precisione di adattamento: Do parts align correctly? Per esempio, a sensor prototype’s housing must fit with a circuit board without gaps.
- Mold Quality: Are there any defects (per esempio., deformazione) from machining that affect assembly?
- Test funzionali: Subject the assembled prototype to simulated aerospace conditions:
- Structural Stability: Test if the prototype withstands vibration (per esempio., 50 Hz frequency for 1 ora).
- Prestazioni meccaniche: Check if moving parts (per esempio., cerniere) operate smoothly.
- Resistenza ambientale: Expose the prototype to high temperatures (per esempio., 120°C for PC parts) or humidity to test durability.
Caso: A prototype of an aerospace fuel line fitting (made from PP) underwent functional testing. It was exposed to 80°C fuel and 10 psi pressure for 24 hours—no leaks or deformation occurred, confirming it met performance standards.
6. Packaging and Shipping: Ensure Safe Delivery
The final step in the plastic aerospace prototype model processing process is packaging and shipping. Aerospace prototypes are often high-value and delicate, so proper handling is essential.
Packaging and Shipping Tips
- Safe Packaging: Use foam inserts and rigid cardboard boxes to cushion the prototype. Per parti fragili (per esempio., PMMA window mockups), add a layer of bubble wrap and label the box “Fragile—Aerospace Prototype.”
- Logistics Selection: Choose a reliable logistics provider with experience shipping aerospace components. Track the shipment in real time to ensure on-time delivery.
- Delivery Time Planning: Coordinate with the client to set a realistic delivery date. Per progetti urgenti (per esempio., prototype testing for a satellite launch), prioritize expedited shipping while maintaining packaging safety.
Yigu Technology’s Perspective on Plastic Aerospace Prototype Model Processing Process
Alla tecnologia Yigu, we know the plastic aerospace prototype model processing process demands precision and material expertise. Many clients struggle with material mismatches or machining errors—our solution is pairing tailored material recommendations (per esempio., PC for high-heat parts, PMMA for optics) with 5-axis CNC machines (±0.005mm accuracy). We also offer in-house gypsum sampling to catch design flaws early, cutting rework time by 40%. Our post-processing team uses aerospace-grade paints and coatings, ensuring prototypes meet industry standards. We deliver reliable prototypes on time, helping clients accelerate their aerospace development cycles.
Domande frequenti
- Q: Which material is best for a plastic aerospace prototype that needs to withstand high temperatures?
UN: computer (Policarbonato) is ideal—it tolerates temperatures up to 130°C and has strong impact resistance. For even higher heat (fino a 150°C), consider modified PC blends. Always test the material under your specific temperature conditions to confirm performance.
- Q: How long does the entire plastic aerospace prototype model processing process take?
UN: It depends on complexity. A simple ABS prototype (per esempio., small sensor housing) richiede 5-7 giorni (material selection to shipping). A complex 5-axis machined PC prototype (per esempio., engine component) takes 10–14 days, including gypsum sampling and functional testing.
- Q: Can CNC machining achieve the tight dimensional tolerances required for aerospace prototypes?
UN: SÌ. Modern 5-axis CNC machines can achieve ±0.005mm tolerances—well within aerospace standards (typically ±0.02mm). Pairing CNC with high-quality CAD/CAM software and skilled programmers ensures the prototype meets all dimensional requirements.