Se te lo stai chiedendo, “What is manual injection molding, e come può funzionare per il mio progetto?" ti abbiamo coperto. In poche parole, lo stampaggio a iniezione manuale è un processo pratico che utilizza macchine azionate manualmente per iniettare materiale fuso (come la plastica) in uno stampo, creazione di parti o prototipi in piccoli lotti. A differenza dello stampaggio a iniezione automatizzato su scala industriale, è conveniente, compatto, and perfect for startups, DIY enthusiasts, or small businesses that don’t need thousands of parts. Whether you’re prototyping a new gadget, making custom crafts, or producing small runs of components, this guide will walk you through every step—from choosing equipment to troubleshooting common issues.
1. What Is Manual Injection Molding, and Who Should Use It?
Primo, let’s clear up the basics. Manual injection molding relies on human effort (instead of electricity or hydraulics) to push molten material into a mold cavity. The machines are small—often tabletop-sized—and cost a fraction of industrial models. But don’t let “manual” fool you: when done right, it can produce high-quality parts with consistent detail.
Key Benefits of Manual Injection Molding
- Low Startup Cost: A basic manual injection molding machine costs \(500–)3,000, rispetto a $10,000+ for entry-level automated machines. This makes it accessible for small budgets.
- Small Batch Flexibility: It’s ideal for runs of 1–500 parts. Per esempio, a startup making a new phone accessory might use manual molding to test 100 units before scaling up.
- Compact Size: Most machines fit on a workbench, so you don’t need a large workshop. This is a game-changer for home hobbyists or garage-based businesses.
- Quick Setup: You can assemble and start using a manual machine in under an hour—no complex programming or training required.
Who Should (and Shouldn’t) Use Manual Injection Molding
| Ideale per | Not Ideal For |
| Startups prototyping small-batch parts | Large manufacturers needing 10,000+ parti mensili |
| DIY enthusiasts making custom crafts (per esempio., parti di giocattoli, gioielli) | Projects requiring ultra-tight tolerances (±0,001 pollici) |
| Small businesses testing product demand before investing in automation | Materials that need extremely high temperatures (per esempio., some high-performance plastics) |
| Educational settings teaching molding basics | Parts larger than 6 pollici (most manual machines have size limits) |
Esempio del mondo reale: A friend of mine runs a small electronics startup. They used a \(1,200 manual injection molding machine to make 200 plastic casings for their first product. It cost them \)3 per part—compared to $15 per part if they’d outsourced to a factory. Once they proved demand, they upgraded to a semi-automated machine—but manual molding got them off the ground.
2. Essential Equipment for Manual Injection Molding
You don’t need a lot of gear to get started, but the right tools will make or break your results. Here’s what you’ll need:
2.1 Manual Injection Molding Machine
The machine is the heart of the process. Look for these key features:
- Clamping Force: Measured in pounds (libbre). Per piccole parti (1–3 inches), a 500–1,000 lbs machine works. Larger parts need 1,500–2,000 lbs to keep the mold closed during injection.
- Compatibilità dei materiali: Most machines handle common plastics like polipropilene (PP), polistirolo (PS), E polietilene (PE). Avoid machines that only work with one material—flexibility is key.
- Heating Element: A built-in heater (150–400°F, depending on the plastic) melts the material. Look for machines with adjustable temperature controls to avoid burning the plastic.
Top entry-level machines include the Protomold Mini (\(800) for hobbyists and the **LNS Technologies Manual Molder** (\)2,500) for small businesses.
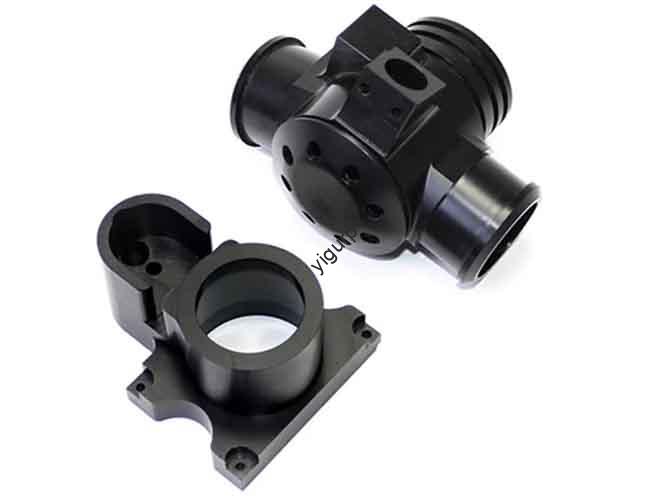
2.2 Stampi
Molds for manual injection molding are usually made from aluminum, acciaio, or even high-temperature plastic (for one-time use). Key considerations:
- Materiale: Aluminum molds are cheap (\(50–)200) and work for 50–100 uses—great for prototyping. Steel molds cost more (\(200–)500) but last 500+ usi, perfect for repeated small batches.
- Progetto: Molds need a sprue (the channel where material enters) E prese d'aria (to release air). If you’re new, start with simple, single-cavity molds—avoid complex shapes with undercuts until you gain experience.
Per Suggerimento: You can 3D-print a mold for one-time tests (use high-temperature PLA or PETG), but it won’t hold up to repeated use. For regular production, invest in a metal mold.
2.3 Materiali (Resins/Plastics)
Stick to thermoplastics—they melt when heated and harden when cooled, making them reusable. Common options:
- Polipropilene (PP): Flessibile, durevole, ed economico (\(1–)2 per libbra). Great for parts like containers or hinges.
- Polistirolo (PS): Stiff and easy to mold (\(0.80–)1.50 per libbra). Ideal for decorative parts or prototypes.
- Acrilonitrile Butadiene Stirene (ABS): Strong and heat-resistant (\(2–)3 per libbra). Used for parts like toy components or electronics casings.
Avoid thermosets (per esempio., resina epossidica) with manual machines—they harden permanently when heated and can clog the machine.
2.4 Equipaggiamento di sicurezza
Never skip safety! Ne avrai bisogno:
- Heat-Resistant Gloves: To handle molten plastic and hot molds (look for gloves rated to 500°F+).
- Safety Glasses: To protect your eyes from splattering plastic.
- Ventilation Mask: Some plastics release fumes when melted—use a mask with an activated carbon filter if you’re working indoors.
3. Step-by-Step Guide to Manual Injection Molding
Let’s walk through the process using a tabletop machine and a simple aluminum mold (for a small plastic widget). We’ll use polypropylene (PP) plastic—great for beginners.
Fare un passo 1: Prepare the Machine and Mold
- Preheat the Machine: Set the heater to 320°F (the melting point of PP) and let it warm up for 10–15 minutes. Use a thermometer to confirm the temperature—too hot, and the plastic will burn; troppo freddo, and it won’t flow.
- Clean the Mold: Wipe the mold cavity with a dry cloth to remove dust or debris. Even a small speck can ruin your part.
- Secure the Mold: Clamp the mold to the machine’s platen (the flat surface where the mold sits). Tighten it firmly—if it’s loose, plastic will leak out during injection.
Fare un passo 2: Load and Melt the Plastic
- Cut the Plastic: Chop the PP into small pellets (1/4 inch or smaller) to help it melt evenly. You’ll need about 2–3 tablespoons of pellets for a small part.
- Load the Hopper/Barrel: Pour the pellets into the machine’s barrel (the tube where melting happens). Don’t overfill—leave 1/4 inch of space at the top.
- Melt the Plastic: Use the machine’s manual plunger to push the pellets toward the heater. Wait 2–3 minutes, then gently push the plunger again—you should feel resistance as the plastic melts. If it’s too hard to push, the plastic isn’t melted yet; if it’s too soft, it’s overheated.
Fare un passo 3: Inject the Plastic into the Mold
- Position the Plunger: Align the machine’s nozzle with the mold’s sprue (the entry channel).
- Apply Pressure: Push the plunger slowly and steadily with both hands. You’ll feel a “give” when the mold is full—stop pushing immediately to avoid overflow.
- Hold Pressure: Keep the plunger pressed for 30–60 seconds (this is called “dwell time”). It helps the plastic fill all crevices and prevents shrinkage.
Fare un passo 4: Cool and Demold the Part
- Cool the Mold: Let the mold sit for 2–5 minutes (a seconda delle dimensioni della parte). You can speed up cooling with a fan, but don’t use water—sudden temperature changes can crack the mold.
- Open the Mold: Unclamp the mold and carefully separate the two halves. Use a plastic tool (not metal—you’ll scratch the mold) to pry the part loose if it’s stuck.
- Trim the Part: Cut off the sprue (the excess plastic from the entry channel) with a utility knife or scissors. Sand the edges with 220-grit sandpaper for a smooth finish.
Fare un passo 5: Test and Adjust
- Inspect the Part: Check for flaws like bubbles, gaps, o superfici irregolari. If you see bubbles, the plastic was too hot or the mold had air trapped (add more vents). If there are gaps, you didn’t apply enough pressure during injection.
- Tweak the Process: Adjust the temperature, dwell time, or pressure as needed. It may take 2–3 test runs to get perfect parts—don’t get discouraged!
4. Applications of Manual Injection Molding
Manual injection molding is more versatile than you might think. Ecco gli usi più comuni:
4.1 Prototyping for Startups
Startups love manual molding because it lets them test designs quickly and cheaply. Per esempio, a team developing a smart watch band can make 50 prototypes with different colors and textures to get customer feedback—all for under $500. This beats outsourcing, which would take weeks and cost thousands.
4.2 Produzione in piccoli lotti
Businesses that need 10–500 parts monthly use manual molding to avoid the high costs of automated machines. A local toy store, ad esempio, might produce 200 custom toy cars each month using a manual machine—they can adjust the design (per esempio., change colors) easily without retooling.
4.3 DIY and Hobby Projects
Hobbyists use manual molding to make one-of-a-kind items. Gli esempi includono:
- Custom board game pieces (replace lost or broken parts).
- Gioielli (mold plastic into unique shapes and paint them).
- Cosplay props (make armor pieces or weapon replicas).
Caso di studio: A hobbyist I know makes custom “nerd” keychains (shaped like video game characters) using a \(700 manual machine. He sells them online for \)10 ogni, and with a production cost of $1 per keychain, he makes a steady side income.
4.4 Educational and Research Settings
Schools and labs use manual injection molding to teach students about manufacturing. It’s a hands-on way to learn about material science (how plastics melt and cool) and mold design—students can make their own parts and see the process from start to finish.
5. Tips for Success and Common Mistakes to Avoid
Pro Tips for Great Results
- Start Small: Begin with simple parts (per esempio., a 1-inch square) before moving to complex shapes. This helps you master temperature and pressure control.
- Reuse Scrap Plastic: Collect the sprue (plastica in eccesso) from each run, chop it up, and reuse it. This reduces waste and saves money—just mix it with 50% new plastic to avoid quality issues.
- Keep the Machine Clean: After each use, wipe the barrel and nozzle with a clean cloth while they’re still warm. If plastic hardens inside, it can clog the machine—use a wire brush to remove stuck bits.
- Invest in a Good Mold: A cheap, poorly made mold will always produce bad parts. Spend a little extra on an aluminum or steel mold— it will save you time and frustration.
Common Mistakes to Steer Clear Of
- Overheating the Plastic: Burning plastic leaves a black residue that clogs the machine and ruins parts. Always follow the material’s recommended melting temperature (per esempio., 320°F for PP, 350°F for ABS).
- Under-Clamping the Mold: If the mold isn’t tight, plastic will leak out (chiamato “flash”). This wastes material and makes parts hard to trim. Always double-check the clamps before injecting.
- Rushing the Cooling Time: Pulling a part out too soon causes warping or cracking. Wait until the mold is cool to the touch—patience pays off!
- Using the Wrong Material: Don’t try to mold high-temperature plastics (per esempio., nylon, SBIRCIARE) with a basic manual machine. They need temperatures over 400°F, which most small machines can’t reach.
6. Yigu Technology’s Perspective on Manual Injection Molding
Alla tecnologia Yigu, we see manual injection molding as a “gateway” to manufacturing for small businesses and creators. We often recommend it to startups that want to validate their product without breaking the bank—many of our clients have used manual machines to turn ideas into sellable parts, then scaled up with our semi-automated equipment later.
One recent client, a small medical device startup, used a manual injection molding machine to make 100 prototypes of a custom catheter clip. By testing these parts with doctors, they refined the design and reduced production costs by 30% before investing in automation. This is the power of manual molding: it lets you learn and adapt quickly.
We also notice a growing trend in eco-friendly manual molding—hobbyists and small businesses are using recycled plastics to make parts, riducendo gli sprechi. As materials and machines get more affordable, we believe manual injection molding will become even more accessible, empowering more people to turn their ideas into physical products.
FAQ About Manual Injection Molding
Q1: How much does it cost to make a part with manual injection molding?
UN: Per piccole parti (1–3 inches), costs range from \(0.50–)5 per parte. This includes plastic (\(0.10–)0.50 per parte), mold wear (\(0.20–)2 per parte), e lavoro. It’s much cheaper than outsourcing (che può costare \(5–)20 per small part).
Q2: Can I use recycled plastic in a manual injection molding machine?
UN: SÌ! Pulito, chopped recycled plastic (per esempio., from water bottles or old toys) works well. Just make sure to remove any labels or contaminants—they can burn and ruin your parts. Mix recycled plastic with 50% new plastic for the best quality.
Q3: How long does it take to make one part?
UN: From start to finish, one part takes 5–10 minutes (preheating time is only needed once per session). Per un lotto di 10 parti, you’ll spend about 30–45 minutes (including cooling and trimming).
Q4: Is manual injection molding safe for beginners?
UN: SÌ, as long as you use safety gear (guanti, glasses, maschera) and follow instructions. The biggest risk is burns from hot plastic or molds—so never touch the machine’s barrel or mold without gloves.
Q5: Can I make parts with different colors?
UN: Assolutamente! Add color pellets (1–2% of the total plastic weight) to the machine’s barrel before melting. Per esempio, mix 1 tablespoon of red color pellets with 1 cup of PP pellets for red parts. You can also paint parts after demolding for more control.