Se ti stai chiedendo come creare clear, stampe in resina trasparente di alta qualità, la risposta breve è: si inizia con la scelta della resina giusta, ottimizzare le impostazioni della stampante 3D, e padroneggiare le fasi di post-elaborazione come la polimerizzazione e la lucidatura. La stampa su resina trasparente non significa solo colpire la “stampa”, ma richiede attenzione ai dettagli che riducono l’opacità, eliminare le linee di livello, and enhance light transmission. Whether you’re making miniatures, parti funzionali, or decorative pieces, following a structured approach will help you avoid common mistakes (like uneven curing or trapped air bubbles) and get results that look professional.
What Is Transparent Resin Printing, and How Does It Work?
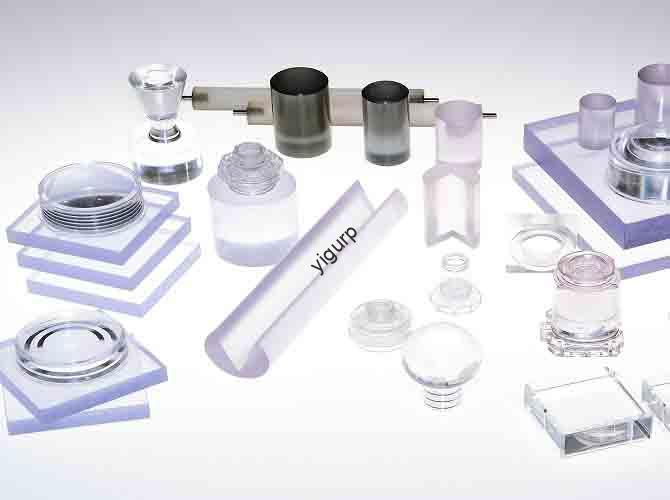
Transparent resin printing is a type of stereolitografia (SLA) O elaborazione digitale della luce (DLP) 3D printing that uses clear or semi-clear photopolymer resin to create objects that transmit light. Unlike standard opaque resins, transparent resins are formulated to minimize light scattering, allowing light to pass through the print rather than being absorbed or reflected.
Al suo centro, the process works like other resin 3D printing methods: a light source (either a laser for SLA or a projector for DLP) cures thin layers of resin one by one, building the object from the bottom up. The key difference with transparent resin is the resin’s composition—most include additives that reduce cloudiness, and some are designed for specific uses (like high-temperature resistance or food safety).
A Real-World Example
Last year, I worked with a jewelry designer who wanted to create clear pendant charms. Her first attempts using a generic transparent resin resulted in foggy prints that looked cheap. After switching to a specialized “high-clarity” resin and adjusting her printer’s layer height (from 0.1mm to 0.05mm), her prints became nearly as clear as glass. She later added a final polish with a microfiber cloth and UV-resistant coating, and her charms now sell out within days. This shows how small changes to materials and settings can transform results.
Choosing the Right Transparent Resin: Key Factors to Consider
Not all transparent resins are the same—choosing the wrong one can lead to frustration, materiale sprecato, and subpar prints. Below are the critical factors to evaluate, plus a comparison of popular options.
1. Clarity Level
Clarity is measured by trasmissione della luce (how much light passes through the material). Most transparent resins have a transmittance rate between 80% E 95% (compared to glass, which is ~92%). Look for resins labeled “high clarity” or “ultra-transparent” if you need maximum light passage (per esempio., for lenses or display cases). Avoid “semi-transparent” or “frosted” resins unless you want a matte finish.
2. Proprietà meccaniche
Consider what your print will be used for:
- Resistenza agli urti: If you’re making functional parts (like phone cases), choose a resin with high impact resistance (per esempio., 2-3 kj /). Brittle resins may crack easily.
- Resistenza al calore: For parts exposed to heat (like lamp shades), look for a heat deflection temperature (HDT) of at least 60°C. Some industrial resins can handle up to 150°C.
- Food safety: If making items like candy molds, use FDA-approved food-safe transparent resin (per esempio., Anycubic Food-Safe Resin).
3. Compatibility with Your Printer
Transparent resins work with most SLA/DLP printers, but check the resin’s viscosità (spessore) and recommended wavelength. Per esempio:
- Resins with high viscosity (above 500 cP) may not flow well in printers with small resin tanks.
- Most resins cure best with 405nm wavelength light (standard for consumer printers), but some require 385nm or 395nm.
Comparison of Top Transparent Resins (2024)
| Resin Brand & Model | Chiarezza (Trasmissione della luce) | Resistenza agli urti | Resistenza al calore (HDT) | Food Safe? | Ideale per |
| Elegoo Ultra Transparent | 90% | 2.5 kj / | 55°C | NO | Miniatures, Decorations |
| Anycubic Clear Resin Plus | 92% | 3.0 kj / | 60°C | NO | Parti funzionali, Lenti |
| Formlabs Clear Resin | 93% | 2.8 kj / | 70°C | NO | Professional Prototypes |
| Siraya Tech Fast Clear | 88% | 3.2 kj / | 65°C | NO | Fast Prints (Low Curing Time) |
| Anycubic Food-Safe Resin | 85% | 2.2 kj / | 50°C | SÌ | Stampi, Kitchen Items |
Optimizing 3D Printer Settings for Transparent Resin Prints
Even the best resin won’t perform well if your printer settings are off. The goal here is to minimize layer lines (which cause cloudiness) and ensure even curing (which prevents spots or discoloration). Below are the most important settings to adjust, based on industry best practices and my own experience.
1. Altezza dello strato
Layer height directly affects clarity—thicker layers create more visible lines, while thinner layers result in smoother surfaces. For transparent prints:
- Recommended: 0.025mm to 0.05mm (contro. 0.1mm for opaque resins). Thinner layers take longer but reduce the need for heavy post-processing.
- Caso di studio: A friend who prints transparent dice switched from 0.1mm to 0.03mm layer height. The dice went from having obvious layer lines to being nearly seamless, and he cut his polishing time in half.
2. Exposure Time
Under-curing leads to soft, cloudy prints; over-curing causes brittleness and yellowing. Follow these guidelines:
- Initial Layer Exposure: 60-120 secondi (longer than opaque resins) to ensure the first layer sticks firmly to the build plate.
- Normal Layer Exposure: 8-15 secondi (varies by resin). Test with a small sample print—if the surface is sticky, increase exposure by 2 secondi.
- Bottom Layers: 3-5 layers with 2x the normal exposure time (impedisce la deformazione).
3. Build Plate Adhesion
Poor adhesion can cause prints to shift mid-print, portando a difetti. To avoid this:
- Clean the build plate with isopropyl alcohol (IPA) and a lint-free cloth before each print.
- Use a build plate adhesive (like Elegoo Build Plate Tape) for smooth resins that don’t stick well.
- Tilt the model at a 15-30° angle (in your slicer software) to reduce contact with the build plate and minimize support marks.
4. Strutture di supporto
Supports are necessary for overhangs, but they can leave marks that ruin clarity. Use these tips:
- Scegliere tree supports (contro. linear supports) — they have smaller contact points, making them easier to remove without damaging the print.
- Place supports on less visible areas (per esempio., the bottom of a figurine, not the front of a lens).
- Set support density to 15-20% (lower than opaque prints) to reduce material use and mark size.
Post-elaborazione: The Secret to Crystal-Clear Transparent Prints
Post-processing is where transparent prints go from “good” to “great.” Skipping steps like cleaning or polishing will leave you with cloudy, dull objects. Follow this step-by-step workflow for best results.
Fare un passo 1: Clean the Print Thoroughly
Uncured resin on the surface causes cloudiness. Here’s how to clean it:
- Remove the print from the resin tank and gently scrape off excess resin with a spatula.
- Soak the print in 99% isopropyl alcohol (IPA) per 5-10 minuti (use a sealed container to avoid evaporation).
- Scrub hard-to-reach areas (like crevices in miniatures) with a soft-bristle brush (per esempio., a toothbrush).
- Rinse the print with fresh IPA for 1 minuto, then pat dry with a lint-free cloth.
- Pro Tip: Use a ultrasonic cleaner (if you have one) per 3-5 minutes—it removes resin from tiny gaps that a brush can’t reach. I use this for small parts like jewelry, and it cuts cleaning time by 70%.
Fare un passo 2: Cure the Print Evenly
Under-cured prints are sticky and cloudy; over-cured prints yellow. Follow these rules:
- Use a UV curing station (preferred) or direct sunlight (avoid midday sun, which is too intense).
- Cure for 2-5 minuti (check the resin’s instructions—Elegoo Ultra Transparent needs 3 minuti, while Formlabs Clear needs 5).
- Rotate the print halfway through curing to ensure all sides get equal light.
- Warning: Don’t cure for more than 10 minutes—this causes “UV yellowing,” especially in resins with low UV resistance.
Fare un passo 3: Polish to Remove Layer Lines
Polishing smooths surface imperfections and boosts clarity. Use this method:
- Start with 400-grit sandpaper (wet sanding) to remove large layer lines. Wet the sandpaper to reduce dust and prevent scratching.
- Move to 800-grinta carta vetrata, Poi 1200-grinta, e infine 2000-grinta (the higher the grit, the smoother the surface).
- For a glass-like finish, use a polishing compound (per esempio., Novus Plastic Polish) and a microfiber cloth. Rub in small circular motions for 2-3 minuti.
- Esempio: I polished a transparent phone case using this method. After 400-grit sanding, it was still slightly cloudy, but after 2000-grit and polishing compound, it looked like it was made of real glass—you could see through it clearly to read text on the phone screen.
Fare un passo 4: (Opzionale) Apply a Clear Coat
For extra protection and shine, use a UV-resistant clear coat (per esempio., Krylon Clear Gloss). This prevents yellowing over time and adds a smooth finish. Spray 2-3 thin coats (holding the can 6-8 inches away) and let each coat dry for 30 minuti.
Common Problems with Transparent Resin Prints (e come risolverli)
Even experienced users run into issues. Below are the most common problems, their causes, and solutions—based on data from 3D printing forums (like Reddit’s r/3Dprinting) and my own troubleshooting.
| Problema | Cause | Soluzione |
| Cloudy/ Foggy Prints | 1. Uncured resin residue2. Thick layer lines3. Over-curing | 1. Clean with 99% IPA and ultrasonic cleaner2. Reduce layer height to 0.03mm3. Shorten curing time by 1-2 minuti |
| Yellowing | 1. Over-curing2. Exposure to sunlight3. Low-quality resin | 1. Follow resin’s curing time guidelines2. Store prints in a dark place3. Use UV-resistant resin (per esempio., Formlabs Clear) |
| Layer Separation | 1. Under-exposure2. Poor layer adhesion3. Resin too cold | 1. Increase normal layer exposure by 2 seconds2. Clean build plate with IPA3. Warm resin to 25-30°C (use a resin heater) |
| Air Bubbles in Print | 1. Resin not degassed2. Fast print speed3. Tank has bubbles | 1. Degas resin in a vacuum chamber (or stir gently and let sit 30 minuti)2. Reduce print speed to 50mm/h3. Tap tank gently to release bubbles before printing |
Yigu Technology’s View on Transparent Resin Printing
Transparent resin printing is rapidly evolving from a niche technique to a mainstream tool—thanks to better resin formulas and more accessible printers. Alla tecnologia Yigu, we believe the future of this space lies in two areas: sostenibilità E funzionalità. We’re seeing growing demand for eco-friendly transparent resins (made from plant-based materials) that reduce waste, and for resins that combine clarity with advanced properties (like flexibility or chemical resistance). For users, this means more options to create prints that are both beautiful and useful. We also recommend beginners start small—try printing a simple keychain or lens cap before moving to complex parts—to build confidence with materials and settings. With the right approach, transparent resin printing can unlock endless creative possibilities, from custom jewelry to functional prototypes.
FAQ About Transparent Resin Printing
1. Can I use transparent resin in an FDM 3D printer?
NO, FDM printers use filament (plastic strands), not resin. Transparent resin only works with SLA or DLP printers, which use light to cure photopolymer resin.
2. How long do transparent resin prints last?
With proper care (stored away from direct sunlight and not exposed to harsh chemicals), transparent resin prints can last 5-10 anni. UV-resistant resins or clear coats can extend this lifespan by preventing yellowing.
3. Is transparent resin more expensive than opaque resin?
SÌ, on average, transparent resin costs 20-30% more than standard opaque resin. Per esempio, a 1kg bottle of opaque resin costs ~\(25, while a 1kg bottle of high-clarity transparent resin costs ~\)35.
4. Can I paint transparent resin prints?
SÌ, but use acrylic paints (oil-based paints can damage the resin). Lightly sand the surface with 800-grit sandpaper first to help the paint adhere. For best results, use a clear base coat before painting.
5. How do I fix a transparent print that’s already yellowed?
If the yellowing is mild, try polishing the surface with 2000-grit sandpaper and a UV-resistant polish. For severe yellowing, you may need to reprint the part—this is why following curing guidelines is so important.