Se te lo sei mai chiesto, “Quanto tempo impiegherà la mia stampa 3D?"non sei solo. Che tu stia stampando un piccolo portachiavi o un prototipo di grandi dimensioni, 3Il tempo di stampa D varia notevolmente: da 30 minuti a diversi giorni. L’incertezza spesso porta alla frustrazione: mancato rispetto delle scadenze del progetto, perdere tempo aspettando stampe fallite, o pianificazione eccessiva per lavori rapidi. Questa guida analizza il key factors that determine 3D printing time, gives you actionable ways to estimate and optimize it, and solves common time-related problems, helping you plan your projects with confidence.
1. Core Factors That Determine 3D Printing Time
3D printing time isn’t random—it’s shaped by six main factors. Understanding these helps you predict how long a print will take and adjust settings to save time without sacrificing quality.
1.1 Size and Complexity of the Printed Object
The bigger or more intricate your model, the longer it takes to print. Think of it like baking a cake: a small cupcake bakes faster than a multi-layered wedding cake.
- Misurare: A 5cm x 5cm x 5cm cube (piccolo) takes 1–2 hours, while a 30cm x 30cm x 30cm storage box (large) can take 24–48 hours.
- Complexity: Models with detailed features (per esempio., small text, intricate lattices) or overhangs need more time. Per esempio:
- A simple figurine (no small details) takes 3–5 hours.
- A figurine with tiny facial features (2mm eyes, 1mm mouth) and overhanging arms takes 6–8 hours (more time for precise layer placement and supports).
The table below compares time for different sizes and complexities:
| Model Type | Misurare | Complexity | Estimated Printing Time |
| Keychain | 4cm x 2cm x 0.5cm | Simple (no details) | 30–60 minutes |
| Phone Case | 16cm x 8cm x 1cm | Moderate (buchi, edges) | 2–4 hours |
| Figurine (basic) | 10cm x 5cm x 15cm | Moderate (no small details) | 3–5 hours |
| Figurine (dettagliato) | 10cm x 5cm x 15cm | High (small features, overhangs) | 6–8 hours |
| Large Storage Box | 30cm x 20cm x 25cm | Simple (no complex parts) | 24–36 hours |
1.2 Printing Accuracy (Altezza dello strato)
Altezza dello strato (the thickness of each layer the printer builds) directly impacts time. Thinner layers mean more layers to print—slower, but smoother. Thicker layers mean fewer layers—faster, but rougher.
- High Accuracy (0.1mm layer height): Great for detailed models (per esempio., jewelry, miniatures). A 10cm tall figurine with 0.1mm layers needs 1000 layers (10cm ÷ 0.01cm = 1000), taking 6–8 hours.
- Medium Accuracy (0.2mm layer height): The sweet spot for most projects (per esempio., phone cases, prototipi). The same 10cm figurine needs 500 layers, taking 3–5 hours.
- Low Accuracy (0.3mm layer height): For rough, parti funzionali (per esempio., a temporary bracket). The 10cm figurine needs 333 layers, taking 2–3 hours.
Common Problem Solved: “Why is my small model taking so long?”
You’re likely using a too-thin layer height. If you don’t need a super-smooth finish, switch from 0.1mm to 0.2mm layer height—this cuts time by 30–40%.
1.3 Print Density (Riempimento)
Print density (the amount of material inside the model) affects both time and strength. Higher density = more material = longer time.
- 100% Density (Solid): For strong, load-bearing parts (per esempio., a tool handle). A 10cm x 10cm x 10cm cube takes 6–8 hours.
- 50% Density (Semi-Solid): For moderate strength (per esempio., a phone case). The same cube takes 3–4 hours.
- 0% Density (Hollow): For lightweight, parti decorative (per esempio., a hanging ornament). The cube takes 30–60 minutes (only the outer walls are printed).
Esempio: A user prints a 15cm tall plant pot. Using 20% infill takes 4 hours—perfect for holding soil. If they accidentally use 100% infill, it takes 12 hours and is unnecessarily heavy.
1.4 Printing Speed
Printing speed (how fast the nozzle moves while extruding material) is measured in mm/s (millimeters per second). Faster speeds = shorter time, but too fast can ruin quality.
- Slow Speed (20–40mm/s): For detailed models (per esempio., miniatures). Ensures the nozzle moves carefully to capture small features.
- Medium Speed (50–80mm/s): For most projects (per esempio., prototipi, decor). Balances speed and quality.
- Fast Speed (90–150mm/s): For large, simple parts (per esempio., a big storage bin). High-end printers handle fast speeds better without errors.
The table below shows how speed affects time for a 10cm x 10cm x 10cm cube (0.2mm layer height, 50% infill):
| Printing Speed | Estimated Time | Quality Notes |
| 30mm/s | 5 ore | Very smooth, great for details |
| 60mm/s | 2.5 ore | Smooth enough for most projects |
| 100mm/s | 1.5 ore | Slightly rough, good for simple parts |
| 150mm/s | 1 hour | Rough surface, only for non-visible parts |
1.5 Printer Structure Stability
A stable printer can handle faster speeds without shaking—saving time. Unstable printers (per esempio., wobbly frames) need slower speeds to avoid blurry prints or layer shifts.
- Stable Printers: Industrial-grade printers or well-built home printers (per esempio., Prusa i3) can run at 80–120mm/s without issues.
- Unstable Printers: Cheap, flimsy printers may need to run at 30–50mm/s to stay accurate—doubling or tripling print time.
Tip: If your printer shakes during fast prints, stabilize it by placing it on a heavy table or adding anti-vibration pads under the feet. This lets you increase speed and cut time.
1.6 Support Structures
Models with overhangs (parts that stick out more than 45°) need strutture di sostegno (extra material to hold them up). Supports add time to print and remove.
- No Supports: A flat model (per esempio., a coaster) takes 30 minutes.
- Light Supports: A model with small overhangs (per esempio., a figurine with slightly outstretched arms) adds 30–60 minutes to print time.
- Heavy Supports: A model with large overhangs (per esempio., a aircraft wing) adds 2–4 hours to print time (plus time to remove supports).
2. How to Estimate 3D Printing Time (Step-by-Step)
You don’t need to guess—use these simple steps to estimate time accurately:
- Use Slicer Software: Every 3D printer needs slicer software (per esempio., Cura, PrusaSlicer) to convert your model into printer code. Slicers have a built-in “time estimator” that calculates time based on your settings (layer height, velocità, infill).
- Esempio: Import a 10cm figurine into Cura, set 0.2mm layer height, 50% infill, 60mm/s speed—the slicer will say “Estimated Time: 3.5 hours.”
- Adjust for Real-World Factors: Slicers are accurate, but add 10–20% extra time for:
- Printer warm-up (5–10 minutes).
- Minor pauses (per esempio., nozzle priming, filament changes).
- Slowdowns for complex sections (per esempio., the slicer may automatically slow speed for small details).
- Use Online Calculators: For quick estimates (before slicing), use tools like 3D Print Time Calculator. Enter model size, layer height, and speed—it gives a rough time.
3. How to Optimize 3D Printing Time (Without Ruining Quality)
If your print is taking too long, use these tricks to speed it up while keeping the part usable:
- Increase Layer Height: Switch from 0.1mm to 0.2mm (cuts time by 30%—quality is still good for most projects).
- Lower Infill: Reduce from 100% to 20–50% (saves time—only use 100% for parts that need maximum strength).
- Increase Speed: Raise speed from 50mm/s to 70–80mm/s (test first with a small sample to ensure quality).
- Minimize Supports: Redesign the model to reduce overhangs (per esempio., tilt a part so overhangs are under 45°—no supports needed).
- Use a Faster Printer: If you print often, invest in a high-speed printer (per esempio., a CoreXY printer that runs at 150mm/s).
Esempio: A user has a 6-hour print for a prototype. They:
- Increase layer height from 0.15mm to 0.2mm.
- Lower infill from 50% A 30%.
- Increase speed from 60mm/s to 80mm/s.
The new time is 3.5 hours—half the original time, and the prototype is still strong enough for testing.
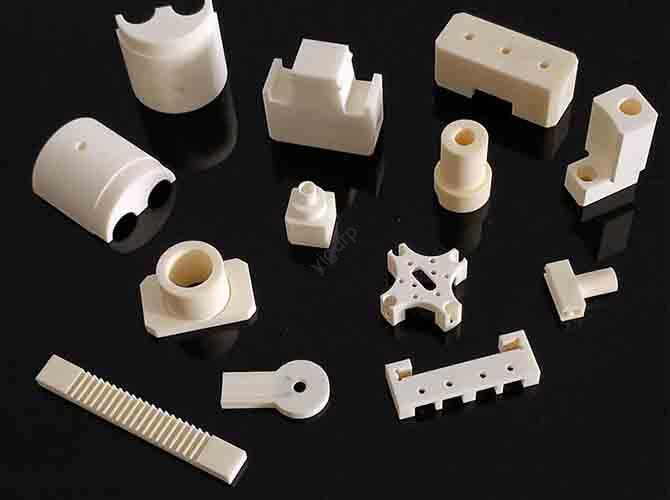
4. Real-World Time Scenarios
To make it concrete, here are common 3D printing projects and their typical times:
- Small Decor (per esempio., keychain, fridge magnet): 30 minutes–2 hours.
- Functional Parts (per esempio., phone case, small bracket): 2–6 hours.
- Medium Prototypes (per esempio., toy car, plant pot): 6–12 hours.
- Large Models (per esempio., storage box, big figurine): 12–48 hours.
- Industrial Prototypes (per esempio., parti aerospaziali): 24–72 hours (high accuracy and strength needed).
La prospettiva della tecnologia Yigu
Alla tecnologia Yigu, we know how long 3D printing takes is a top concern for users—time wasted on slow prints hurts productivity. Our solutions include a smart slicer tool with AI-powered time estimation (adjusts for real-world factors like printer stability) and high-speed printers (up to 150mm/s) that maintain quality. We also offer material bundles (per esempio., fast-print PLA) optimized for speed. For users, we recommend starting with our time-estimation guide to avoid overplanning. As 3D tech evolves, we’ll integrate faster extrusion systems to cut time further, making 3D printing more efficient for everyone.
Domande frequenti
1. Why is my print taking longer than the slicer’s estimate?
Slicers don’t account for real-world delays: printer warm-up, filament tangles, or automatic speed reductions for complex sections. Add 10–20% to the slicer’s time for a more accurate estimate. If it’s way longer, check for issues (per esempio., a clogged nozzle slowing extrusion).
2. Can I pause a long print (per esempio., 24 ore) and resume later?
SÌ! Most printers have a pause button. To avoid problems:
- Keep the build plate heated (prevents the print from detaching).
- Don’t move the printer or plate while paused.
- Resume within 24 ore (longer pauses can cause nozzle clogs).
3. Does using a different material change print time?
SÌ, but only slightly. PLA (easy to print) and PETG (slightly slower) have similar times for the same settings. Resin (used in SLA printers) is faster for small, detailed parts—e.g., a 5cm miniature takes 1–2 hours with resin vs. 3–4 hours with PLA. Metal powder (industriale) is slower—large parts take days.