Se sei un professionista dell'approvvigionamento che acquista parti di prototipi o un ingegnere di prodotto che perfeziona un nuovo progetto, comprensione CNC machining prototype processes is key to ensuring quality, velocità, ed efficienza in termini di costi. A differenza delle lavorazioni tradizionali, CNC (Controllo numerico computerizzato) la produzione di prototipi si basa su una precisa programmazione computerizzata per modellare i materiali, rendendola ideale per prototipi complessi o in volumi ridotti. Below is a step-by-step breakdown of the entire process, with real-world examples and data to help you apply these steps to your projects.
1. Part Selection: Choosing the Right Components for CNC Machining
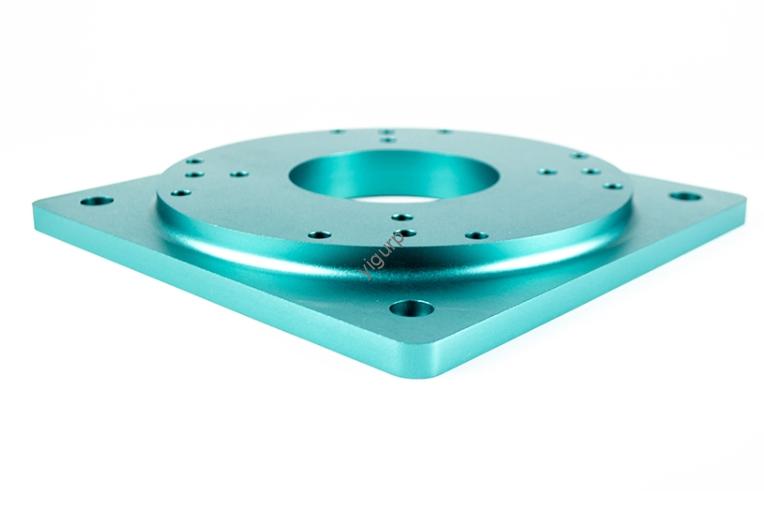
The first step in any CNC prototype project is selecting parts that truly benefit from CNC technology. Not all prototypes need CNC machining—simple parts (like basic plastic brackets) might be cheaper to make with 3D printing. But for parts requiring tight tolerances (per esempio., ±0,001 pollici) or high material strength (per esempio., aluminum alloy prototypes for aerospace), CNC is the better choice.
Esempio: A medical device company developing a surgical tool prototype needed a stainless steel component with a smooth, sterile surface and precise hole alignments. They chose CNC machining over 3D printing because 3D-printed parts often have layer lines that could trap bacteria, while CNC delivers a uniform finish.
Key Criteria for Part Selection:
| Fattore | Why It Matters for Prototypes | Ideal for CNC? |
| Tolerance Requirements | Tolleranze più strette (±0.0005–±0.005 inches) | SÌ |
| Material Hardness | Metalli (alluminio, acciaio) or rigid plastics (SBIRCIARE) | SÌ |
| Surface Finish Needs | Liscio, burr-free surfaces (Ra 0,8–3,2 μm) | SÌ |
| Design Complexity | Intricate features (per esempio., cavità interne, discussioni) | SÌ |
2. Process Analysis: Ensuring Your Design Is CNC-Ready
Once parts are selected, you’ll analyze the part’s 2D/3D drawings to confirm it’s programmable and that all geometric elements (like arcs, buchi, o smussi) sono chiari. This step avoids costly mistakes later—for example, a hidden undercut that CNC tools can’t reach.
Esempio: An automotive startup designed a prototype gear for an electric vehicle. During process analysis, engineers noticed the gear had a 0.5mm undercut that their CNC mill’s standard tool couldn’t access. They adjusted the design to a 1mm undercut (within the tool’s reach) instead of reordering a custom tool, risparmio 2 weeks of lead time.
Key Checks During Process Analysis:
- Are all dimensions labeled clearly (per esempio., diametro, profondità, angolo)?
- Do geometric features (per esempio., fillets, radii) match the CNC tool’s capabilities?
- Is the part’s design compatible with the chosen material (per esempio., no thin walls that could bend during machining)?
3. Progettazione del processo: Building a Roadmap for Machining
Process design is where you map out Come the CNC machine will make the prototype. This includes setting the machining sequence (which features to cut first), selecting tools, and defining cutting parameters (velocità, velocità di avanzamento, depth of cut).
Esempio: A consumer electronics company was making a prototype aluminum phone case. Their process design prioritized:
- Cutting the outer shape first (to secure the material in the CNC vice).
- Drilling camera and port holes (to avoid warping the case later).
- Adding a 0.2mm chamfer to edges (for a polished look).
Common Cutting Parameters for Prototype Materials:
| Materiale | Velocità del mandrino (giri al minuto) | Tasso di avanzamento (IPM) | Depth of Cut (pollici) |
| Alluminio 6061 | 3,000–6,000 | 50–200 | 0.1–0.25 |
| Acciaio inossidabile 304 | 1,000–3,000 | 20–80 | 0.05–0.15 |
| PEEK Plastic | 2,000–4,000 | 30–100 | 0.08–0.2 |
4. Mathematical Processing: Calculating Tool Paths
CNC machines follow exact coordinates to move tools—so you need to convert the part’s design into numerical data (X, Y, Z coordinates) for the machine’s controller. This step often uses CAD/CAM software (like SolidWorks or Mastercam) to generate tool paths and node coordinates (points where the tool changes direction).
Why It Matters: Even a small coordinate error can ruin a prototype. Per esempio, if a hole’s X-coordinate is off by 0.002 pollici, a prototype circuit board might not fit with other components.
5. Programmazione & Control Media Creation
Prossimo, you write a CNC program (using G-code, the standard language for CNC machines) based on the mathematical data. The program tells the machine when to start cutting, how fast to move, E when to change tools. You’ll also create control media—usually an electronic file (per esempio., USB drive) or cloud link— to send the program to the CNC machine.
Tip: For prototypes, keep programs simple. Avoid complex subroutines unless necessary—this makes it easier to fix errors during testing.
6. Program Validation: Catching Errors Before Machining
Never skip program validation! This step involves:
- Reviewing the G-code for typos (per esempio., a missing “G01” command for linear movement).
- Using simulation software (like CNC Simulator Pro) to “test run” the program—this shows the tool path on a screen without using real material.
Esempio: A robotics company caught a mistake during validation: their program told the tool to cut 0.5 inches deeper than the part’s thickness. Fixing the G-code took 1 hour—saving them from wasting a $200 aluminum block.
7. Trial Processing: Testing the First Prototype
Once the program is validated, you’ll run a trial with the actual material. This is your chance to check for issues like:
- Burrs on edges (fixed by adjusting the tool’s feed rate).
- Size discrepancies (fixed by tweaking coordinates).
- Surface finish flaws (fixed by changing the tool type).
Data Point: According to a 2024 survey of product engineers, 78% of CNC prototype projects require 1–2 trial runs to meet quality standards. This is normal—trial processing ensures the final prototype matches your design.
8. Process Finalization & Archiving
After the trial prototype passes inspections (per esempio., using a coordinate measuring machine, or CMM), you’ll finalize the process: document the G-code, tool list, cutting parameters, and inspection results. Archive these files so you can reuse them for future prototypes (per esempio., if you need to make 10 more of the same part) or modify them for design updates.
Beneficio: Archiving saves time—one aerospace supplier reported cutting 30% off their lead time for repeat prototypes by reusing archived CNC programs.
Yigu Technology’s Perspective on CNC Machining Prototypes
Alla tecnologia Yigu, we believe CNC machining prototypes are the bridge between design ideas and mass production. For procurement teams, our process ensures transparency—we share trial reports and archived files so you can verify quality. Per ingegneri di prodotto, we offer flexible adjustments during trial runs to refine designs without extra costs. Unlike generic CNC shops, we focus on prototype-specific needs: inversione di tendenza veloce (5–7 days for most parts) and tight tolerance control (down to ±0.0005 inches). This approach helps our clients launch products 20% più velocemente delle medie del settore.
Domande frequenti
- Q: How long does a CNC machining prototype take to make?
UN: Most prototypes take 5–10 days, a seconda della complessità. Parti semplici (per esempio., a small aluminum bracket) can be done in 3–5 days, while complex parts (per esempio., a multi-feature gear) may take 10–14 days (including trial runs).
- Q: Is CNC machining more expensive than 3D printing for prototypes?
UN: It depends on the material and size. For small plastic parts, 3D printing is cheaper (Spesso \(50–)200). For metal parts or parts with tight tolerances, CNC is more cost-effective (tipicamente \(100–)500) because it avoids post-processing costs (like sanding 3D-printed layers).
- Q: What materials are best for CNC machining prototypes?
UN: The top choices are aluminum (6061, 7075) for lightness and machinability, acciaio inossidabile (304, 316) per la durabilità, and PEEK plastic for high-temperature applications. These materials are easy to source and produce consistent prototype results.