Quando gli sviluppatori di prodotto e gli ingegneri hanno bisogno di parti prototipo che bilancino la durata, chiarezza, ed efficienza in termini di costi, CNC machining PET prototype parts emerge as a reliable solution. Polietilene tereftalato (ANIMALE DOMESTICO) è un materiale termoplastico versatile noto per la sua eccellente resistenza meccanica e stabilità chimica, che lo rende ideale per prototipi in settori come l'elettronica di consumo, dispositivi medici, e imballaggio. This guide walks you through everything from PET’s key benefits to real-world applications, helping you make informed decisions for your prototyping projects.
1. What Are CNC Machining PET Prototype Parts?
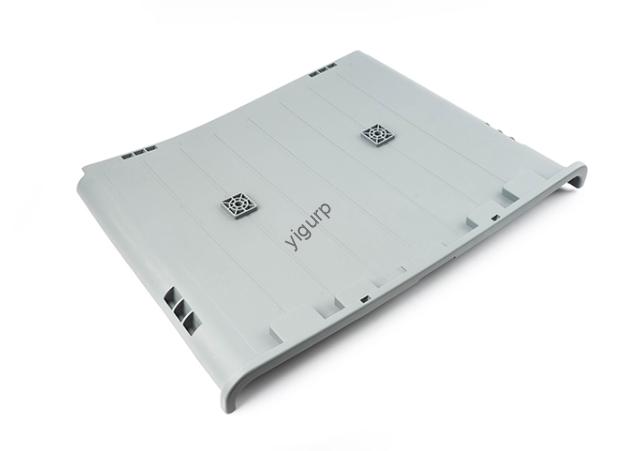
CNC machining PET prototype parts are physical prototypes crafted from PET plastic using Computer Numerical Control (CNC) tecnologia. Unlike additive methods like 3D printing, CNC machining uses a subtractive process: it carves the desired shape from a solid PET block, ensuring high precision and consistent quality.
Key Advantages of PET for Prototyping
PET stands out among prototyping materials for solving common challenges like cost, durabilità, e usabilità. Here’s why it’s a top choice:
- Efficacia in termini di costi: PET raw materials are more affordable than engineering plastics like PPS, making it ideal for low-budget prototype projects.
- Mechanical strength: Offers good tensile strength (fino a 70 MPa) e resistenza agli urti, suitable for testing functional parts like gear prototypes.
- Clarity option: Clear PET variants allow visual inspection of internal structures—perfect for medical device prototypes (per esempio., fluid flow components).
- Resistenza chimica: Resists water, alcoli, e acidi deboli, ensuring prototypes hold up in everyday testing environments.
- Ease of machining: PET’s low melting point (250-260°C) and machinability reduce tool wear, abbassando i costi di produzione.
2. Step-by-Step Process for CNC Machining PET Prototype Parts
Creating CNC machining PET prototype parts requires a structured approach to avoid errors like material melting or dimensional inaccuracies. Di seguito è riportato un dettaglio, actionable process with tools and tips:
| Fare un passo | Detailed Actions | Tools/Software Used | Critical Tips for Success |
| Progetto & Programmazione | 1. Create a 3D model of the prototype using CAD software. 2. Convert the model to G-code (istruzioni della macchina) tramite il software CAM. | CAD: SolidWorks, Autodesk Inventor CAM: Mastercam, Fusione 360 | Utilizzo parametric design to quickly adjust dimensions if your team requests changes. |
| Configurazione della macchina | 1. Select a CNC machine (3-axis for simple parts, 5-axis for complex shapes). 2. Secure the PET block to the worktable with clamps. | 3-asse CNC (per esempio., Haas TM-1) 5-asse CNC (per esempio., DMG MORI) | Utilizzo soft-jaw clamps to avoid damaging PET’s surface—especially critical for clear PET. |
| Lavorazione grezza | Remove excess PET material at high feed rates to reach the near-final shape. | Large endmills (8-12mm) Velocità di avanzamento: 600-900 mm/min | Keep cutting speed low (120-150 m/mio) to prevent PET from melting and gumming up tools. |
| Finitura | Use small tools for precise cuts to meet dimensional and surface quality requirements. | Small endmills (2-5mm) Velocità di avanzamento: 200-400 mm/min | Fare domanda a aria compressa (instead of liquid coolant) to keep PET parts dry and clean. |
| Post-trattamento | 1. Clean parts with isopropyl alcohol to remove chips. 2. Polish surfaces with 600-800 carta vetrata a grana. 3. Inspect dimensions with a CMM. | Ultrasonic cleaner Coordinate Measuring Machine (CMM) | For clear PET, utilizzare un polishing compound to restore transparency after machining. |
| Controllo qualità & Consegna | 1. Visually inspect for cracks, graffi, or deformities. 2. Verify tolerances (typically ±0.02mm for PET). 3. Package parts for shipping. | Calipers Visual inspection checklist | Document inspection results to share with your team for design validation. |
3. Casi di studio nel mondo reale: Parti prototipo in PET con lavorazione CNC
To illustrate how CNC machining PET prototype parts solve real problems, here are two industry examples:
Caso 1: Consumer Electronics Charger Housing Prototype
A startup developing a wireless charger needed a prototype housing that was lightweight, durevole, ed economico. Hanno scelto CNC machining PET prototype parts for these reasons:
- PET’s low cost fit their tight budget (5 prototypes cost under $200 totale).
- CNC machining ensured the housing’s USB port cutout had precise tolerances (±0,01 mm), so the port fit perfectly.
Risultato: The prototype passed drop tests (1.5m onto concrete) senza rompersi. The startup used the design to secure funding and moved to mass production—saving 3 weeks of development time.
Caso 2: Medical Fluid Reservoir Prototype
A medical device company needed a clear prototype reservoir to test fluid flow for a new insulin pump. CNC machining PET prototype parts were the solution because:
- Clear PET allowed engineers to visualize fluid movement during testing.
- PET’s chemical resistance meant it didn’t react with insulin or cleaning solutions.
Risultato: The prototype met FDA guidelines for biocompatibility. The company used the data to optimize the reservoir’s shape, reducing fluid waste by 15%.
4. CNC Machining PET vs. Other Prototyping Methods
Choosing the right prototyping method depends on your project’s needs. Below is a comparison of CNC machining PET with 3D printing (FDM) e stampaggio ad iniezione:
| Caratteristica | CNC Machining PET | 3D Stampa (FDM) | Stampaggio ad iniezione (ANIMALE DOMESTICO) |
| Tempi di consegna | 1-2 giorni | 4-8 ore | 2-3 settimane (tooling required) |
| Costo (1-5 Prototipi) | \(30-\)150 per parte | \(20-\)80 per parte | $800+ (costo degli utensili) |
| Tolleranza | ±0,02 mm (alta precisione) | ±0,1 mm (lower precision) | ±0,01 mm (alto, but inflexible) |
| Finitura superficiale | Liscio (Ra 1.2-1.8 µm) | Layer lines (Ra 3.5-5.0 µm) | Liscio (Ra 0.8-1.2 µm) |
| Ideale per | Funzionale, low-cost prototypes with tight tolerances | Veloce, simple prototypes (per esempio., parentesi) | Produzione di massa (1000+ parti) |
For most teams, CNC machining PET prototype parts strike the best balance between cost, precisione, and usability—especially for functional testing.
5. Yigu Technology’s Perspective on CNC Machining PET Prototype Parts
Alla tecnologia Yigu, we’ve helped 300+ clienti (dalle startup a Fortune 500 aziende) create CNC machining PET prototype parts. We recommend PET for projects where cost and speed matter without sacrificing quality. Our 3-axis CNC machines are optimized for PET: we use specialized endmills to prevent melting and offer 24-hour turnaround for urgent orders. For clear PET parts, our post-polishing process ensures transparency, critical for medical and electronics applications. Every PET prototype undergoes CMM inspection to meet your exact specifications—so you can trust the results for design validation.
Domande frequenti
1. How much does CNC machining a PET prototype part cost?
Cost depends on size and complexity: piccolo, parti semplici (per esempio., a 50x50mm bracket) costo \(30-\)50, while larger, parti complesse (per esempio., a 150x100mm medical reservoir) costo \(80-\)150. Quantity discounts apply for 10+ parti.
2. Can CNC machining PET prototype parts be used for food-contact applications?
SÌ! Food-grade PET (conforme alla FDA 21 CFR 177.1310) is available. We use food-safe cutting tools and cleaning processes to ensure parts meet food-contact standards—ideal for packaging prototypes.
3. What is the maximum size of a CNC machining PET prototype part?
Our standard CNC machines handle PET blocks up to 800mm x 600mm x 400mm. Per parti più grandi (per esempio., 1200mm x 800mm packaging prototypes), we offer custom setups with our 5-axis machines.