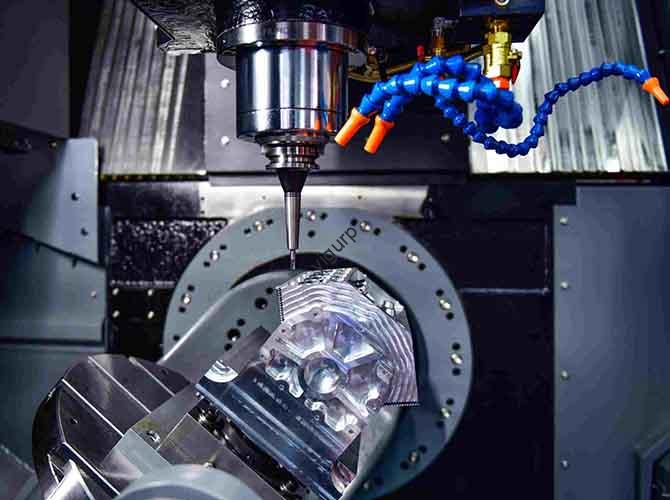
Pezzi sottili: generalmente definiti come parti con un rapporto lunghezza/diametro superiore 10:1 (per esempio., alberi, perni, o bastoncini sottili)—sono difficili da lavorare con i torni CNC. Loro stretti, la struttura lunga li rende soggetti a vibrazioni, deformazione, e scarsa precisione. Ma con il giusto approccio al design, programmazione, e fasi di lavorazione, puoi ottenere risultati coerenti, risultati di alta qualità. Questo articolo si rompe 5 fasi critiche Di CNC lathe processing for slender workpieces, fixing common pain points with actionable solutions.
1. Fase di progettazione: Lay the Foundation for Easy Machining
A poorly designed slender workpiece can turn machining into a nightmare—even with the best CNC lathe. The goal here is to prioritize producibilità without sacrificing function.
Common Design Problems & Correzioni
| Design Problem | Why It Hurts Machining | Soluzione |
| Overly complex geometries (per esempio., tiny grooves, sharp angles) | Creates hard-to-reach areas; increases tool vibration | Simplify shapes: Replace sharp angles with 0.5–1mm radii; avoid grooves narrower than 2mm (too small for standard tools). |
| Unnecessary details (per esempio., non-functional decorative cuts) | Adds machining time; raises risk of workpiece bending | Remove non-essential features: Only keep details required for the part’s use (per esempio., a shaft only needs keyways for assembly). |
| Inconsistent diameter along the length | Causes uneven tool pressure; leads to deformation | Use gradual diameter changes: Limit diameter shifts to 5% per 10mm length (per esempio., from 10mm to 9.5mm over 10mm). |
Key Question: What if my part esigenze a complex feature (per esempio., a thin slot)?
Use a two-step approach: Machine the basic slender shape first (to reduce vibration), then add the complex feature with a specialized small-diameter tool (3mm or less). This minimizes stress on the workpiece.
2. Programming Phase: Avoid Errors That Break Parts or Machines
Programming mistakes for slender workpieces aren’t just costly—they can bend the part or damage the CNC lathe’s spindle. L'attenzione qui è su program correctness E tool path efficiency.
3 Must-Follow Programming Rules
- Use Slow Feed Rates for Initial Cuts: Slender workpieces vibrate easily at high feed rates (over 100mm/min). Start with feed rates of 50–80mm/min for roughing cuts—this reduces tool pressure and keeps the part stable.
- Add Tool Retraction Pauses: When moving the tool from one section to another, pause for 0.5 seconds before retracting. This prevents sudden pulls that could bend the workpiece (like yanking a thin stick too fast).
- Test the Program with a Simulation: Never run a new program on a real workpiece first. Use CNC simulation software (per esempio., Siemens NX, Fanuc CNC Simulator) to check for collisions or abnormal tool movements. A single simulation can save you from wasting a $50 slender part.
Esempio: A programmer once skipped simulation and used a feed rate of 150mm/min for a 8mm-diameter, 100mm-long shaft. The tool vibrated so much that the shaft bent 2mm—rendering it useless. Simulating the program would have caught the high feed rate and prevented the mistake.
3. Machine Tool Preparation Stage: Set Parameters for Precision
Even a well-designed part and correct program will fail if the CNC lathe’s parameters are wrong. The key here is to match parameters to the workpiece material (per esempio., aluminum vs. acciaio) and its slenderness.
Parameter Settings by Material (for Slender Workpieces)
| Materiale | Velocità del mandrino (giri al minuto) | Cutting Depth (mm) | Coolant Type |
| Alluminio (6061) | 2000–3000 | 1–1,5 | Water-soluble coolant (impedisce il surriscaldamento) |
| Acciaio al carbonio (1045) | 1200–1800 | 0.8–1.2 | Oil-based coolant (riduce l'usura dell'utensile) |
| Acciaio inossidabile (304) | 800–1200 | 0.5–1.0 | Refrigerante ad alta pressione (cools the part fast) |
Per Suggerimento: Always check the lathe’s tailstock alignment. A misaligned tailstock (off by even 0.1mm) will cause the slender workpiece to taper (thicker on one end, thinner on the other). Use a dial indicator to align the tailstock before starting—this takes 5 minutes but saves hours of rework.
4. Processing Stage: Choose Tools & Maintain Them for Quality
Tool selection and wear are major causes of poor surface quality and workpiece deformation in slender part machining. The goal here is to pick the right tool E replace it before it fails.
Tool Selection Guide for Slender Workpieces
| Tipo di strumento | Ideale per | Perché funziona | Replacement Interval |
| Carbide Inserts (TNMG 160404) | Roughing cuts (removing excess material) | Difficile, resistente al calore; handles high cutting forces | Every 20–30 parts |
| Acciaio ad alta velocità (HSS) Utensili | Finishing cuts (superficie liscia) | Flessibile; reduces vibration on thin parts | Every 15–20 parts |
| Anti-Vibration Tools | Extra-slender parts (length-to-diameter > 15:1) | Has built-in dampeners to stop vibration | Every 25–35 parts |
Causa & Effetto: If you use a worn carbide insert (beyond its replacement interval), it will pull at the workpiece instead of cutting cleanly. This leads to:
- Finitura superficiale ruvida (Ra > 3.2μm, contro. the target Ra < 1.6µm)
- Workpiece deformation (bending or twisting)
- Longer machining time (the tool has to make more passes to fix errors)
5. Quality Control Stage: Ensure Consistency Batch After Batch
Without proper quality checks, even a few bad slender parts can ruin a whole batch. L'attenzione qui è su monitoraggio in tempo reale E systematic testing.
3-Step Quality Control Process
- Controlli in corso: After every 5 parti, measure the diameter and straightness with a micrometer (precisione: ±0,001 mm) and a straightedge. If a part is off by 0.05mm, adjust the lathe’s feed rate or spindle speed immediately.
- Post-Machining Testing: Per parti critiche (per esempio., alberi motore), use a coordinate measuring machine (CMM) to check for dimensional errors. A CMM can detect even 0.002mm deviations—smaller than a human hair.
- Record Keeping: Log every batch’s parameters (materiale, velocità, velocità di avanzamento) and quality results. If you have issues later (per esempio., a batch of bent parts), you can look back and identify what changed (per esempio., a new tool brand).
La prospettiva della tecnologia Yigu
Alla tecnologia Yigu, we’ve helped hundreds of clients solve slender workpiece machining issues. The biggest mistake we see is skipping pre-machining checks—like tailstock alignment or tool wear tests. Our CNC lathes come with built-in “slender part modes” that auto-adjust spindle speed and feed rate based on the part’s length-to-diameter ratio. We also recommend using our anti-vibration tool holders, which reduce vibration by 60% compared to standard holders. Remember: Machining slender parts isn’t about “forcing” the lathe—it’s about matching every step to the part’s unique needs.
Domande frequenti
- Q: My slender workpiece bends during machining—what’s the first thing I should check?
UN: Check the tailstock pressure. Too much pressure (over 50N) pushes the workpiece, causing bending; too little (under 20N) leads to vibration. Adjust it to 30–40N for most materials.
- Q: Can I machine a slender workpiece (length-to-diameter = 20:1) with a standard CNC lathe?
UN: SÌ, but you’ll need two things: an anti-vibration tool holder and a steady rest (a device that supports the workpiece mid-length). The steady rest prevents the part from wobbling—critical for ratios over 15:1.
- Q: Why does my stainless steel slender part have a rough surface, even with a new tool?
UN: Stainless steel generates more heat during cutting. If your coolant flow is too low (under 5L/min), the tool overheats and leaves a rough finish. Increase coolant flow to 8–10L/min and use high-pressure coolant for best results.