Se sei un ingegnere di prodotto o un professionista degli acquisti che lavora allo sviluppo di robot, sai quanto è critico ABS robot prototype proofing is to cut costs and avoid design flaws. Questa guida analizza ogni fase della creazione di un prototipo affidabile di robot ABS, con esempi reali, dati, e suggerimenti per risolvere le sfide comuni.
1. Why Choose ABS Plastic for Robot Prototypes?
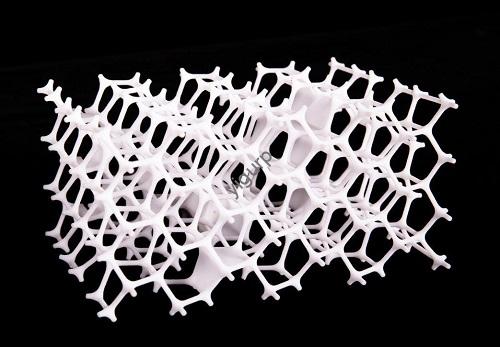
ABS (Acrilonitrile Butadiene Stirene) is the top pick for ABS robot prototype progetti, and for good reason. Its unique mix of strength and flexibility solves key pain points engineers face during early-stage testing.
Key Advantages of ABS for Robot Prototypes
| Vantaggio | Benefit for Robot Prototypes | Esempio del mondo reale |
| Elevata resistenza agli urti | Withstands accidental drops during testing (fino a 15 kJ/m² impact strength) | A logistics robot prototype survived 10+ drop tests from 1.2m without cracking. |
| Easy Machinability | Cuts 30% faster than materials like PC on CNC machines | A 5-axis CNC finished an ABS robot arm part in 45 min (contro. 60 mins for PC). |
| Versatile Surface Treatments | Accepts spraying, galvanica, or silk screening | An automotive robot prototype got a matte black spray finish to match final product specs. |
| Conveniente | 20-30% cheaper than high-performance plastics like POM | A startup reduced prototype costs by $800 per unit using ABS instead of POM. |
When to Use Other Materials
While ABS is ideal for most cases, sometimes you’ll need alternatives:
- computer (Policarbonato): For prototypes needing high heat resistance (per esempio., robot parts near motors).
- PMMA (Acrilico): Per parti trasparenti (per esempio., robot vision system covers).
- POM (Acetale): For high-wear parts (per esempio., robot gears)—but expect higher costs.
2. Step-by-Step ABS Robot Prototype Proofing Process
Creating a high-quality ABS robot prototype requires strict adherence to 5 core steps. Below is a detailed breakdown with actionable tips.
Fare un passo 1: 3D Design & Analysis
Primo, turn your concept into a precise 3D model using software like SolidWorks O UG NX. This stage is make-or-break for avoiding costly reworks.
- Action Tip: Use simulation tools (per esempio., ANSYS) to test stress points. Per esempio, a robotics team used ANSYS to simulate a robot gripper’s pressure—they adjusted the design to fix a weak spot before machining, risparmio 2 weeks of rework.
- Key Requirement: Ensure the model’s tolerance is ±0.05mm for critical parts (per esempio., robot joints) to match real-world performance.
Fare un passo 2: Programmazione CAM
Prossimo, convert your 3D model into CNC machine code with tools like Mastercam O SolidCam.
- Critical Check: Test the program in a simulator (per esempio., Vericut) to avoid collisions. A manufacturer once skipped this step—their CNC tool crashed into an ABS part, wasting $500 in material and 8 hours of production.
- Efficiency Hack: Optimize tool paths to reduce machining time by 15-20% (per esempio., using a spiral cut for curved ABS surfaces).
Fare un passo 3: Lavorazione CNC
Use 3-axis, 4-asse, or 5-axis CNC machines to cut the ABS material. For complex ABS robot prototype parti (per esempio., articulated arms), 5-axis machines are best.
- Real Data: A 5-axis CNC machine can machine an ABS robot torso (con 12 superfici curve) In 2.5 hours with an accuracy of ±0.02mm.
- Monitoring Tool: Utilizzare un Macchina di misura a coordinate (CMM) to check part dimensions mid-process. This ensures no part deviates from design specs.
Fare un passo 4: Post-elaborazione
Give your ABS prototype a professional finish and boost its durability with these steps:
- Sbavatura: Rimuovere gli spigoli vivi (critical for robot parts that interact with humans).
- Trattamento superficiale: Apply oil spraying (per la resistenza alla corrosione) or UV treatment (per la protezione dai graffi).
- Serigrafia: Add labels (per esempio., “Emergency Stop” on robot controls) for usability testing.
- Esempio: A medical robot prototype got a biocompatible spray finish to meet FDA testing requirements.
Fare un passo 5: Assemblea & Test funzionali
Put all parts together and test if the prototype works as intended.
- Must-Test Functions:
- Operation stability (run the robot for 24 hours non-stop).
- Measurement accuracy (per esempio., a pick-and-place robot should hit targets within ±0.1mm).
- Caso di studio: A warehouse robot prototype failed initial stability tests—engineers found a loose ABS joint, fixed it, and passed testing 3 days later.
3. Controllo qualità: Ensure Your ABS Prototype Meets Standards
To avoid delivering a faulty ABS robot prototype, follow strict quality control (Controllo qualità) processi.
Key QC Measures
- Multiple Checkpoints: Test parts after machining, post-elaborazione, e assemblaggio. Per esempio:
- Check ABS part dimensions with a 2.5D projector after CNC machining.
- Inspect surface finish for scratches or uneven spraying.
- Verify assembly alignment with a laser tracker.
- Certificazioni: Follow ISO 9001 standards to ensure traceability. Every ABS part should have a batch number so you can trace issues back to the source.
Yigu Technology’s View on ABS Robot Prototype
Alla tecnologia Yigu, we’ve supported 500+ robotics teams with ABS robot prototype soluzioni. We believe ABS is unmatched for early-stage testing because it balances performance and cost—helping teams validate designs fast without overspending. Our 5-axis CNC machining centers and ISO 9001 QC system ensure every ABS prototype meets ±0.02mm accuracy, and we often suggest surface treatments like UV coating to extend prototype lifespan for longer testing cycles. Per gli ingegneri, the right ABS prototype isn’t just a model—it’s a tool to de-risk full-scale production.
FAQ About ABS Robot Prototype
- Q: How long does it take to make an ABS robot prototype?
UN: For a simple prototype (per esempio., a robot gripper), it takes 3-5 giorni. For complex ones (per esempio., a 6-axis robot arm), expect 7-10 giorni (compreso il disegno, lavorazione, e test).
- Q: Can ABS robot prototypes be used for long-term testing?
UN: Yes—with proper post-processing (per esempio., UV treatment), ABS prototypes can withstand 1,000+ hours of continuous testing. For longer cycles (6+ mesi), we recommend adding a protective coating.
- Q: How much does an ABS robot prototype cost compared to other materials?
UN: In media, an ABS prototype is 20-30% cheaper than PC or POM. Per esempio, a small robot part costs \(50-\)100 in ABS, contro. \(70-\)140 in PC.