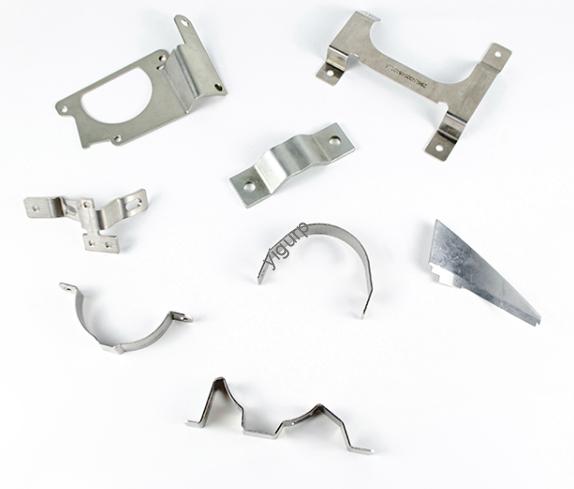
Per ingegneri di prodotto e team di approvvigionamento nel settore della strumentazione, ABS instrument prototype model proofing is a make-or-break step in new product development. ABS (Acrilonitrile Butadiene Stirene) è la spina dorsale di questi prototipi: la sua miscela di robustezza, facile lavorazione, e la versatilità lo rende perfetto per testare qualsiasi cosa, dai sensori industriali agli analizzatori di laboratorio. Sotto, we break down the key steps of ABS prototype proofing, with real cases and data to help you avoid costly delays and ensure your prototype meets design goals.
1. Selezione dei materiali: Choosing ABS and Complementary Materials
The first step to a reliable ABS instrument prototype is picking the right materials. ABS is the primary choice, but pairing it with other polymers can boost performance for specific instrument needs.
Materials for ABS Instrument Prototype Proofing
| Materiale | Proprietà chiave | Ideal Instrument Uses |
| Plastica ABS | Elevata resistenza agli urti (20 kj /), good tensile strength (40 MPa), easy to machine/paint | Prototype casings for pressure gauges, control panels for flow meters |
| computer (Policarbonato) | Resistenza al calore superiore (fino a 135°C), elevata trasparenza | Heat-exposed parts of temperature sensors, display windows for analyzers |
| PMMA (Acrilico) | 92% trasmissione della luce, resistente ai graffi | Viewports for laboratory centrifuges |
| PU (Poliuretano) | Flessibile, moldable for small batches | Sealing gaskets for leak-test instruments |
Real Case: A manufacturer building a prototype for a portable pH meter initially used pure ABS for the body. But the device’s screen window needed better transparency—adding a 2mm PMMA layer to the ABS casing solved the issue, without compromising the prototype’s durability.
Always match materials to your instrument’s function: For a prototype of a high-temperature industrial sensor, mix ABS with 30% PC to boost heat resistance.
2. Fase di progettazione: Laying the Groundwork for Precision
A flawed design can ruin even the best ABS prototype. This phase ensures your ABS instrument prototype matches your intended functionality.
Two Critical Design Steps:
- 3D Model Creation: Use software like SolidWorks, UG NX, or Catia to build a detailed 3D model. Include every detail—from the size of screw holes in an ABS sensor bracket to the curve of a handheld instrument’s grip. A 0.1mm error in the model can lead to misaligned parts later.
- Design Analysis: Use simulation tools to test stress, deformazione, e durata. Per esempio, an ABS prototype of a heavy-duty industrial scale was tested for how much weight it could support before cracking. The analysis revealed a weak spot in the base—reinforcing it early saved 4 weeks of rework.
Industry data shows: 70% of prototype rejections stem from untested designs. Non saltare questo passaggio!
3. Programming Phase: Preparing for CNC Machining
Clear programming ensures your CNC machine shapes the ABS material accurately into your ABS instrument prototype.
Key Programming Steps:
- Programmazione CAM: Convert your 3D model into CNC-readable code using tools like Mastercam or SolidCam. For an ABS prototype of a gas detector, the code will specify where to cut sensor ports and how smooth to make the outer surface.
- Program Testing: Use simulation software to check for errors (per esempio., collisioni degli utensili). A European instrumentation firm once found a collision risk in their code—fixing it before machining prevented $2,500 in wasted ABS material and 3 days of delays.
This phase takes 1–2 days on average but reduces machining errors by 65%.
4. Processing Stage: Shaping the ABS Prototype
CNC machining is the workhorse here, turning raw ABS material into a functional ABS instrument prototype.
Lavorazione & Monitoring Tips:
- Choose the Right CNC Machine: Use 3-axis machines for simple parts (per esempio., ABS sensor mounts) and 5-axis machines for complex shapes (per esempio., curved ABS casings for handheld instruments). 5-axis machining cuts production time by 35% for intricate designs.
- Real-Time Measurement: Use tools like coordinate measuring machines (CMM) or 2.5D projectors to check dimensions as you go. For an ABS prototype of a liquid level sensor, CMMs ensure the measurement tube is exactly 10mm in diameter—critical for accurate sensor readings.
Real Case: A US-based firm used 5-axis machining for an ABS prototype of a water quality analyzer. The prototype met all size requirements on the first try, avoiding 2 weeks of rework.
5. Post-Processing Stage: Polishing the Prototype
Post-processing makes your ABS instrument prototype look and perform like the final product.
Essential Post-Processing Steps:
- Sbavatura: Use 200–400 grit sandpaper to smooth knife marks and burrs. An ABS prototype of a voltmeter once had sharp edges that could scratch users—deburring fixed this in 15 minuti.
- Trattamento superficiale: Customize based on needs:
- Pittura: Use industrial-grade paint for ABS casings (per esempio., heat-resistant paint for high-temperature instrument prototypes).
- Silk Screen Printing: Add labels (per esempio., “Power” or “Calibrate”) to ABS control panels.
- Galvanotecnica: Add a metal finish for parts that need conductivity (per esempio., ABS connector ports on data loggers).
6. Assembly Testing: Ensuring Functionality
Even a well-machined prototype fails if it doesn’t assemble or work correctly. This phase validates your ABS instrument prototype for real use.
Must-Do Tests:
- Test Assembly: Put all parts (per esempio., ABS casing + internal electronics) together. A Chinese instrumentation brand found their ABS prototype of a humidity sensor had a loose circuit board—adjusting the ABS mounting slots fixed it.
- Test funzionali: Simula l'uso nel mondo reale:
- For an ABS prototype of a flow meter: Test if it measures liquid flow accurately.
- For a handheld ABS instrument: Check if the grip is comfortable and buttons work reliably.
85% of successful instrumentation launches include 2+ rounds of functional testing on prototypes.
7. Controllo qualità: Meeting Industry Standards
Strict quality control ensures your ABS instrument prototype meets the instrumentation industry’s high standards.
Quality Steps:
- Multiple Checkpoints: Test materials, progetto, lavorazione, e assemblaggio. Substandard parts are reworked immediately.
- Follow Certifications: Adhere to ISO 9001 (qualità generale) o ISO 13485 (for medical instruments). These standards ensure traceability—if a problem arises, you can pinpoint where it happened.
La prospettiva della tecnologia Yigu
Alla tecnologia Yigu, we’ve supported 400+ instrumentation brands with ABS instrument prototype model proofing. We believe success lies in balancing precision and efficiency: using 5-axis CNC for complex parts cuts lead times, while ISO 9001 checks guarantee quality. We always prioritize design analysis—this saves clients time and reduces rework. For ABS prototypes, every step matters, and our process ensures your prototype is ready for testing and mass production.
Domande frequenti
- Q: How long does ABS instrument prototype model proofing take?
UN: Typically 5–10 days. Parti semplici (per esempio., ABS sensor brackets) take 5 giorni, while complex prototypes (per esempio., curved ABS instrument casings) take 10 days with 5-axis machining.
- Q: Can ABS prototypes be reused for multiple tests?
UN: Yes—ABS’s high impact resistance lets it withstand 8–12 rounds of functional testing (per esempio., assembly/disassembly, simulated use) before showing wear.
- Q: Is ABS more cost-effective than PC for instrument prototypes?
UN: Yes—ABS costs ~30% less than PC. It’s ideal for prototypes where extreme heat resistance isn’t needed (per esempio., room-temperature sensors). For heat-exposed parts, mix ABS with PC to balance cost and performance.