Quando si tratta di 3Stampa D with plastic powders—especially for creating detailed prototypes or lightweight parts—how do you ensure you’re using 3D printing PS powder correctly? PS (Polistirolo) la polvere è una scelta popolare per tecnologie come SLS (Sinterizzazione laser selettiva) grazie al suo basso costo e alla buona stampabilità, ma richiede una gestione specifica, magazzinaggio, and parameter tuning to avoid failures. This guide breaks down every critical step—from material selection to post-processing—solving common pain points and helping you achieve consistent, stampe di alta qualità.
1. What Is 3D Printing PS Powder?
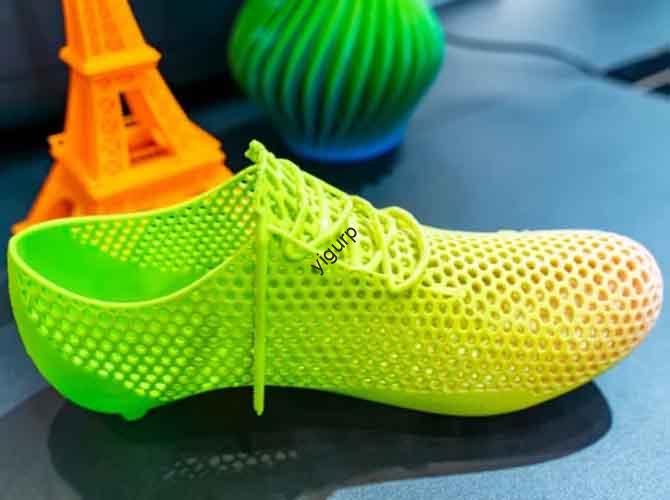
3D printing PS powder is a fine, thermoplastic powder made from polystyrene—optimized for additive manufacturing technologies like SLS and MJF (Fusione multigetto). Unlike filament-based PLA or ABS, PS powder is fused layer by layer using a laser or heat source, rendendolo ideale per complessi, parti cave (per esempio., modelli architettonici, custom packaging inserts) that would be hard to print with FDM.
Think of PS powder like baking flour: just as flour needs the right consistency and storage to make good bread, PS powder requires specific particle size and dryness to print well. Per esempio, a PS powder with uneven particle sizes (some too large, some too small) will spread inconsistently on the print bed—leading to gaps or weak layers in the final part.
2. Key Considerations for 3D Printing PS Powder (Before You Start)
Before loading PS powder into your printer, address these four critical factors to avoid costly mistakes:
2.1 Choose the Right PS Powder for Your Printer
Not all PS powders are compatible with every 3D printer. Use this table to match powder specs to your machine’s requirements:
| Powder Specification | Typical Range for 3D Printing | Why It Matters | Example Compatibility Issue |
|---|---|---|---|
| Particle Size | 50–100 µm (micrometri) | Powders too large (>100 µm) won’t fuse evenly; too small (<50 µm) clump easily. | A printer designed for 60–80 μm powder will struggle with 120 μm PS powder—leading to rough part surfaces. |
| Particle Shape | Spherical or near-spherical | Spherical particles spread smoothly on the bed; irregular shapes cause clumping. | Irregular PS powder particles create uneven layers, making a 3D-printed cup leaky. |
| Punto di fusione | 150–180°C | Must match your printer’s laser/heat source temperature (SLS printers typically operate at 160–170°C for PS). | A PS powder with a 190°C melting point will not fuse properly in a 170°C SLS printer. |
| Moisture Content | <0.1% (dry powder) | Moisture causes bubbles during printing—weakening parts and ruining surface finish. | A PS powder stored in a humid closet (umidità >0.5%) will print with tiny holes in the layers. |
Pro Tip: Always check your printer’s manual for recommended PS powder specs—most SLS printers (per esempio., Formlabs Fuse 1) list approved powder brands and parameters.
2.2 Store PS Powder Correctly (Prevent Degradation)
PS powder is sensitive to moisture, Calore, and sunlight—poor storage ruins its printability. Follow these storage rules:
- Ambiente: Keep powder in a dry, cool room (temperatura: 15–25°C; umidità: <30%). Use a dehumidifier if your space is humid.
- Containers: Store powder in airtight, opaque plastic containers (per esempio., sealed buckets with desiccant packs). Opaque containers block sunlight (which causes PS to become brittle).
- Shelf Life: Unopened PS powder lasts 6–12 months; opened powder lasts 3–6 months (even in airtight containers). Mark containers with “open date” to avoid using expired powder.
Caso di studio: A design studio stored PS powder in a garage (umidità: 60%) per 2 mesi. When they tried to print, the powder clumped so badly it jammed the printer’s recoater arm—costing $200 in repairs and 3 days of downtime.
2.3 Prioritize Personal Protection (Safety First)
PS powder is fine and lightweight—easy to inhale or get on skin. Always wear the following PPE (Personal Protective Equipment):
- N95 or FFP2 Mask: Prevents inhalation of powder particles (long-term inhalation can irritate the lungs).
- Nitrile Gloves: Stops powder from absorbing into skin (PS can cause dryness or mild irritation for sensitive skin).
- Safety Goggles: Protects eyes from powder dust (even a small amount in the eye causes discomfort).
Rule of Thumb: Never handle PS powder in a room without ventilation—open windows or use an exhaust fan to keep air moving.
3. Step-by-Step 3D Printing Process with PS Powder
Follow this linear workflow to ensure your PS powder prints come out smooth, forte, and error-free:
Fare un passo 1: Prepare the Printer & Bed
- Clean the Print Bed: Wipe the bed with a dry, lint-free cloth to remove leftover powder from previous prints. Even a small amount of old powder can cause new layers to stick unevenly.
- Calibrate the Recoater: Adjust the recoater arm (which spreads powder) to ensure it lays a uniform layer (50–100 μm thick—matching your powder’s particle size). Use the printer’s calibration tool to check layer height.
- Preheat the Chamber: Set the printer’s chamber temperature to 10–20°C below PS’s melting point (per esempio., 150°C for a 160°C melting point powder). This preheats the powder, making it easier to fuse with the laser.
Fare un passo 2: Load & Spread PS Powder
- Load Powder into Hopper: Pour dry PS powder into the printer’s hopper—do not overfill (fill to 80% capacity to avoid jamming). Tap the hopper gently to settle the powder.
- First Layer Spread: Let the recoater arm spread the first layer of powder on the bed. Check the printer’s camera (if available) to ensure the layer is even—no gaps or clumps. If there are gaps, stop the printer, clean the bed, and reload powder.
Fare un passo 3: Optimize Printing Parameters (Critical for Quality)
PS powder requires specific parameters to fuse properly without warping or burning. Use these recommended settings (tested for SLS printers):
| Parametro | Recommendation for PS Powder | Perché funziona |
|---|---|---|
| Laser Power | 10–20 W (adjust based on powder thickness) | Too much power (>20 W) burns PS; too little (<10 W) leaves powder unfused. |
| Scan Speed | 1000–2000 mm/s | Balances fusion speed and part strength—faster speeds for thin parts, slower for thick parts. |
| Spessore dello strato | 50–100 µm (match powder particle size) | Thicker layers (>100 µm) reduce detail; thinner layers (<50 µm) increase print time. |
| Hatch Spacing | 0.1–0,2 mm | Ensures overlapping laser scans—no gaps between fused areas. |
Esempio: Printing a 5cm x 5cm PS prototype with 80 μm powder: Set laser power to 15 W, scan speed to 1500 mm/s, layer thickness to 80 µm, and hatch spacing to 0.15 mm. This setup produces a strong part with smooth surfaces.
Fare un passo 4: Post-elaborazione (Termina la parte)
Dopo la stampa, PS parts need post-processing to remove excess powder and improve quality:
- Depowdering: Use a soft brush or compressed air (low pressure: 2–3 bar) to blow excess powder off the part. Collect leftover powder (if clean) per il riutilizzo (sift it through a 100 μm sieve first to remove clumps).
- Levigatura: For rough surfaces, sand the part with 400–800 grit sandpaper. Sand in circular motions—PS is soft, so avoid pressing too hard (this can deform the part).
- Lucidatura (Opzionale): For cosmetic parts (per esempio., display models), apply a small amount of acrylic polish to a cloth and buff the surface—this creates a slight shine without damaging the PS.
4. Common 3D Printing PS Powder Issues & Soluzioni
Even with proper prep, issues can arise. Here’s how to fix the most frequent problems:
| Issue | Cause | Soluzione |
|---|---|---|
| Part Cracks After Printing | PS powder was too moist (caused bubbles during fusion); laser power too low (weak layer bonds). | Dry powder in a 60°C oven for 2–4 hours; increase laser power by 2–3 W. |
| Powder Clumps in the Hopper | Powder stored in humid conditions; expired powder (degraded particles stick together). | Discard expired powder; store new powder with desiccant packs; sift clumpy powder through a 100 μm sieve (only reuse if sifted). |
| Uneven Surface Finish | Recoater arm not calibrated (uneven powder layers); laser scan speed too fast. | Recalibrate the recoater to ensure 50–100 μm layer height; reduce scan speed by 200–300 mm/s. |
5. Yigu Technology’s Perspective on 3D Printing PS Powder
Alla tecnologia Yigu, we’ve helped 120+ clients—from design studios to small manufacturers—optimize3D printing PS powder flussi di lavoro. The biggest mistake we see? Skipping powder drying—moisture is the #1 cause of PS print failures, yet many users overlook this step.
Our pro tip: For clients printing high-volume PS parts (per esempio., 50+ prototypes weekly), we recommend a dedicated powder drying station (maintains 0.05% contenuto di umidità) and sieve system—this cuts defect rates by 70% and extends powder reuse by 2x. We also provide custom parameter presets for popular SLS printers, ensuring clients get consistent results without trial-and-error. As PS powder blends (per esempio., PS+glass fiber for strength) grow in use, we’re updating our guides to help users leverage these new materials.
Domande frequenti: Your Top 3D Printing PS Powder Questions Answered
Q1: Can I reuse leftover 3D printing PS powder?
A1: Yes—if it’s clean and dry. After depowdering, sift the leftover powder through a 100 μm sieve to remove clumps or debris. Mix reused powder with new powder at a 1:1 ratio (reused powder loses some printability after 2–3 uses). Never reuse powder that’s discolored (sign of degradation) or has foreign particles.
Q2: What’s the difference between 3D printing PS powder and regular polystyrene?
A2: Regular polystyrene (per esempio., plastic cups) is a solid material, while 3D printing PS powder is a fine, spherical powder optimized for layer-by-layer fusion. Regular polystyrene also has larger particle sizes (too big for 3D printing) and higher moisture content—using it in a 3D printer will cause jams and failed prints.
Q3: Can I use 3D printing PS powder in an FDM printer?
A3: No—FDM printers use filament, not powder. PS powder requires SLS, mjf, or other powder-based 3D printing technologies that use heat/lasers to fuse powder layers. Putting PS powder in an FDM printer will clog the nozzle and damage the machine.