Sono finiti i giorni del complesso, produzione in più fasi che richiede settimane per trasformare un progetto in una parte fisica. IL 3D printing one-step process has changed the game: trasforma un 3D digitale (CAD) modellare direttamente in un prototipo tangibile o in una parte per l'uso finale, senza strumenti aggiuntivi, nessuna catena di montaggio, non ci sono lunghe attese. Whether you’re a small business making prototypes or a manufacturer scaling production, this guide will show you how to leverage the one-step process to save time, tagliare i costi, ed evitare le trappole comuni.
1. What Is the 3D Printing One-Step Process?
IL 3D printing one-step process is exactly what it sounds like: a single manufacturing stage that turns a digital design into a physical object. A differenza dei metodi tradizionali (come lo stampaggio ad iniezione, which requires creating molds first, o lavorazione, which involves cutting and shaping material), 3D printing builds parts layer by layer directly from the CAD file.
How It Works in Simple Terms
- Progetto: You create or download a 3D CAD model (using software like Fusion 360 or Tinkercad).
- Preparare: You slice the model into thin layers (using software like Cura) and send the file to your 3D printer.
- Print: The printer deposits or fuses material (like filament or powder) layer by layer to build the part.
- Fine (Opzionale): For some projects, you might add simple post-processing (like sanding), but this is often minimal—unlike traditional manufacturing’s multiple finishing steps.
The key here is that there’s no “middle step” (like mold-making). This is why the one-step process is so fast and cost-effective, especially for small batches or custom parts.
2. Why Choose the One-Step Process? 4 Vantaggi principali
The 3D printing one-step process solves major pain points of traditional manufacturing. Here’s how it helps users:
1. Faster Turnaround Times
Traditional manufacturing can take 2–4 weeks to make a prototype (per esempio., creating a mold for injection molding takes 1–2 weeks alone). With the one-step process, you can print a part in hours to days.
Esempio: A startup in Berlin needed a prototype for a new phone case. Using FDM (a one-step technology), they uploaded their CAD model at 9 AM and had a physical prototype by 3 PM the same day. With traditional machining, this would have taken 5–7 days.
2. Lower Costs for Small Batches
Traditional methods have high upfront costs (per esempio., a mold for injection molding can cost \(1,000–)10,000). The one-step process eliminates these costs—you only pay for the material and print time.
3. Libertà di progettazione
The one-step process lets you print complex designs (like hollow parts, strutture interne, or organic shapes) that are impossible or expensive with traditional methods. You don’t have to “simplify” your design to fit a mold or machining tool.
4. Meno rifiuti
Traditional manufacturing cuts or grinds material, leading to 30–50% waste. The one-step process uses only the material needed to build the part, riducendo i rifiuti a 5–10% (and many materials are recyclable).
3. Superiore 3 One-Step 3D Printing Technologies (Compared)
Not all one-step 3D printing technologies are the same. The best choice depends on your project (per esempio., prototype vs. end-use part, bilancio, material needs). Below is a breakdown of the three most popular, cost-effective options—based on data from Xometry, a leading 3D printing service.
| Tecnologia | Come funziona | Ideale per | Tipo materiale | Costo (Single Unit vs. 20 Unità) | Pro | Contro |
| FDM (Modellazione della deposizione fusa) | Melts thermoplastic filament and deposits it layer by layer | Prototipi, low-strength end-use parts (per esempio., vasi per piante, parti di giocattoli) | Filamento (ABS, Nylon, PLA) | ABS: €22.18 (1 unità) / €22.15 (20 unità)ULTEM 9085: €106.10 (1 unità) / €93.02 (20 unità) | Basso costo, veloce, wide color options, large part sizes | Linee di livello visibili, needs support structures (extra material/waste), less detail |
| SLS (Sinterizzazione laser selettiva) | Uses a laser to fuse thermoplastic powder into layers | Parti durevoli per uso finale (per esempio., ingranaggi, parentesi), low-to-medium batches | Polvere (PA 12, TPU) | Nylon PA 12: €79.72 (1 unità) / €57.77 (20 unità)Flex TPU: €121.76 (1 unità) / €109.86 (20 unità) | No support structures, elevata durabilità, libertà di progettazione | Fewer color options, rough finish, small part size limits |
| mjf (HP Multi Jet Fusion) | Uses jets to deposit fusing agents on thermoplastic powder, then fuses it with heat | High-accuracy end-use parts (per esempio., componenti medici, alloggiamenti per l'elettronica) | Polvere (PA 11, PA 12, TPU) | PA 12: €18.29 (1 unità) / €15.96 (20 unità)TPU: €21.81 (1 unità) / €16.62 (20 unità) | Fastest for batches, alta precisione, nessun supporto | Limited post-processing, few colors, large parts may warp |
Chiave da asporto: For most beginners or budget-focused projects, FDM is the best one-step option. For durable, parti ad alto volume, mjf offers the best value (note the big cost drop when ordering 20 unità!).
4. How to Optimize the One-Step Process for Lower Costs
The one-step process is already affordable, but you can save even more by tweaking your design and settings. Below are the most impactful ways to cut costs—based on Xometry’s cost factors.
1. Adjust Part Volume
The cost of one-step 3D printing is directly tied to the volume della parte (more material = higher cost). To reduce volume without changing the part’s function:
- Make the part more compact (per esempio., shrink empty spaces that don’t affect strength).
- Avoid over-sizing (print only the size you need—no extra material).
Esempio: A furniture designer was printing a 3D-printed chair leg that was 15cm tall. By reducing the height to 12cm (still strong enough) and making the base narrower, they cut material use by 25%—lowering the cost from €18 to €13.50 per leg.
2. Optimize Wall Thickness
Wall thickness affects both cost and strength. Thicker walls use more material (higher cost), but too-thin walls break easily. Follow these guidelines for one-step printing:
- FDM: Minimum wall thickness = 1.2mm (thicker if the part needs strength).
- SLS: Minimum wall thickness = 0.7mm.
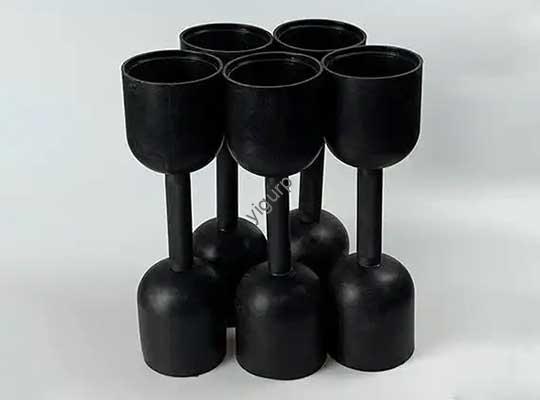
Pro Tip: Use thinner walls for non-load-bearing parts (per esempio., a decorative cup) and thicker walls for load-bearing parts (per esempio., a shelf bracket). This balances cost and durability.
3. Hollow Out Parts (When Possible)
Hollowing out parts is a great way to save material in the one-step process. Less material = lower cost and lighter parts. Just remember:
- Leave small holes in hollow parts to let air escape during printing (impedisce la deformazione).
- Don’t hollow critical areas (per esempio., the base of a chair leg—keep it solid for strength).
Esempio: A toy company was printing plastic action figures with solid bodies. By hollowing the torso (leaving a 2mm wall), they reduced material use by 40%—saving €5 per figure when printing 100 unità.
4. Minimize Support Structures
Support structures are extra material the printer uses to hold up overhanging parts (per esempio., a “roof” on a part). They add cost (more material) and time (you have to remove them after printing). To reduce supports:
- Design parts with self-supporting angles (45 degrees or more—no supports needed for overhangs at this angle).
- Choose technologies that don’t need supports (per esempio., SLS or MJF—they use powder as support).
Cost Impact: For an FDM part with lots of overhangs, supports can add 10–20% to the material cost. By adjusting the design to 45-degree angles, you eliminate this extra cost.
5. Real-World Use Cases of the One-Step Process
The one-step process isn’t just for prototypes—it’s used in industries from healthcare to automotive. Here are two examples of how it solves real problems:
Caso 1: Medical Prototyping (FDM One-Step Process)
A small clinic in Madrid needed a prototype of a custom knee brace for a patient. With traditional manufacturing, this would have required:
- Creating a mold (2 settimane, €1,500).
- Casting the brace (1 settimana, €300).
- Finitura (3 giorni, €200).
Totale: 3.5 settimane, €2,000.
Using the FDM one-step process:
- The clinic scanned the patient’s knee and created a CAD model (1 giorno).
- They printed the prototype (8 ore, €50 in PLA material).
- They sanded the edges (1 ora, nessun costo aggiuntivo).
Totale: 1.5 giorni, €50.
The clinic tested the prototype, made small tweaks to the CAD model, and printed the final brace—all in under a week.
Caso 2: Produzione in piccoli lotti (MJF One-Step Process)
A startup in Amsterdam makes custom phone grips. They needed to produce 50 grips for a launch. With injection molding (tradizionale):
- Mold cost: €3,000.
- Production time: 2 settimane.
- Unit cost: €2 (totale: €100 for 50 unità + €3,000 mold = €3,100).
Using the MJF one-step process:
- No mold cost.
- Production time: 3 giorni.
- Unit cost: €15.96 (PA 12 materiale, totale: €798 for 50 unità).
The startup saved €2,302 and got their grips to market 11 days faster. Per piccoli lotti, the one-step process is unbeatable.
Yigu Technology’s View on the 3D Printing One-Step Process
Alla tecnologia Yigu, we see the one-step 3D printing process as a catalyst for accessible manufacturing. It levels the playing field—small businesses and startups no longer need big budgets for tooling to bring ideas to life. We recommend FDM for beginners (basso costo, facile da usare) and MJF for businesses scaling small batches (veloce, alta precisione). Our team also helps clients optimize designs: we recently worked with a furniture brand to hollow their chair parts, riducendo i costi dei materiali 35% while keeping strength. The one-step process isn’t just fast—it’s smart, and we’re investing in tools to make it even more affordable for everyone.
Domande frequenti: Your Questions About the 3D Printing One-Step Process Answered
1. Can the one-step process be used for large-scale production (1,000+ unità)?
The one-step process works best for small-to-medium batches (1–500 unità). Per 1,000+ unità, traditional methods like injection molding may be cheaper (once you cover the mold cost). Detto questo, technologies like MJF are getting faster—some manufacturers use it for 1,000-unit batches if the part is complex (per esempio., custom electronics).
2. Do I need expensive software to use the one-step process?
NO! There are free, user-friendly tools for every step:
- Progettazione CAD: Tinkercad (free for beginners), Fusione 360 (free for startups/students).
- Affettare: Cura (gratuito, works with most printers).
- You can even download pre-made CAD models from sites like Thingiverse (gratuito) if you don’t want to design from scratch.
3. How do I choose between FDM, SLS, and MJF for my one-step project?
Use this quick guide:
- FDM: Best for low-cost prototypes (per esempio., a plant pot) or parts that don’t need high strength.
- SLS: Best for durable end-use parts (per esempio., un ingranaggio) that need to handle wear.
- mjf: Best for high-accuracy parts (per esempio., a medical component) o piccoli lotti (20+ unità) where speed matters.