Nel frenetico settore aerospaziale, 3D printed aerospace prototype models have become a game-changer. Consentono agli ingegneri di testare nuovi progetti, convalidare le prestazioni, e ridurre i cicli di sviluppo, fondamentali per rimanere all'avanguardia in un settore in cui ogni giorno e ogni dollaro contano. Tuttavia, creating effective 3D printed aerospace prototypes isn’t straightforward. Challenges like choosing the right produzione additiva tecnologia, selecting aerospace-grade materials, and ensuring prototypes meet strict performance standards often trip up teams. This article breaks down the entire process around four core themes, offering actionable solutions to common problems and helping you build high-quality aerospace prototypes efficiently.
1. 3Tecnologia di stampa D: Choose the Right Tool for Aerospace Needs
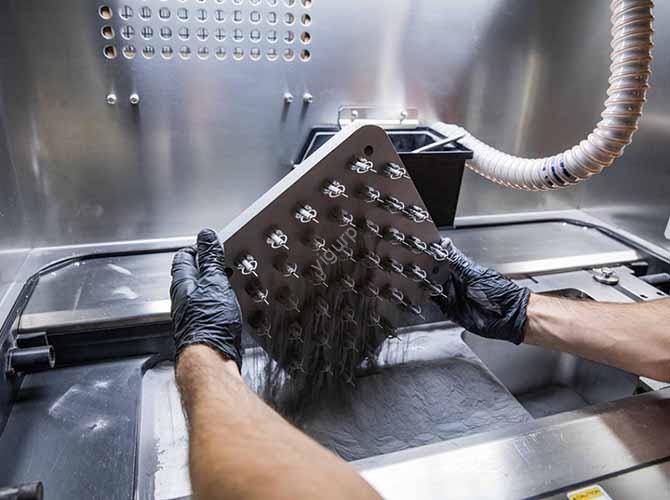
3Tecnologia di stampa D is the foundation of aerospace prototype development. Unlike consumer-grade 3D printing, aerospace prototypes demand precision, durabilità, and compatibility with specialized materials. Selecting the right technology—from FDM A SLS—depends on the prototype’s purpose (per esempio., form, adatto, or function testing) e requisiti prestazionali.
1.1 Comparison of 3D Printing Technologies for Aerospace Prototypes
| Tecnologia | Working Principle | Key Advantages for Aerospace | Limitations for Aerospace | Ideal Prototype Types |
| Modellazione della deposizione fusa (FDM) | Melts thermoplastic filaments (per esempio., ABS, lardo) and extrudes them layer-by-layer | Basso costo; compatible with aerospace-grade polymers (per esempio., SBIRCIARE); easy to scale for large parts | Low precision (layer height ≥0.1mm); weak layer adhesion (risk of delamination under stress) | Large-scale scale models (per esempio., aircraft fuselage sections); non-load-bearing components (per esempio., avionics housings for fit testing) |
| Stereolitografia (SLA) | Uses UV light to cure liquid photopolymers into solid layers | Alta precisione (layer height ≥0.025mm); smooth surface finish (Ra ≤0.8μm); ideal for detailed parts | Brittle parts (poor impact resistance); limited material options (mostly photopolymers, not metal) | Piccolo, detailed prototypes (per esempio., satellite antenna components); conceptual design models for aerodynamic testing |
| Sinterizzazione laser selettiva (SLS) | Uses a laser to sinter powdered materials (per esempio., nylon, leghe metalliche) into layers | Non sono necessarie strutture di supporto; high part density (>95%); compatible with metal (per esempio., titanio) | High cost; slow build speed (20-50 mm/h); requires post-sintering (per esempio., HIPing for metals) | Prototipi funzionali (per esempio., aircraft bracket prototypes for load testing); geometrie complesse (per esempio., lattice structures for lightweighting) |
A common question here is: When should I use SLS over FDM for aerospace prototypes? If your prototype needs to withstand mechanical stress (per esempio., a wing rib prototype for load testing) or has complex internal geometries (per esempio., a fuel injector model), SLS is better—it produces stronger, more durable parts. For low-cost, large-scale fit-testing models (per esempio., checking if a new avionics unit fits in the cockpit), FDM is the more practical choice.
2. Aerospace Industry Requirements: Align Prototypes with Strict Standards
IL Industria aerospaziale has some of the most rigorous standards in manufacturing—prototypes are no exception. From material compatibility to performance under extreme conditions, every aspect of a 3D printed aerospace prototype must align with industry norms (per esempio., ASTM F3300 for 3D printed aerospace parts).
2.1 Key Aerospace Requirements for 3D Printed Prototypes
| Requirement Category | Specific Standards | Impact on Prototype Development |
| Aerospace Materials | Polimeri: SBIRCIARE (melting point 343℃), lardo (resistenza chimica); Metalli: Ti-6Al-4V (high strength-to-weight), Inconel 718 (resistenza al calore) | Avoid low-grade materials (per esempio., standard ABS)—they fail under extreme temperatures/pressures. Per esempio, a prototype for engine components must use Inconel 718 (withstands 650℃+), not nylon. |
| Performance Under Extremes | Temperature range (-60℃ to 200℃ for most components); pressione (fino a 10 bar for hydraulic parts); vibrazione (20-2000 Hz for aircraft engines) | Prototypes must undergo environmental testing. For a satellite prototype, test it at -60℃ (space-like conditions) to ensure it doesn’t crack; for an aircraft engine part, test vibration resistance to avoid fatigue failure. |
| Avionics Compatibility | Isolamento elettrico (for parts near wiring); electromagnetic interference (EMI) shielding (for communication components) | For a prototype avionics housing, use FDM with carbon-fiber-reinforced PEEK (provides EMI shielding); avoid SLA photopolymers (poor electrical insulation). |
| Lightweighting | Target weight reduction (10-30% contro. parti tradizionali); elevato rapporto resistenza/peso (≥200 MPa/(g/cm³)) | Use SLS to print lattice structures—they reduce weight by 25% pur mantenendo la forza. Per esempio, an aircraft bracket prototype with a lattice core weighs 30% less than a solid one but can still support 500 N of load. |
3. Sviluppo del prototipo: From Concept to Functional Test
Sviluppo del prototipo for aerospace is an iterative process—from early conceptual design to final prototipi funzionali. Rushing this process often leads to costly rework; following a structured approach ensures prototypes meet goals without delays.
3.1 Step-by-Step Aerospace Prototype Development Process
- Conceptual Design: Define the prototype’s purpose (per esempio., aerodynamic testing, fit validation) and key requirements (per esempio., peso, resistenza alla temperatura). Use sketching or simple 3D models to explore 2-3 design variants. Per esempio, when designing a new aircraft winglet prototype, sketch variants with different angles (15°, 20°, 25°) to test aerodynamic efficiency.
- Prototipazione rapida: Use low-cost 3D printing (per esempio., FDM for large parts, SLA for small details) to create early-stage prototypes. Focus on form and fit, not function. This step helps identify design flaws early—for instance, a FDM-printed cockpit panel prototype might reveal that a new switch is too close to a display, making it hard to reach.
- Iterative Design: Test the rapid prototype, gather feedback, and refine the design. Repeat this 2-3 times to fix issues like poor ergonomics or incompatible dimensions. Per esempio, if a SLA-printed satellite antenna prototype has weak signal reception, adjust the antenna’s curvature and reprint a new version.
- Prototipazione funzionale: Use high-performance 3D printing (per esempio., SLS for metal parts, FDM with PEEK) to create prototypes that mimic the final part’s function. Add post-processing (per esempio., levigatura, pittura, o trattamento termico) to improve performance. A functional wing rib prototype, Per esempio, might be SLS-printed with Ti-6Al-4V and heat-treated to increase tensile strength to 900 MPa.
- Test e convalida: Subject the functional prototype to aerospace-specific tests:
- Aerodynamic testing (wind tunnel tests to measure drag/lift).
- Load testing (apply 120% of the expected load to ensure durability).
- Environmental testing (expose to extreme temperatures, umidità, or vibration).
4. Modeling and Simulation: Predict Performance Before Printing
Modeling and Simulation are critical for aerospace prototypes—they let you test performance virtually, reducing the need for physical prototypes and cutting costs. Tools like CAD software and FEA help optimize designs and catch issues before 3D printing.
4.1 Key Simulation Tools and Their Uses
| Tool/Method | Scopo | Practical Application Example |
| Progettazione assistita da computer (CAD) | Create detailed 3D models with precise dimensions (tolerance ±0.01mm) | Use SolidWorks to design a aircraft landing gear prototype—add features like holes for bolts and fillets to reduce stress concentration. |
| Analisi degli elementi finiti (FEA) | Simulate mechanical stress, strain, and fatigue to predict failure | Run FEA on a SLS-printed engine bracket prototype—apply 500 N of load to see if the bracket bends (max allowable deflection: 0.5mm). If it bends 0.8mm, thicken the bracket’s walls. |
| Computational Fluid Dynamics (CFD) | Simulate fluid flow (aria, fuel) to optimize aerodynamics or fuel efficiency | Use CFD to test a FDM-printed aircraft wing prototype—adjust the wing’s angle of attack to reduce drag by 15%. |
| Virtual Prototyping | Combine CAD, FEA, and CFD to create a digital twin of the prototype | Build a virtual twin of a satellite prototype—simulate its orbit, variazioni di temperatura, and signal reception to ensure it works in space before printing. |
A common challenge here is: How do I ensure simulation results match real-world performance? Calibrate your simulation software with material data from the 3D printer manufacturer. Per esempio, if you’re simulating a PEEK prototype, use the actual tensile strength (90 MPa) and modulus (3.6 GPa) of the PEEK filament you’re using—don’t rely on generic material data, which can be inaccurate by 10-15%.
5. Yigu Technology’s Perspective on 3D Printed Aerospace Prototypes
Alla tecnologia Yigu, we focus on “simulation-driven, performance-first” for 3D printed aerospace prototypes. We use SLS for metal functional parts (Ti-6Al-4V, Inconel 718) and FDM with PEEK for polymers, ensuring material compliance with ASTM F3300. Our workflow integrates CAD (SolidWorks) + FEA (ANSYS) + CFD (Fluent) to predict performance—cutting physical prototype needs by 40%. For testing, we conduct wind tunnel and -60℃ to 200℃ environmental tests. The core is balancing speed (rapid prototyping in 3-5 giorni) and aerospace rigor—delivering prototypes that bridge design and flight-ready parts.
Domande frequenti
1. What 3D printing technology is best for aerospace prototypes that need to withstand high temperatures?
For high-temperature aerospace prototypes (per esempio., componenti del motore, satellite parts exposed to solar radiation), SLS is ideal—especially when using heat-resistant materials like Inconel 718 (withstands up to 650℃) o PEEK (melting point 343℃). SLA is not recommended (photopolymers degrade above 80℃), and FDM works only if using high-performance filaments (per esempio., lardo) instead of standard plastics.
2. How can I reduce the cost of 3D printed aerospace prototypes without sacrificing quality?
Focus on iterative design with low-cost rapid prototyping first: Use FDM (per pezzi di grandi dimensioni) o SLA (for small details) to test form/fit in early stages—these technologies cost 50-70% less than SLS. Only use high-cost technologies (per esempio., SLS for metal) for functional prototypes. Anche, optimize the design for 3D printing (per esempio., reduce support structures, use lattice cores) to cut material waste by 20-30%.
3. Do 3D printed aerospace prototypes need post-processing?
Yes—post-processing is critical for meeting aerospace standards. For FDM prototypes: Sand layers to improve surface finish (Ra from 3.2μm to 1.6μm) and heat-treat (per esempio., anneal PEEK at 200℃) to strengthen layer adhesion. For SLS metal prototypes: Use hot isostatic pressing (HIP) to eliminate pores (increases density to >99%) and CNC machine critical surfaces (to achieve ±0.01mm tolerance). For SLA prototypes: Cure under UV light for 2-4 hours to reduce brittleness.