Processing methods of toy prototypes refer to the techniques used to transform design concepts into physical toy models—each method differs in cost, précision, et adéquation à des types de jouets spécifiques (par ex., figurines d'action, jouets en peluche, ou des jouets mécaniques). Choisir la bonne méthode est essentiel pour valider la faisabilité de la conception, fonctionnalité de test, et accélérer la mise sur le marché. This article breaks down the core processing methods, their workflows, comparative strengths, troubleshooting tips, and real-world applications to help toy developers make informed decisions.
1. What Are the Core Processing Methods of Toy Prototypes?
Each method is tailored to different toy complexities, batch sizes, and budget constraints. The table below details their key traits, flux de travail, et cas d'utilisation idéaux.
| Processing Method | Core Principle | Flux de travail étape par étape | Ideal Toy Types | Avantages clés |
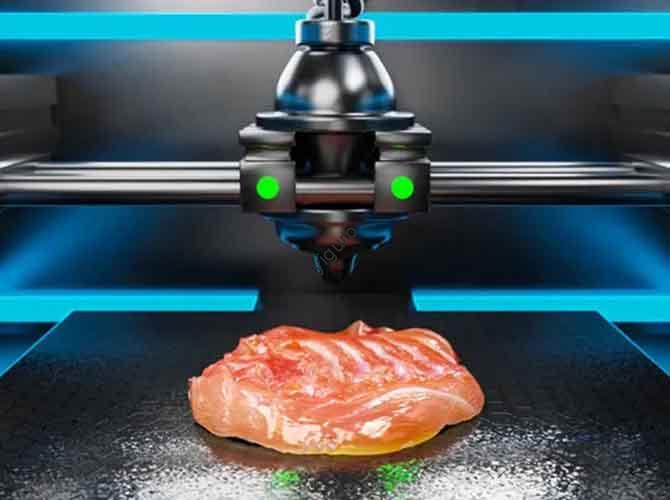
| 3D Impression | Layer-by-layer deposition of plastic (PLA, ABS) or resin to build 3D models from digital designs. | 1. Model Preparation: Export 3D CAD files (Format STL) and optimize for printing (ajouter des supports pour les surplombs).2. Parameter Setting: Choose layer thickness (0.1–0.2mm for smooth surfaces), infill (10–30% for structural stability), and printing speed (30–60 mm/s).3. Exécution de l'impression: Load filament/resin into the printer (FDM for PLA/ABS; SLA for resin) and start printing.4. Post-traitement: Remove supports with pliers, sand with 200–1000 grit sandpaper, and polish to remove layer lines. | Complex-shaped toys: Action figures with movable joints, puzzle toys with intricate grooves, or miniaturized models. | – Délai d'exécution rapide (4–24 hours per prototype).- No mold needed (low upfront cost for small batches: 1–10 unités).- Capture les moindres détails (par ex., 0.5mm-thick facial features on a doll). |
| CNC Fine Carving | Computer-controlled cutting tools remove material from solid blocks (plastique, bois, ou en métal) to shape toy parts. | 1. Design Import: Convert 3D models to G-code (machining instructions) using software like Mastercam.2. Material Fixing: Secure the material block (par ex., POM plastic, acrylique, ou alliage d'aluminium) to the CNC machine bed.3. Toolpath Optimization: Set cutting depth (0.1–0.5mm per pass) and tool speed (10,000–15 000 tr/min) to avoid overheating.4. Carving & Finition: Machine the part, then sand (400–800 grains) or sandblast the surface to improve smoothness. | High-precision toys: Mechanical toy gears, wooden toy blocks, or metal toy components (par ex., hinges for a toy box). | – Ultra-haute précision (±0.05mm for critical features like gear teeth).- Durable parts (suitable for load-testing, par ex., a toy car’s axle).- Works with rigid materials (par ex., POM for wear-resistant toy wheels). |
| Silicone Molding & Replication | A master prototype (3D-printed or CNC-machined) is used to create a silicone mold, which is then filled with materials like PU resin to produce multiple copies. | 1. Master Prototype Making: Create a high-quality master (par ex., a 3D-printed resin toy figure).2. Silicone Mold Production: Encase the master in a mold box, pour liquid silicone (500–2000 cP viscosity), and cure at 25–80°C for 4–24 hours.3. Démoulage & Replication: Remove the master to reveal the mold, then inject PU resin/epoxy into the mold and cure.4. Garniture & Assemblée: Cut off excess material (gate marks) and assemble multi-part toys (par ex., a toy robot’s body + arms). | Small-batch toy production: 10–50 units of a doll, toy animal, or decorative toy (par ex., Christmas ornaments). | – Cost-effective for batches (lower per-unit cost than 3D printing).- Preserves master details (par ex., texture on a toy’s fur or clothing).- Fast replication (3–5 days per batch). |
| Handcrafting | Manual shaping of materials (clay, bois, mousse, or fabric) using tools like carving knives, glue, and paint—ideal for artisanal or one-off toys. | 1. Sélection des matériaux: Choose clay (for sculpting), mousse (for soft toys), ou du bois (for traditional toys like wooden trains).2. Façonner & Sculpting: Carve, moule, or sew the material into the toy’s shape (par ex., sculpt a clay doll’s face or sew a plush teddy bear).3. Finition: Sand wooden parts, paint details (par ex., eyes, motifs), and add accessories (par ex., a toy’s hat or scarf). | Artisanal toys: Custom plush toys, hand-painted ceramic figures, or traditional wooden toys (par ex., a hand-carved top). | – No specialized equipment needed (lowest upfront cost).- High customization (easy to adjust designs on the spot).- Suitable for unique, non-replicable toys (par ex., a one-of-a-kind art doll). |
2. How to Compare & Choose the Right Processing Method?
Use the following framework to select a method based on 5 critical factors: taille du lot, toy complexity, budget, précision, et chronologie.
2.1 Comparative Table of Key Factors
| Facteur | 3D Impression | CNC Fine Carving | Silicone Molding | Handcrafting |
| Taille du lot | 1–10 unités | 1–20 units | 10–50 unités | 1–5 units |
| Toy Complexity | Haut (supports undercuts, structures creuses) | Moyen (best for rigid, formes simples) | Haut (replicates complex master details) | Moyen (limited by manual skill) |
| Coût (Per Unit) | \(5–)30 (PLA/ABS); \(15–)50 (résine) | \(20–)100 (plastic/wood); \(50–)200 (métal) | \(3–)15 (PU resin copies) | \(10–)100 (depends on material/skill) |
| Précision | ±0.1–0.5mm (layer lines affect smoothness) | ±0,05–0,1 mm (highest for rigid parts) | ±0,1–0,3 mm (matches master precision) | ±1–5mm (lowest, skill-dependent) |
| Production Timeline | 4–24 hours per part | 1–3 days per part | 3–5 days per batch (moule + copies) | 1–7 days per part (skill-dependent) |
| Idéal pour | Rapid iteration of complex toys | High-precision mechanical toy parts | Small-batch replication of detailed toys | Custom artisanal or one-off toys |
2.2 Decision-Making Example Scenarios
- Scenario 1: A startup needs 5 prototypes of a complex action figure (avec 3 movable joints and textured armor) dans 3 jours.
- Choice: 3D Impression (resin SLA). It captures fine details (armor texture) quickly and avoids mold costs.
- Scenario 2: A toy manufacturer wants 30 copies of a simple wooden toy car (no moving parts) for market testing.
- Choice: Silicone Molding. Make a CNC-machined wooden master, then replicate 30 PU resin copies at low cost.
- Scenario 3: An artist wants a one-of-a-kind plush toy with custom embroidery and fabric details.
- Choice: Handcrafting. It allows full customization (embroidery, fabric selection) without equipment constraints.
3. What Are the Critical Post-Processing Steps for Toy Prototypes?
Post-processing enhances appearance, fonctionnalité, and safety—critical for toy prototypes (especially those for children).
3.1 Finition des surfaces
| Étape | But | Method & Outils | Exemple |
| Ponçage & Polissage | Remove processing marks (lignes de calque, tool scratches) and create smooth surfaces (avoids sharp edges). | – Sand with 200→400→800→1000 grit sandpaper (coarse to fine).- Polish with polishing paste (cerium oxide) and a soft cloth for a glossy finish. | Sanding a 3D-printed doll’s face to eliminate layer lines; polishing a CNC-machined wooden toy car to a smooth shine. |
| Coloration & Decoration | Match design aesthetics (couleurs, motifs) and add brand identity (logos, safety labels). | – Spray Coating: Apply primer (pour l'adhésion), base color (acrylic/model paint), and protective paint (matte/glossy).- Water Transfer Printing: Add complex patterns (par ex., cartoon skin, camouflage) to curved surfaces (par ex., a toy truck’s body).- Sérigraphie: Print small details (par ex., “Ages 3+” labels, logos de marque) on flat surfaces. | Spraying a toy robot’s body blue; using water transfer to add tiger stripes to a plush toy’s fabric. |
3.2 Assemblée & Tests fonctionnels
| Étape | But | Method & Outils | Exemple |
| Component Assembly | Join multiple parts (par ex., a toy’s head + corps + limbs) securely and safely. | – Glue: Use non-toxic instant glue (pour pièces en plastique) or fabric glue (for plush toys).- Attaches: Use small screws (M2–M3) for mechanical parts (par ex., engrenages de jouets) or snaps for easy disassembly. | Gluing a doll’s arm to its body; using snaps to attach a toy’s removable hat. |
| Functional Validation | Ensure moving parts work smoothly and safely (no jamming or breakage). | – Test joint mobility (par ex., bend a toy’s leg 100 times to check for durability).- Verify electronic features (par ex., a toy’s sound module plays the correct “beep” when a button is pressed). | Testing a toy car’s wheels to ensure they spin freely; checking a light-up toy’s battery life (≥8 hours of use). |
3.3 Safety Compliance
| Étape | But | Method & Normes | Exemple |
| Edge Blunting | Eliminate sharp edges (hazard for children under 3). | File or sand edges to a radius of ≥0.5mm; use a deburring tool for CNC-machined parts. | Blunting the edges of a wooden toy block to avoid splinters. |
| Small Part Check | Ensure no detachable parts (≤3cm) pose choking hazards (per ASTM F963 or EN 71 normes). | Use a “choking hazard tester” (a 31.75mm diameter cylinder) to check if parts fit inside—if they do, secure them with glue. | Gluing a toy’s small button eyes to its face to prevent detachment. |
4. What Are Common Problems & Troubleshooting Tips?
Even with careful processing, issues can arise—here’s how to fix them.
| Problème | Root Cause | Solution |
| 3D Printing Layer Lines Visible on Toy Surfaces | Layer thickness too high (≥0.2mm); insufficient post-processing. | – Reduce layer thickness to 0.1–0.15mm during printing.- Sand with 800→1000→2000 grit sandpaper, then polish with paste. |
| CNC-Machined Toy Parts Have Rough Surfaces | Cutting tool dull; feed rate too high. | – Replace the cutting tool with a sharpened one (par ex., carbide end mill).- Reduce feed rate by 20–30% (par ex., from 1000mm/min to 700mm/min).- Sandblast the surface for a uniform matte finish. |
| Silicone Mold Deforms During Replication | Silicone hardness too low (<50UN); no release agent used. | – Use higher-hardness silicone (70A–80A) for the mold.- Apply a silicone-compatible release agent (par ex., petroleum jelly) to the master before mold making. |
| Handcrafted Toy Has Uneven Paint Coverage | Paint applied too thick; brush strokes visible. | – Apply 2–3 thin coats of paint (allow 30 minutes drying time between coats).- Use an airbrush for large surfaces (par ex., a plush toy’s body) or a fine-tip brush for details (par ex., eyes). |
5. What Are Real-World Application Examples?
5.1 Action Figure Prototype (3D Impression + Silicone Molding)
- But: Créer 20 prototypes of a 15cm-tall action figure with 4 movable joints and a textured cape.
- Processus:
- 3D print a resin master (ANS, 0.1mm layer thickness) to capture joint details and cape texture.
- Make a 70A silicone mold from the master.
- Inject PU resin into the mold to produce 20 copies.
- Sand, peinture (metallic silver for armor), and assemble joints with small metal pins.
- Résultat: 20 durable prototypes ready for user testing, costing \(12 par unité (contre. \)35 for 3D-printed copies).
5.2 Wooden Toy Train (Usinage CNC + Handcrafting)
- But: Make 5 high-precision wooden toy train cars (with interlocking couplings) for a boutique toy brand.
- Processus:
- CNC machine the train body and wheels from maple wood (±0.05mm precision for coupling holes).
- Hand-sand the surfaces to 800 grit and apply non-toxic wood stain.
- Handcraft the couplings (small wooden pins) and attach them to the train cars with glue.
- Résultat: Durable, safe toy trains that meet ASTM F963 standards for children under 3.
Yigu Technology’s Perspective
Chez Yigu Technologie, we see choosing the right toy prototype processing method as a “cost-time-quality balance act.” Too many clients overspend on CNC machining for simple toys or rely on 3D printing for large batches—wasting time and money. Our approach: We analyze toy complexity (par ex., “Does it have moving parts?») and batch size to recommend the best method. Par exemple, we helped a toy startup cut costs by 40% by switching from 3D printing 50 doll prototypes to silicone molding (using a 3D-printed master). We also prioritize safety: We ensure post-processing removes all sharp edges and use non-toxic paints for children’s toys. For toy developers, the right method isn’t just about making a prototype—it’s about validating designs efficiently while keeping kids safe.
FAQ
- Can I combine multiple processing methods for a single toy prototype?
Yes—hybrid approaches are common. Par exemple: 3D print a toy’s complex head (with facial details), CNC machine its rigid body (pour la durabilité), and handcraft its soft fabric clothes. This balances precision, coût, et personnalisation.
- What’s the most cost-effective method for 10–15 units of a detailed toy (par ex., a doll with painted features)?
Silicone molding is best. Make a single 3D-printed resin master (captures painted details via texture), then produce 10–15 PU resin copies. Total cost is 30–50% lower than 3D printing each unit separately.
- How do I ensure a CNC-machined toy part meets safety standards (par ex., no sharp edges)?
- Design parts with ≥0.5mm edge radii in the 3D model (avoids sharp corners during machining).
- Post-process with a deburring tool to remove burrs, then sand edges with 400+ grit sandpaper.
- Test edges with a “choking hazard tester” and a soft cloth (no snags or sharp points).