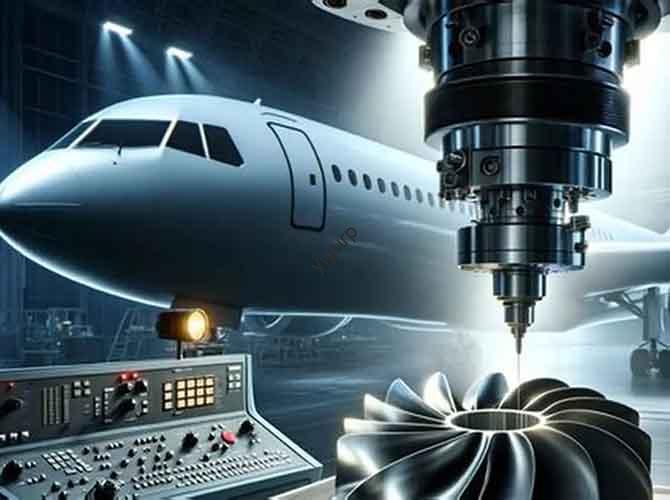
Le développement d'un modèle de prototype de presse-agrumes nécessite un processus d'usinage CNC précis pour valider la rationalité de la conception., tester l'ajustement des composants (par ex., assemblage de lame, voies d'écoulement du jus), et évaluer les détails centrés sur l'utilisateur (par ex., base antidérapante, disposition des boutons). Contrairement aux gros électroménagers, les presse-agrumes sont compacts, des structures multifonctionnelles (des gobelets à jus transparents aux pièces de transmission résistantes à l'usure) qui exigent des stratégies d'usinage sur mesure. Ce guide détaille le flux de travail complet, from preliminary design to final assembly, avec des paramètres clés, sélections de matériaux, and practical tips to ensure prototype success.
1. Préparation préliminaire: Poser les bases de l'usinage
The success of CNC machining starts with thorough preparation, including 3D modeling, sélection des matériaux, and equipment/tool readiness. This stage ensures the subsequent process avoids rework and meets design goals.
(1) 3Modélisation D: Define Juicer Structure with Precision
Use professional CAD software (par ex., SolidWorks, et, ProE) to create a detailed 3D model that covers all critical components. The model must balance aesthetic design, functional logic, and machining feasibility.
| Component Category | Key Design Details | Precision Requirements | But |
| Main Body (Coquille) | Streamlined contour, base antidérapante (groove depth 2mm), button mounting holes (Φ8mm) | Shell dimensional error ±0.2mm; hole position tolerance ±0.1mm | Ensure structural stability; fit control buttons and power components |
| Juice Cup (Transparent) | Inner cavity volume (par ex., 500ml), feeding port (Φ50mm), juice outlet (Φ15mm) | Cavity roundness error ≤0.1mm; wall thickness uniformity ±0.05mm | Ensure smooth juice flow; avoid leakage at connections |
| Tool Holder & Pièces de transmission | Blade mounting slot (depth 5mm), gear cavity (for POM gears), motor fixing holes | Slot depth tolerance ±0.05mm; gear cavity clearance 0.1mm | Fit rotating components; ensure smooth blade operation |
Model Optimization Tips:
- Component Splitting: Split integrated structures (par ex., cup body + lid) into independent parts to avoid tool interference. Par exemple, machine the juice cup and its lid separately, then assemble with a sealing ring.
- Process Marking: Label critical features (par ex., “polish inner wall of juice cup”) and reference datums (par ex., base bottom as origin) to guide CNC programming.
- Interference Check: Use software to simulate blade rotation and juice flow—ensure 0.5mm clearance between blade and cup wall to prevent friction.
(2) Sélection des matériaux: Match Performance to Component Roles
Juicer components have distinct functional needs (transparence, résistance à l'usure, force), so material selection is critical. Below is a detailed comparison of suitable options:
| Type de matériau | Applicable Components | Propriétés clés | Machinability Advantages |
| Plastique ABS | Main shell, base, lid | Haute résistance aux chocs (Izod strength 20 kj /), facile à colorier, faible coût | Low tool wear; machinable at 8,000–12,000 rpm (fast and efficient) |
| PC Plastic | Transparent juice cup, fenêtre d'observation | Haute transparence (light transmittance ≥88%), résistant aux chocs (10x plus résistant que le verre) | Precision cutting achievable; minimal edge chipping (≤0,1 mm) |
| POM (Polyoxyméthylène) | Engrenages, porte-outil (wear-resistant parts) | Faible coefficient de frottement (0.15), haute résistance à l'usure, bonne stabilité dimensionnelle | No deformation during machining; suitable for small transmission parts |
| Alliage d'aluminium (6061) | Motor brackets, metal decorative parts | Haute rigidité (résistance à la traction 276 MPa), résistant à la corrosion | Fast cutting speed; surface can be anodized for enhanced texture |
Material Blank Preparation:
- Cut blanks with 5–10mm machining allowance on all sides to accommodate roughing and finishing:
- A PC juice cup (final size: Φ80mm×120mm) needs a Φ90mm×130mm blank.
- An ABS main shell (200mm×150mm×80mm) requires a 210mm×160mm×90mm blank.
(3) Équipement & Préparation des outils: Ensure Machining Accuracy
Select CNC equipment and tools based on component complexity and material properties to avoid defects like tool marks or dimensional deviations.
| Equipment/Tool Type | Selection Criteria | Recommended Specifications |
| CNC Machining Center | 3-axis for flat parts; 5-axis for curved surfaces (par ex., juice cup inner wall) | Positioning accuracy ±0.005mm; spindle speed range 8,000–24,000 rpm |
| Fraises | Solid carbide for plastics; acier rapide (HSS) for aluminum alloy | – Ebauche: Φ8–Φ12mm flat-bottom mills (enlèvement de matière rapide)- Finition: Φ2–Φ6mm ball-head mills (surfaces courbes); Φ0.5–2mm small mills (logo/buttons) |
| Outils spéciaux | Taper cutters (chamfering juice cup edges); diamond polishers (PC transparency) | Taper angle 45°; diamond polisher grit 1,200# (for PC surface refinement) |
| Calendrier | Vacuum suction cups (flat ABS/PC parts); precision vises (aluminum/POM components) | Vacuum pressure ≥0.8 MPa; vise clamping force ≥3 kN (prevents workpiece displacement) |
2. Exécution d'usinage CNC: From Blank to Prototype Components
This stage divides machining into roughing and finishing to balance efficiency and precision—critical for juicer components with diverse structures.
(1) Usinage grossier: Shape the Foundation
Roughing removes most excess material to bring the blank close to the final shape, prioritizing speed while avoiding tool damage.
| Type de composant | Roughing Focus | Opérations clés & Paramètres |
| ABS Main Shell | Machine outer contour, base grooves, button holes | Use Φ10mm flat-bottom mill; vitesse de coupe 10,000 tr/min, vitesse d'avance 1,200 mm/min; layer depth 3mm |
| PC Juice Cup | Mill outer wall and inner cavity; pre-drill feeding/juice outlets | Use Φ8mm end mill; vitesse de coupe 9,000 tr/min, vitesse d'avance 800 mm/min; retain 0.5mm finishing allowance |
| POM Gear Cavity | Machine cavity outline and mounting holes | Use Φ6mm end mill; vitesse de coupe 8,000 tr/min, vitesse d'avance 600 mm/min; éviter la surchauffe (POM melts at 160°C) |
Post-Roughing Inspection:
- Use a digital caliper to check key dimensions (par ex., juice cup diameter, shell height) and ensure they are within ±0.5mm of the design value.
- Clean chips with compressed air—especially critical for PC parts (chips left on surfaces cause scratches during finishing).
(2) Finition: Achieve Precision & Qualité des surfaces
Finishing refines components to meet final design requirements, focusing on transparency (PC), smoothness (ABS), et précision dimensionnelle (POM/aluminum).
| Type de composant | Finishing Focus | Opérations clés & Paramètres |
| PC Juice Cup | Polish inner/outer walls (transparence); chamfer edges (prevent sharpness) | Use Φ4mm ball-head mill (inner wall); vitesse de coupe 15,000 tr/min, vitesse d'avance 500 mm/min; then diamond polish (light transmittance ≥85%) |
| ABS Main Shell | Smooth shell surface; engrave logo/button labels (depth 0.3mm) | Use Φ2mm ball-head mill; vitesse de coupe 12,000 tr/min, vitesse d'avance 700 mm/min; surface roughness Ra ≤0.8μm |
| POM Gear Cavity | Refine cavity walls; ensure gear clearance (0.1mm) | Use Φ3mm end mill; vitesse de coupe 9,000 tr/min, vitesse d'avance 500 mm/min; dimensional tolerance ±0.05mm |
Finishing Quality Checks:
- For PC parts: Use a spectrophotometer to verify transparency (≥85%) and a surface roughness tester to confirm Ra ≤0.4μm.
- For POM gear cavities: Use a feeler gauge to check clearance (0.1mm) and ensure gears rotate smoothly without jamming.
3. Post-traitement: Enhance Aesthetics & Fonctionnalité
Post-processing bridges the gap between machined components and a realistic juicer prototype, focusing on surface refinement and assembly readiness.
(1) Traitement de surface: Tailor to Material & Component Role
| Material/Component | Surface Treatment Steps | Expected Outcome |
| ABS Main Shell | 1. Sand with 400#→800#→1200# sandpaper (remove tool marks)2. Degrease with isopropyl alcohol3. Spray matte/gloss paint (50µm d'épaisseur) | Paint adhesion ≥4B (pas de pelage); surface gloss 30–70 GU (per design) |
| PC Juice Cup | 1. Diamond polishing (1,200#→2,000# grit)2. Clean with lens cleaner3. Apply anti-scratch coating | Aucune rayure visible; anti-scratch level ≥3H (essai au crayon) |
| Aluminum Brackets | 1. Degrease with alkaline cleaner2. Anodize (silver-gray, 8–10μm film)3. Sandblast (finition mate) | Résistance à la corrosion: No rust after 48-hour salt spray test; friction coefficient ≤0.15 |
| POM Gear Parts | No additional treatment (naturally smooth surface) | Friction coefficient remains 0.15; no wear after 1,000 rotation tests |
(2) Assemblée & Débogage fonctionnel
Proper assembly ensures components work together seamlessly, while functional tests validate the prototype’s usability.
Assembly Steps:
- Vérification avant assemblage: Verify all parts meet dimensional requirements (par ex., juice cup fits shell with 0.5mm clearance).
- Component Fixing:
- Bond PC juice cup to ABS shell with food-grade adhesive (ensure no leakage).
- Screw aluminum motor brackets to the base (couple 5 N·m, avoid thread damage).
- Install POM gears and 3D-printed resin simulation blades (replace real metal blades for safety).
- Sealing Test: Pour 200mL water into the juice cup—check for leakage at connections (no water seepage within 10 minutes).
Débogage fonctionnel:
- Button Operation: Test switch/pulse buttons 100 times—stroke 2mm ±0.2mm, feedback force 5–8N (comfortable for users).
- Blade Rotation: Simulate juicing with a motor (500 tr/min)—ensure blade rotates smoothly, no friction with cup wall.
- Juice Flow: Pour water through the feeding port—check flow rate (≥50mL/min) and no residue in the cup.
4. Contrôle de qualité & Optimisation des processus
Strict quality control ensures the prototype meets design standards, while optimization reduces costs for future iterations.
(1) Key Quality Control Standards
| Control Item | Acceptance Criteria | Inspection Method |
| Précision dimensionnelle | – Juice cup: ±0,1mm- Coquille: ±0,2 mm- Gear cavity: ±0,05 mm | MMT (critical components); digital caliper (parties générales) |
| Qualité des surfaces | – PC: Ra ≤0.4μm, transparency ≥85%- ABS: Ra ≤0.8μm, no tool marks | Surface roughness tester; spectrophotometer; inspection visuelle (500lux light) |
| Functional Performance | – No leakage (10-minute water test)- Blade rotation: 500 rpm ±50 rpm | Water leakage test; tachometer (blade speed) |
(2) Process Optimization Tips
- Material Saving: Design hollow structures for ABS parts (par ex., base with 3mm thick walls) to reduce blank size—saves 20–30% material cost.
- Efficacité d'usinage: Combine roughing and semi-finishing for simple parts (par ex., decorative strips) to cut tool change time by 15%.
- Post-Processing Simplification: For hidden parts (par ex., motor brackets), skip anodizing—use natural aluminum finish to save 10–15% of treatment cost.
Yigu Technology’s Perspective on CNC Machining Juicer Prototype Models
Chez Yigu Technologie, nous croyons functional precision and user experience are the core of juicer prototype machining. Many clients overcomplicate processes—for example, using 5-axis machines for flat ABS shells when 3-axis works, or over-polishing hidden POM parts. Our team optimizes for both quality and cost: We use PC with diamond polishing for juice cups (ensuring transparency ≥85%) and 3-axis machines for most components to cut 20% of machining time. We also simplify blade simulation (3D-printed resin instead of metal) for safety and cost. For batch prototypes, we use multi-cavity fixtures to machine 2–3 juice cups at once, réduisant le temps de production en 30%. Our goal is to deliver prototypes that validate design and user needs at the lowest cost.
FAQ
- Why is PC plastic preferred for juicer juice cups instead of acrylic?
PC plastic has higher impact resistance (10x plus résistant que le verre) and better temperature stability (heat-resistant up to 135°C) than acrylic—critical for juice cups that may encounter accidental drops or warm liquids. Acrylic is prone to cracking and yellowing under heat, making it unsuitable for long-term juicer use.
- How to prevent POM parts from melting during CNC machining?
POM melts at 160°C, so we control temperature by: 1) Using low cutting speeds (8,000–10,000 rpm) to reduce friction heat; 2) Blowing compressed air continuously to cool the workpiece; 3) Avoiding deep cuts (layer depth ≤2mm) to minimize heat accumulation. These steps keep POM temperature below 120°C during machining.
- What is the total time required to machine a single juicer prototype?
Total time is ~4–6 days: 1 day for 3D modeling/material prep, 1–2 days for CNC machining (ébauche + finition), 1 day for post-processing (polishing/painting), and 1–2 days for assembly/debugging. Batch production (10+ prototypes) can be shortened to 3–4 days with parallel processing.