Vacuum duplicating products are high-precision replicas created by pouring liquid materials (par ex., résine, polyuréthane) dans des moules, fabriqués à partir de prototypes tels que des impressions 3D ou des pièces CNC, sous vide. Ce processus élimine les bulles d'air, s'assurer que le produit final reflète la forme du prototype, texture, et des détails d'une précision exceptionnelle. Des pièces automobiles aux dispositifs médicaux, these products play a critical role in small-batch production, design testing, et personnalisation. This article breaks down their core principles, sélections de matériaux, production workflows, and applications—with clear comparisons and tips to help you achieve consistent, des résultats de haute qualité.
1. Core Definition & Working Principle of Vacuum Duplicating Products
To understand their value, it’s first critical to clarify what vacuum duplicating products are and how the vacuum process ensures their precision.
1.1 Définition
Vacuum duplicating products are physical replicas of a master prototype (par ex., 3D-printed resin part, CNC-machined metal component) produced via the following steps:
- A mold (typically silicone or epoxy) is created from the master prototype.
- Matériaux liquides (par ex., résine, polyuréthane) are poured into the mold under vacuum pressure (-0.095 à -0.1MPa).
- La matière guérit (at room temperature or with heat) to form a solid product that matches the prototype’s shape and details.
1.2 Key Principle: Why Vacuum Matters
The vacuum environment solves two critical challenges of traditional casting:
- Bubble Elimination: Vacuum pressure removes trapped air from the liquid material, preventing voids or surface defects in the final product. Par exemple, a silicone mold for a dental crown prototype would trap air bubbles without vacuum—resulting in a crown with gaps that don’t fit the patient’s tooth.
- Full Detail Filling: Reduced pressure lowers the material’s viscosity, letting it flow into tiny mold cavities (par ex., 0.05mm-wide textures on a phone case prototype) that gravity alone can’t reach.
Real-World Example: An aerospace engineer uses vacuum duplicating to create a replica of an aircraft wing component. The vacuum ensures the resin fills every small channel in the mold—critical for testing how air flows through the component during flight.
2. Sélection des matériaux: Moules, Prototypes, and Casting Materials
The quality of vacuum duplicating products depends entirely on choosing the right materials for each stage. Below is a breakdown of core materials and their use cases:
2.1 Mold Materials: The “Negative Template”
Molds determine the product’s detail retention and durability. Choose based on your prototype’s complexity and batch size:
| Matériau du moule | Key Characteristics | Curing Requirements | Applications idéales |
| Silicone | – Grande flexibilité (Shore A 20–40) for easy demolding of complex parts (par ex., contre-dépouilles).- Excellent detail retention (captures 0.05mm textures).- Résistance à la température (-60°C à 300°C).- Reusable 20–50 cycles. | – Room-temperature curing (20°C–25°C): 4–8 hours.- Accelerated curing (50°C–60°C): 2–3 hours.- Requires vacuum degassing to remove mold bubbles. | Small-batch functional parts: boîtiers pour dispositifs médicaux (hearing aids), composants de jouets, and consumer electronics prototypes (TV remote buttons). |
| Résine époxy | – Haute dureté (Shore D 60–80) for tight dimensional accuracy (±0,05 mm).- Good heat/chemical resistance (120°C–180°C after curing).- Less flexible than silicone; better for flat/geometric parts. | – Room-temperature curing: 8–12 hours.- Post-cure (80°C): 1 heure (boosts strength).- Needs release agents (sticks to prototypes without them). | Pièces de haute précision: composants aérospatiaux (engine conduits), electronic device shells (smartwatch casings), et supports structurels. |
2.2 Casting Materials: The “Final Product”
Select based on the product’s end-use (force, flexibilité, transparence):
| Casting Material | Propriétés clés | Vacuum Casting Tips | Applications idéales |
| Unsaturated Polyester Resin | – Faible coût ($15–30 per kg).- Fast curing (30–60 minutes with accelerator).- Easy to color (add pigments for custom shades).- Moderate strength (résistance à la traction: 30–40 MPa). | – Mix with 1% accelerator + 1% catalyst.- Pour quickly—short pot life (20–30 minutes). | Pièces décoratives: furniture trim, sculptures d'art, and low-stress consumer goods (par ex., plastic plant pots). |
| Résine époxy | – Haute résistance (résistance à la traction: 50–80 MPa) and chemical resistance.- Low shrinkage (0.5–1%) for dimensional stability.- Résistant à la chaleur (120°C–180°C after curing). | – Utiliser 1:1 resin-to-hardener ratio.- Degas for 1–2 minutes to remove bubbles. | Pièces structurelles: garniture intérieure automobile (panneaux du tableau de bord), poignées pour dispositifs médicaux, and aerospace prototypes. |
| Polyuréthane (Unité centrale) | – Flexible (Shore A 30–80) or rigid (Shore D 60–80) variants.- Good wear resistance (ideal for parts with friction, par ex., semelles).- Fast curing (1–2 hours at 20°C). | – Avoid overmixing (causes premature curing).- Cure at room temperature for best flexibility. | Pièces fonctionnelles: soft gaskets (pour l'électronique), cushioning (chair pads), and custom insoles. |
2.3 Prototype Materials: The “Master Model”
Prototypes are the foundation of accurate replicas. Choose based on precision needs:
| Prototype Material | Key Traits | Compatibility with Molds | Idéal pour |
| SLA 3D-Printed Resin | – Haute précision (±0,05 mm) for intricate details.- Surface lisse (Ra 0,8 μm) reduces mold finishing time. | Excellent with silicone/epoxy molds; use silicone oil as a release agent. | Pièces complexes: couronnes dentaires, jewelry patterns, and electronic device shells. |
| CNC-Machined Metal | – Ultra-durable (reusable for 100+ mold makings).- High surface finish (Ra 0,4 μm) for mirror-like replicas. | Good with epoxy molds; use petroleum jelly to prevent sticking. | Industrial masters: pièces automobiles, composants aérospatiaux, and high-wear prototypes. |
| FDM 3D-Printed PLA | – Faible coût ($50–100 per prototype).- Facile à usiner (sand to smooth surfaces).- Précision (±0.1mm–±0.3mm). | Suitable for silicone molds; sand layer lines first to avoid texture transfer. | Prototypes à faible coût: pièces de jouets, simple consumer goods, and design concept tests. |
3. Step-by-Step Production Workflow
Creating vacuum duplicating products follows a linear, repeatable process—each step critical to avoiding defects.
3.1 Stage 1: Master Prototype Preparation
- Faire le ménage & Lisse:
- Wipe the prototype with isopropyl alcohol (70%–90%) to remove dust, huile, or 3D print residue.
- Sand FDM prototypes with 400–1500 grit sandpaper to eliminate layer lines—uneven surfaces will be replicated in the mold.
- Apply Release Agent:
- Use silicone oil for plastic/metal prototypes, petroleum jelly for wax prototypes, or specialized spray for silicone-on-silicone replication.
- Apply a thin, even layer—thick coats distort details, while missing spots cause the mold to stick to the prototype.
3.2 Stage 2: Fabrication de moules
Using silicone (the most common mold material) as an example:
- Frame Setup:
- Place the prototype in a plastic/wood frame and seal edges with masking tape to prevent silicone leakage.
- Ensure 5–10mm of space between the prototype and frame (for even silicone coverage).
- Silicone Mixing & Dégazage:
- Mix silicone base and curing agent at a 10:1 ratio (condensation silicone) ou 1:1 ratio (additive silicone). Stir slowly for 2–3 minutes to avoid bubbles.
- Place the mixture in a vacuum chamber (-0.1MPa) for 1–2 minutes to remove trapped air.
- Verser & Guérison:
- Pour silicone slowly over the prototype (tilt the frame to 45° to reduce splashing).
- Cure at 20°C–25°C for 6 heures (ou 3 hours at 60°C for faster results).
3.3 Stage 3: Coulée sous vide & Guérison
- Préparation du matériel:
- Mix the casting material (par ex., epoxy resin at 1:1 ratio) according to the manufacturer’s instructions.
- Coulée sous vide:
- Pour the material into the silicone mold and place the assembly in a vacuum chamber (-0.095 à -0.1MPa) for 2–3 minutes.
- The vacuum ensures the material fills every mold cavity—critical for parts like dental crowns or aerospace components.
- Guérison:
- Room-temperature curing: PU resin (1–2 heures), unsaturated polyester resin (30–60 minutes).
- Heat curing: Résine époxy (60°C pour 2 heures) for increased strength.
3.4 Stage 4: Démoulage & Finition
- Démoulage:
- Gently peel the silicone mold from the product—silicone’s flexibility prevents damage to both the product and mold. For epoxy molds, use a release tool to pry the mold open (epoxy is rigid).
- Finition:
- Trim excess material (éclair) with a sharp knife.
- Sand the product with 400–800 grit sandpaper for a smooth finish. Pour les pièces très brillantes (par ex., coques de téléphone), apply a clear varnish.
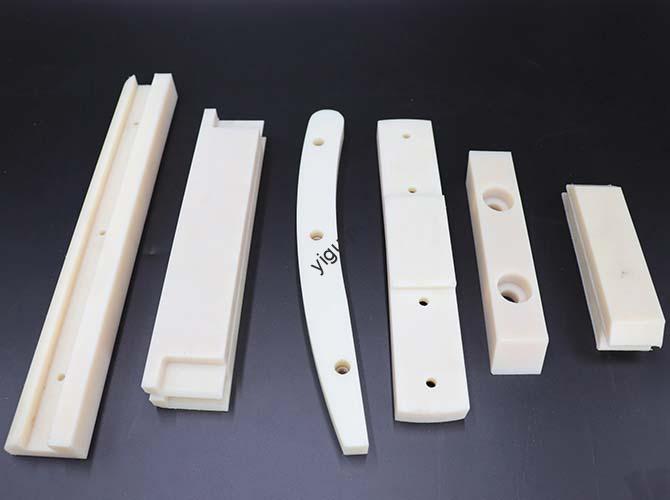
4. Key Application Fields of Vacuum Duplicating Products
Vacuum duplicating products excel in industries where precision, production en petites séries, and customization are critical:
4.1 Fabrication industrielle
- Automobile: Produce small batches (10–50 unités) of interior parts (par ex., panneaux du tableau de bord, poignées de porte) for design verification. Par exemple, a car manufacturer uses vacuum duplicating to test 20 different dashboard designs—saving $50,000 compared to making steel molds for each design.
- Aérospatial: Create replicas of complex components (par ex., engine nozzles, wing sections) for stress testing. The vacuum ensures the replica’s internal channels match the prototype—critical for testing fuel flow during flight.
4.2 Dispositifs médicaux
- Dentistry: Produce custom dental crowns and bridges from 3D-printed tooth models. Vacuum duplicating ensures the crown fits the patient’s tooth exactly—reducing the need for adjustments during surgery.
- Prothèses: Create prototypes of prosthetic limbs (par ex., hand shells) using biocompatible polyurethane. The vacuum ensures the shell’s texture is smooth enough for skin contact.
4.3 Biens de consommation
- Électronique: Test non-metallic device shells (par ex., TV remote casings, coques de smartphone) for appearance and fit. A tech startup uses vacuum duplicating to produce 30 phone case prototypes—testing how well the case protects the phone from drops.
- Jouets: Manufacture limited-edition toys (par ex., anime figurines) with intricate details. Vacuum duplicating captures tiny features (par ex., a figurine’s facial expressions) that mass-production molds can’t replicate cost-effectively.
5. Avantages & Limitations of Vacuum Duplicating Products
5.1 Avantages principaux
- Haute précision: Dimensional accuracy of ±0.1mm–±0.3mm, with detail retention down to 0.05mm.
- Low Cost: Mold costs are 80% lower than traditional steel molds (par ex., \(500 for a silicone mold vs. \)5,000 pour l'acier). Ideal for small batches (10–500 unités).
- Flexibilité matérielle: Choose from resins, polyuréthane, and more to match the product’s needs (par ex., transparent resin for a lamp shade, soft PU for a toy).
- Délai d'exécution rapide: From prototype to product in 3–7 days—vs. 2–4 weeks for steel mold production.
5.2 Limitations to Consider
- Low Production Efficiency: Manual pouring and demolding limit output to 1–10 parts per hour—unsuitable for mass production (10,000+ unités).
- Mold Life: Silicone molds last 20–50 cycles; epoxy molds last 30–80 cycles. For batches over 500 unités, steel molds become more cost-effective.
- Material Strength: Cast parts (par ex., résine) have 10–20% lower tensile strength than injection-molded parts. Par exemple, a resin phone case may crack under 50kg of force, while an injection-molded ABS case withstands 80kg.
6. Yigu Technology’s Perspective on Vacuum Duplicating Products
Chez Yigu Technologie, we’ve helped clients across industries leverage vacuum duplicating to reduce development time and costs—especially in medical and aerospace fields. A common mistake we address is overusing epoxy molds for complex parts: one client tried to make a silicone-like toy prototype with an epoxy mold, resulting in parts that broke during demolding. We switched to a flexible silicone mold, which let the toy’s undercuts release easily and reduced rework by 70%. Pour les pièces de haute précision (par ex., couronnes dentaires), we always recommend vacuum degassing for both the mold and casting material—this eliminates 95% of surface defects. Our key insight: Vacuum duplicating isn’t just a low-cost alternative to traditional manufacturing—it’s a tool for innovation, letting clients test more designs faster without risking expensive tooling. By aligning mold material with prototype complexity (silicone for curves, epoxy for flat parts), clients get consistent, high-quality products every time.
7. FAQ: Common Questions About Vacuum Duplicating Products
Q1: Can I use vacuum duplicating to produce food-contact products (par ex., plastic cups)?
A1: Oui, but only with food-grade materials. Choisir food-safe silicone for the mold and FDA-approved casting materials (par ex., food-grade PU or epoxy). Test the final product for compliance (par ex., FDA 21 CFR 177.2600) to ensure no chemicals leach into food. Avoid standard resins—they may contain toxins.
Q2: How do I fix bubbles in my vacuum duplicating product?
A2: Bubbles usually stem from incomplete vacuum degassing or fast pouring. Correctifs:
- Extend vacuum time by 1–2 minutes (ensure pressure reaches -0.1MPa).
- Pour the material slower (10–15ml per second) to avoid trapping air.
- For thick molds (>10mm), use layered pouring: fill 1/3 of the mold, degas, then add more material.
Q3: What’s the maximum size of a vacuum duplicating product?
A3: It depends on your vacuum chamber size—standard chambers handle parts up to 600mm × 600mm × 600mm (par ex., a small TV back cover). Pour les pièces plus grandes (par ex., a car door panel), use sectional molds: create 2–3 smaller molds, produce sections of the product, then assemble them. This also reduces material waste and ensures full detail filling.