En impression 3D, the roughness of 3D printing is more than just a cosmetic issue—it directly impacts a part’s performance, durabilité, et même la sécurité. Que vous imprimiez un prototype pour un client, un équipement fonctionnel pour une machine, ou un implant médical, la rugosité de la surface affecte l'apparence de la pièce, s'adapte à d'autres composants, résiste à l'usure, and lasts over time. Pour les passionnés d'impression 3D, ingénieurs, et les professionnels des achats, understanding what causes roughness and how to reduce it is key to producing high-quality prints. This guide breaks down the main factors influencing the roughness of 3D printing, proven solutions to smooth surfaces, measurement methods, and real-world examples—all to help you achieve the smooth, reliable prints you need.
Why the Roughness of 3D Printing Matters: Beyond Aesthetics
At first glance, rough 3D printed surfaces might seem like a minor annoyance, but they can create major problems in real-world use. The roughness of 3D printing impacts four critical aspects of a part’s performance:
1. Fit and Functionality
Rough surfaces prevent parts from fitting together tightly. Par exemple, a rough 3D printed hinge won’t rotate smoothly with a matching pin—gaps from roughness cause friction, porter, and even jamming.
- Real-World Example: A small robotics company printed ABS gears with rough tooth surfaces. The gears didn’t mesh properly with each other, leading to noisy operation and premature wear—they needed replacement after just 100 hours of use. After smoothing the gear teeth, the same gears lasted 500+ hours with no issues.
2. Résistance à l'usure
Rough surfaces have tiny peaks and valleys that catch on other materials, accelerating wear. A smooth surface, par contre, reduces friction and lasts longer.
- Data Point: A study by 3D printing researchers found that parts with a surface roughness (Râ) de 1.6 μm lasted 3x longer in wear tests than parts with an Ra of 6.3 µm. For industrial parts like bearings or sliding components, this difference means fewer replacements and lower maintenance costs.
3. Aesthetics and Customer Perception
For consumer products (like phone cases or decorative models) or client prototypes, roughness makes parts look unprofessional. A smooth surface signals quality, which can win over customers or secure project approvals.
- Exemple: A startup presented a 3D printed prototype of their new smartwatch band to investors. The rough surface (from unoptimized settings) made the band look cheap, and investors questioned the product’s quality. After smoothing the band’s surface, the startup re-pitched—and secured $500,000 in funding.
4. Biocompatibilité (for Medical Parts)
In medical 3D printing (par ex., implants or surgical tools), rough surfaces can trap bacteria or irritate tissue. Smooth surfaces are essential for patient safety and compliance with medical standards.
- Critical Example: A medical device manufacturer had to recall 3D printed dental crowns because their rough inner surfaces irritated patients’ gums. After adjusting their process to reduce roughness, the crowns met biocompatibility standards, and patient complaints dropped to zero.
Key Factors Influencing the Roughness of 3D Printing
The roughness of 3D printing isn’t random—it’s caused by specific choices in printer type, matériels, and settings. Understanding these factors lets you target solutions and avoid rough prints from the start.
1. Printer Type: Resolution Determines Baseline Roughness
Different 3D printing technologies have different inherent resolutions, which set a “baseline” for roughness. High-resolution printers produce smoother surfaces by default:
| Printer Type | Typical Surface Roughness (Râ, µm) | Key Advantage for Smoothness | Applications idéales |
| ANS (Stéréolithographie) | 0.1–1.0 | Uses UV light to cure liquid resin, creating fine details and smooth layers | Medical parts, bijoux, high-detail prototypes |
| SLS (Frittage sélectif au laser) | 1.0–3,0 | Sinters powder into dense parts with minimal layer lines | Pièces fonctionnelles, composants industriels |
| FDM (Modélisation des dépôts fondus) | 3.0–10.0 | Affordable and versatile, but extruded filaments create visible layer lines | Projets de loisirs, low-cost prototypes |
- Real-World Comparison: A designer printed the same small figurine with SLA and FDM. The SLA figurine had a smooth surface (Ra = 0.8 µm) with no visible layer lines, while the FDM version had rough edges (Ra = 5.2 µm) and noticeable layer steps. For a display model, the SLA print was far more suitable.
2. Propriétés des matériaux: Some Materials Are Naturally Smoother
The type of 3D printing material you use also affects roughness. Materials with fine particle sizes or low viscosity tend to produce smoother surfaces:
- Résines (ANS): Materials like Formlabs Grey Pro Resin or Rigid Resin cure into smooth, glass-like surfaces. Their liquid form fills tiny gaps, eliminating rough spots.
- Powders (SLS): Fine nylon or polyamide powders (with particle sizes of 20–50 μm) sinter into dense, parties lisses. Coarser powders (100+ µm) create rougher surfaces.
- Filaments (FDM): PLA and PETG filaments can be smooth if printed correctly, but ABS or TPU often have rougher surfaces due to their higher melting viscosity.
- Exemple: A toy manufacturer tested two SLS materials for 3D printed action figures: fine nylon powder (30 µm) and coarse nylon powder (80 µm). The fine powder produced figures with smooth skin details (Ra = 1.5 µm), while the coarse powder created rough, grainy surfaces (Ra = 4.0 µm). The manufacturer chose the fine powder for their final product.
3. Paramètres d'impression: Tweaks That Reduce Roughness
Even with the right printer and material, poor parameter settings can lead to rough prints. Three key parameters have the biggest impact:
un. Épaisseur de couche
Thicker layers create more visible “steps” on the surface (the “layer step effect”), increasing roughness. Reducing layer thickness smooths these steps.
- Guideline: For FDM printers, use 0.15–0.20 mm layers (contre. 0.25–0.30 mm) for smoother surfaces. For SLA, 0.05–0.10 mm layers are ideal.
- Exemple: A hobbyist printed a PLA cup with 0.30 mm layers (rough surface, Ra = 6.5 µm) and then with 0.15 mm layers (smoother surface, Ra = 3.8 µm). The thinner layers cut roughness by 40%.
b. Filling Speed and Printing Speed
Fast filling or printing speeds can cause the printer to extrude or cure material unevenly, creating blobs or gaps. Slowing down these speeds lets the material settle smoothly.
- Recommendation: Reduce filling speed by 20–30% for the top layers (the ones visible on the surface). For SLA, lower printing speed (50–70 mm/h) for detailed areas.
- Impact: An industrial shop printed ABS brackets at 80 mm/s (rough surface, Ra = 7.2 µm) and then at 50 mm/s (smoother surface, Ra = 4.5 µm). The slower speed gave the plastic more time to bond evenly.
c. Nozzle/Tip Size (FDM/SLA)
Smaller nozzles (FDM) or tips (ANS) deposit less material at a time, creating finer details and smoother surfaces.
- FDM: UN 0.4 mm nozzle is standard, but a 0.25 mm nozzle produces smoother edges (though it prints slower).
- ANS: UN 0.05 mm tip (contre. 0.10 mm) cures smaller resin droplets, reducing roughness.
- Exemple: A jewelry maker used a 0.25 mm FDM nozzle to print small metal-plated pendants. The pendants had smooth edges (Ra = 3.2 µm) that took plating evenly. Avec un 0.4 mm nozzle, the pendants were rough (Ra = 5.8 µm) and the plating peeled off in spots.
Post-traitement: The Final Step to Smooth 3D Prints
Even with optimized settings, many 3D prints need post-processing to achieve the desired smoothness. These three methods are the most effective for reducing the roughness of 3D printing:
1. Ponçage: The Most Accessible Method
Sanding uses abrasive paper to grind down rough surfaces and layer lines. It works for all 3D printing materials and is easy to do at home or in a workshop.
- Étape par étape:
- Commencez avec du papier de verre grossier (120–240 grains) to remove large layer lines.
- Move to medium grit (400–600 grains) to smooth the surface.
- Finish with fine grit (800–1200 grains) for a polished look.
- Exemple: A prop maker sanded an FDM-printed ABS cosplay helmet. Before sanding, the helmet had a rough surface (Ra = 8.0 µm); after sanding with 1200 grit paper, the surface was smooth (Ra = 2.0 µm) and ready for painting.
2. Polissage: For a Glossy Finish
Polishing takes sanding a step further, creating a shiny, surface semblable à un miroir. It’s ideal for decorative parts or prototypes that need a high-end look.
- Méthodes:
- Polissage mécanique: Use a polishing wheel with a compound (like car wax or metal polish) to buff the surface.
- Polissage chimique (ABS Only): Use acetone vapor to melt the top layer of ABS, filling in tiny gaps. Place the part in a sealed container with acetone (don’t touch the liquid) for 5–10 minutes.
- Résultat: A furniture designer polished an SLS-printed nylon chair leg. The polished leg had a glossy surface (Ra = 1.2 µm) that matched the chair’s other wooden components—something sanding alone couldn’t achieve.
3. Revêtement: Smooth and Protect
Applying a coating fills in rough spots and adds a protective layer. Common coatings include:
- Primer: A spray-on primer (like automotive primer) smooths small imperfections and prepares the surface for painting.
- Résine époxy: A clear epoxy coating creates a hard, smooth surface—great for jewelry or display models.
- Acrylic Spray: A clear acrylic sealer adds a matte or glossy finish while reducing roughness.
- Exemple: A startup printed PLA phone cases with a slightly rough surface (Ra = 4.5 µm). They sprayed the cases with a clear acrylic sealer, which filled in tiny gaps and reduced roughness to Ra = 2.3 µm. The cases looked sleek and professional, et les ventes ont augmenté de 30%.
Measuring and Evaluating the Roughness of 3D Printing
To ensure your prints meet quality standards, you need to accurately measure the roughness of 3D printing. Two main methods are used:
1. Contact Profilometers
These tools use a tiny stylus to scan the surface, measuring the height of peaks and valleys. They provide precise numerical values (like Ra, the average roughness).
- Use Case: Industrial manufacturers use contact profilometers to test medical parts or aerospace components, ensuring roughness meets strict industry standards (par ex., Râ < 1.0 μm for implants).
2. Non-Contact Methods
Tools like laser scanners or optical microscopes create 3D images of the surface without touching it. They’re ideal for delicate parts that could be damaged by a stylus.
- Use Case: A research lab used a laser scanner to measure the roughness of SLA-printed resin parts. The scanner revealed tiny rough spots (0.5 μm tall) that a contact profilometer missed, helping the lab optimize their resin curing process.
- Pro Tip: For hobbyists or small businesses without professional tools, use a “visual comparison” guide. Print a test part with known roughness (par ex., Ra = 2 µm, 5 µm, 10 µm) and compare your prints to it—this gives you a rough estimate of surface quality.
Yigu Technology’s View on the Roughness of 3D Printing
Chez Yigu Technologie, we know the roughness of 3D printing is a make-or-break factor for many projects—from consumer products to industrial components. We help clients choose the right tools and materials: recommending SLA printers and fine resins for smooth medical parts, or guiding FDM users to adjust layer thickness and speed for better results. We also share post-processing tips, like sanding techniques or coating recommendations, to help clients achieve their desired smoothness. Par exemple, we advised a toy maker to switch from coarse to fine SLS powder, cutting their parts’ roughness by 60% et améliorer la qualité des produits. Our goal is to make reducing 3D printing roughness simple and accessible, so every client can produce prints that look great and perform well.
FAQ:
- Q: My FDM prints are still rough even after reducing layer thickness. What else can I do?
UN: Try slowing down your printing speed (by 20–30%) and using a smaller nozzle (0.25–0.3 mm instead of 0.4 mm). You can also add a “ironing” feature in your slicer software—this melts the top layer slightly, smoothing out rough spots. A hobbyist used these tweaks and reduced their FDM print roughness from Ra = 6.0 μm to Ra = 3.0 µm.
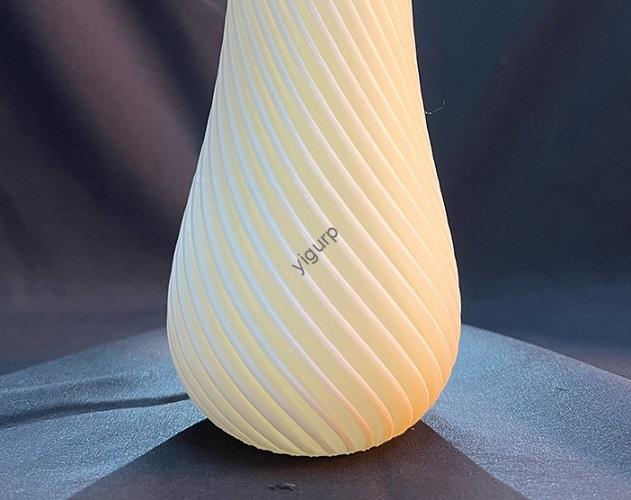
- Q: Can I get a smooth surface with a budget FDM printer (sous $300)?
UN: Oui! Budget printers like the Creality Ender 3 can produce smooth prints with adjustments: utiliser 0.15 mm layer thickness, slow the print speed to 40–50 mm/s, and sand the final part with 800 grit paper. A student printed a PLA vase with an Ender 3—after sanding, it had a smooth surface that looked like it was made with a more expensive printer.
- Q: Is there a way to avoid post-processing and get smooth prints right off the printer?
UN: Use an SLA printer—they produce smooth surfaces (Ra = 0.1–1.0 μm) without post-processing. For FDM, the “ironing” slicer feature can reduce the need for sanding, but you’ll still likely need light polishing for a glossy finish. An SLA user printed a resin figurine that was smooth and ready to display immediately—no post-processing required.