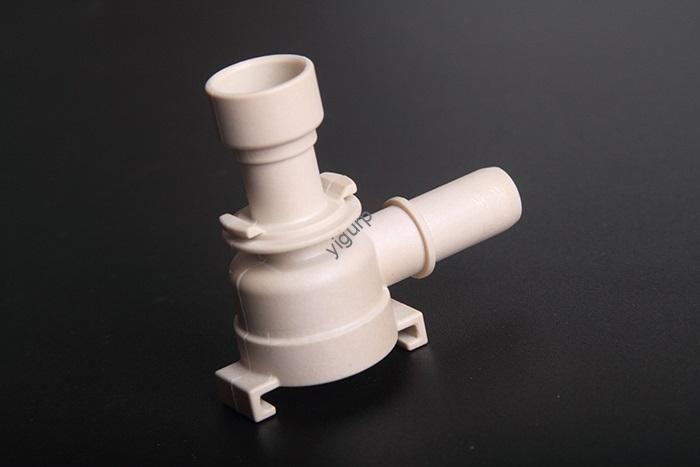
Si vous êtes un spécialiste des achats ou un ingénieur produit travaillant sur le développement de drones, understanding the process of metal drone prototype model is key to ensuring design success and functional reliability. Les prototypes métalliques comblent le fossé entre les conceptions 3D et les performances réelles : ils vous permettent de tester la durabilité, aérodynamique, et capacité de charge avant la production à grande échelle. Ci-dessous un détail, practical breakdown of every stage, with real-world examples and data to help you make informed decisions.
1. Sélection des matériaux: Choosing the Right Metal for Your Prototype
The first and most critical step in the metal drone prototype process is picking a material that matches your prototype’s goals (par ex., poids, force, coût). Three metals dominate this space, each with unique advantages for specific drone types.
| Metal Type | Propriétés clés | Notes communes | Ideal Drone Components | Real-World Example | Fourchette de coût (USD/livre) |
| Alliage d'aluminium | Faible densité (2.7 g/cm³), haute résistance | 6061, 7075 | Frame, ailes, body casings | A consumer drone maker used 6061 aluminum for a prototype frame—cut weight by 30% contre. acier. | \(2–)5 |
| Alliage de titane | Rapport résistance/poids élevé, résistant à la chaleur | Ti-6Al-4V | Des pièces performantes (par ex., supports de moteur) | A military drone prototype used Ti-6Al-4V for its rotor hub—withstood 500°F (260°C) during testing. | \(30–)50 |
| Acier inoxydable | Résistant à la corrosion, capacité de charge élevée | 304, 316 | Load-bearing parts (par ex., train d'atterrissage) | A industrial inspection drone used 316 stainless steel for landing gear—no rust after 6 months of outdoor use. | \(3–)8 |
Tip for procurement teams: If your prototype is for initial design checks (not extreme conditions), 6061 aluminum offers the best balance of cost and processability.
2. Phase de conception: Turning Concepts into Testable 3D Models
Avant usinage, you need a precise design that accounts for both function and manufacturability. This phase has two core steps:
2.1 3D Model Design
Use professional software to create a detailed 3D model of the drone. The goal is to replicate every feature—from screw holes to curved surfaces—so the prototype matches your final product vision.
Common tools: SolidWorks (most popular for small teams), UG NX (for complex aerospace designs), Catia (used by major drone manufacturers like DJI).
Exemple: A startup developing a delivery drone used SolidWorks to design its prototype. They added 0.1mm tolerances to the propeller mounts—this small detail prevented vibration issues during later flight tests.
2.2 Design Analysis
Don’t skip simulation! Use software to test your design for stress, déformation, or dynamic issues avant usinage. This saves time and material costs.
Key analyses:
- Stress testing (par ex., Will the frame hold 5kg of cargo?)
- Aerodynamic simulation (par ex., Will the wings reduce drag?)
- Thermal analysis (par ex., Will the battery compartment overheat?)
Cas: An agricultural drone team used ANSYS (a simulation tool) to analyze their prototype’s body. They found a weak spot in the tail—redesigning it early avoided a $2,000 machining mistake.
3. Programming Phase: Preparing for CNC Machining
Machines CNC (Commande numérique par ordinateur) are the backbone of metal drone prototype machining—they turn 3D models into physical parts. This phase ensures the machine works accurately and safely.
3.1 Programmation FAO
Convert your 3D model into code that CNC machines understand using CAME (Fabrication assistée par ordinateur) logiciel. The software generates tool paths—exact routes the machine’s cutting tools will take.
Top tools: Mastercam (great for 3-axis machining), SolidCam (integrates with SolidWorks).
Why it matters: A precise tool path reduces material waste. Par exemple, a team machining a titanium prototype used Mastercam to optimize paths—cutting time from 8 heures pour 5 heures.
3.2 Program Testing
Never run a new program on a CNC machine without testing it first! Use simulation software to check for:
- Tool collisions (par ex., Will the cutting tool hit the machine?)
- Overcutting (par ex., Will the tool remove too much material?)
Tool example: VERICUT (a leading simulation tool).
Real result: A drone parts manufacturer caught a collision error in simulation—avoiding $5,000 in damage to their 5-axis CNC machine.
4. Processing Stage: Machining the Prototype
This is where your design becomes a physical part. The type of CNC machine you use depends on your prototype’s complexity.
4.1 Usinage CNC
- 3-machines CNC à axes: Best for simple parts (par ex., flat landing gear brackets). They move the tool along three directions (X, Oui, Z) and work well for low-cost, prototypes de base.
- 5-machines CNC à axes: Ideal for complex parts (par ex., curved wing edges or beveled body panels). They add two more rotation axes, letting the tool reach hard-to-access areas.
Precision stat: 5-axis machines can achieve tolerances as tight as ±0.001mm—critical for parts like propeller shafts, where even small errors cause vibration.
4.2 Measurement and Monitoring
Pendant l'usinage, utiliser precision measuring tools to check parts in real time. This ensures every component meets your design specs.
Common tools:
- Machine de mesure de coordonnées (MMT): Scans parts to verify size and shape.
- Calipers and micrometers: For quick checks of small features (par ex., hole diameters).
Exemple: A drone prototype team used a CMM to test 10 aluminum frame parts. They found 2 parts were 0.05mm too small—reworking them immediately prevented assembly issues later.
5. Post-Processing Stage: Finishing and Testing the Prototype
Machined parts need finishing touches to perform well, and the full prototype needs testing to validate its design.
5.1 Traitement de surface
Surface processes improve appearance, durabilité, et performances. Here are the most common for metal drone prototypes:
- Ébavurage: Supprimer les arêtes vives (prevents damage to wires during assembly).
- Sablage: Créer un lisse, finition mate (reduces wind resistance for small drones).
- Anodisation: Add a protective layer (par ex., anodized 7075 aluminum resists scratches and corrosion).
Cas: A marine drone prototype used anodized aluminum for its body—after 10 tests in saltwater, there was no sign of rust.
5.2 Assembly and Testing
Put all parts together, then run tests to ensure the prototype works as intended. Key tests include:
- Flight tests: Check stability, vitesse, and battery life (par ex., a delivery drone prototype flew 5km with a 3kg load—meeting design goals).
- Stability tests: Test performance in wind or rain (par ex., an agricultural drone handled 20mph winds without tipping).
- Functional validation: Ensure parts like cameras or sensors work with the prototype (par ex., a survey drone’s camera captured clear images from 100m).
6. Contrôle de qualité: Ensuring Consistency and Reliability
Contrôle de qualité (QC) runs through every stage of the metal drone prototype process—it’s how you avoid costly rework and ensure the prototype is representative of your final product.
6.1 Full Monitoring
Set up checkpoints at every stage:
- Material QC: Verify metal grades (par ex., test 6061 aluminum for density).
- Machining QC: Check part dimensions after every 5 unités.
- Post-processing QC: Inspect surface treatments (par ex., ensure anodization thickness is 0.002mm).
Stat: Teams with 3+ QC checkpoints reduce prototype defects by 40% (per aerospace manufacturing data).
6.2 Certification ISO
Follow international standards like OIN 9001 (gestion de la qualité) ou OIN 13485 (for medical drones). Certification ensures:
- Consistent processes (every prototype is made the same way).
- Traçabilité (you can track which batch of metal was used for each part).
Why it matters: Procurement teams at large companies (par ex., Amazon for delivery drones) often require ISO certification from prototype suppliers.
Yigu Technology’s Perspective
Chez Yigu Technologie, we believe the metal drone prototype process is all about balancing precision and practicality. Many teams overcomplicate early prototypes—for example, using titanium for basic frames when 6061 aluminum works. Our engineers work with clients to pick materials and processes that match their goals: for initial design checks, we prioritize fast, cost-effective 3-axis machining; for high-performance prototypes, we use 5-axis machines and ISO 9001-controlled workflows. The right process doesn’t just build a prototype—it builds confidence in your final product.
FAQ
- Q: How long does the metal drone prototype process take?
UN: It depends on complexity. A simple prototype (par ex., a basic frame) takes 1–2 weeks. A complex one (par ex., a high-performance military drone part) takes 3–4 weeks, y compris la conception et les tests.
- Q: Which material is best for a drone prototype on a tight budget?
UN: 6061 aluminium. It’s cheaper than titanium or stainless steel, facile à usiner, and light enough for most consumer or industrial drone prototypes.
- Q: Do I need ISO certification for a small drone prototype project?
UN: Not always—if it’s for internal testing only, ISO may not be necessary. But if you plan to share the prototype with clients or scale to production, OIN 9001 helps build trust and ensure consistency.