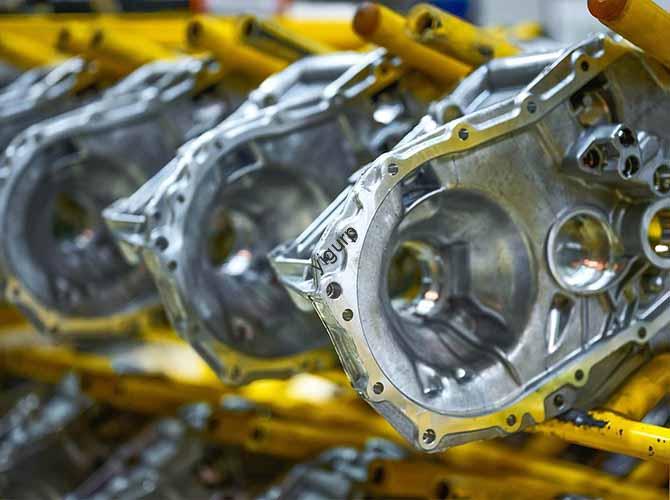
La machine à marcher de précision (un polyvalent, équipement d'usinage multifonctionnel) joue un rôle central dans la production de modèles prototypes. It combines the advantages of tournant, fraisage, et forage, permettant l'usinage de haute précision de pièces prototypes complexes, souvent avec des tolérances aussi étroites que ±0,005 mm. Qu'il s'agisse de composants de test automobile ou de prototypes de dispositifs médicaux, mastering the walking machine’s machining process ensures your prototype meets design goals while saving time and cost. This guide breaks down every key stage, from machine selection to surface finish, to help you avoid common pitfalls.
1. Machine Tool Selection: Laying the Foundation for Precision
Choosing the right walking machine is the first critical step—its machine accuracy, rigidité, and capacity directly impact prototype quality. Not all walking machines are equal; your choice depends on the prototype’s size, complexité, et exigences de tolérance.
| Type de machine | Principales fonctionnalités | Ideal Prototype Scenarios | Conseils de sélection |
| CNC Walking Lathe | Combines turning and milling; 2-4 axes; compact design. | Small cylindrical prototypes (par ex., arbres, petits engrenages) with minor milling features. | Prioritize machine accuracy (positional accuracy ≤±0.003 mm) for tight-tolerance parts. |
| CNC Walking Milling Machine | Focuses on milling; 3-5 axes; supports complex 3D machining. | Prototypes with irregular shapes (par ex., automotive bracket prototypes, medical implant models). | Check machine rigidity—look for a heavy-duty base to reduce vibration during high-speed cutting. |
| Hybrid Walking Machine | Integrates turning, fraisage, et broyage; liaison multi-axes. | Complex prototypes needing multiple processes (par ex., aerospace component prototypes with both cylindrical and flat features). | Ensure machine capacity (workpiece weight ≤50 kg for most prototypes) matches your part size. |
| Grinding-Equipped Walking Machine | Adds grinding function; ideal for finish machining. | Prototypes requiring ultra-smooth surfaces (par ex., precision bearing prototypes). | Verify grinding spindle runout (≤0.001 mm) to guarantee surface quality. |
Quick Tip: For early-stage prototypes (where tolerance can be ±0.01 mm), a basic 3-axis CNC walking lathe/milling machine works. For final validation prototypes (needing ±0.002 mm tolerance), invest in a hybrid walking machine with high rigidity.
2. Machining Process Planning: Streamlining Prototype Production
A well-designed process plan avoids rework and cuts machining time by 20-30%. It’s all about arranging the right operations in the right order and optimizing each step.
Core Steps in Process Planning
- Process Sequence: Follow the “rough machining → semi-finish machining → finish machining” rule. Par exemple, when making a gear prototype:
- Rough turn the outer diameter (remove 80% of excess material).
- Semi-mill the gear teeth (leave 0.1-0.2 mm machining allowance).
- Finish turn and mill to reach final dimensions.
Why? Rough machining removes material fast; finish machining ensures precision without wasting time on excess material.
- Machining Strategy:
- Pour des prototypes simples (par ex., flat plates): Use “layered cutting” (cut layer by layer along the Z-axis).
- For complex 3D prototypes (par ex., curved medical parts): Adopt “adaptive clearing” (the machine adjusts cutting path based on part shape to reduce tool wear).
- Operation Planning: Combine similar operations. Par exemple, do all drilling first (using the same tool) before switching to milling—this reduces tool change time by 15%.
- Process Simulation: Use software like Mastercam or UG to simulate the entire process. This catches collisions (par ex., tool hitting the fixture) and identifies inefficient paths. A case study: A team simulated the machining of an automotive sensor prototype and optimized the path, cutting the machining cycle depuis 45 minutes pour 32 minutes.
Process Optimization Tips
- Prioritize critical features: Machine the prototype’s key surfaces (par ex., a medical part’s contact surface) first—this ensures they’re not damaged in later operations.
- Avoid over-processing: For early prototypes, skip unnecessary finish steps (par ex., fine grinding) if surface roughness Ra ≤1.6 μm is enough.
3. Contrôle de précision: Ensuring Prototype Accuracy
Precision is the soul of prototype machining—even a 0.005 mm deviation can make a prototype fail fit tests. Precision control covers tolerance, mesures, and real-time adjustments.
Key Control Measures
| Control Aspect | Specific Actions | Tools/Standards |
| Contrôle de tolérance | Set reasonable tolerances based on prototype stage: – Early prototype: ±0.01-±0.02 mm – Final prototype: ±0.002-±0.005 mm | Follow ISO 286-1 (tolerance standard) to define limits. |
| Positioning Accuracy | Calibrate the walking machine weekly: – Check axis backlash (adjust if >0.002 mm) – Verify spindle concentricity (runout ≤0.001 mm) | Use a laser interferometer for calibration. |
| Répétabilité | Test the machine’s repeatability (ability to produce the same result repeatedly): – Machine 10 identical prototype features – Measure each with a micrometer – Ensure deviation ≤±0.003 mm | Micromètre numérique (précision ±0,001 mm). |
| Precision Inspection | Do in-process inspection: – After rough machining: Check dimension allowance (assurer 0.1-0.2 mm left for finish machining) – After finish machining: Full inspection of key features | Machine de mesure de coordonnées (MMT) for complex prototypes; optical measuring instrument for small parts. |
Question: Why does my prototype’s dimension drift after machining?
Answer: It’s likely due to thermal deformation (the walking machine heats up during long cycles). Solve it by: 1) Preheating the machine for 30 minutes before machining; 2) Adding a cooling system to the spindle; 3) Doing finish machining in the morning (lower ambient temperature reduces thermal impact).
4. Material Considerations: Matching Material to Prototype Needs
The right material ensures the prototype behaves like the final part—without wasting money on overpriced options. Sélection des matériaux balances properties, usinabilité, et le coût.
Common Prototype Materials & Machining Tips
| Type de matériau | Exemples | Propriétés clés | Usinabilité | Walking Machine Tips |
| Métaux | Aluminium 6061, Acier doux 1018 | Aluminium: Léger, bonne conductivité thermique; Acier: Haute résistance. | Aluminium (excellent); Acier (good) | For aluminum: Use high spindle speed (2000-3000 tr/min) to reduce chip buildup. Pour l'acier: Use carbide tools and coolant to prevent tool wear. |
| Alliages | Titanium Alloy Ti-6Al-4V, Acier inoxydable 304 | Titane: Rapport résistance/poids élevé; Acier inoxydable: Résistant à la corrosion. | Titane (pauvre); Acier inoxydable (fair) | Lower feed rate (50-100 mm/min) for titanium to avoid tool overheating. For stainless steel: Use sharp tools to reduce work hardening. |
| Plastiques | ABS, COUP D'OEIL | ABS: Facile à usiner, faible coût; COUP D'OEIL: Résistance aux hautes températures. | ABS (excellent); COUP D'OEIL (fair) | For ABS: Use compressed air (au lieu du liquide de refroidissement) pour éviter de fondre. Pour le COUP D'OEIL: Utiliser de l'acier rapide (HSS) tools and slow spindle speed (800-1200 tr/min). |
| Composites | Carbon Fiber-Reinforced Polymer (CFRP) | Haute résistance, léger. | Équitable (fibers wear tools fast) | Use diamond-coated tools and low cutting speed (500-800 tr/min) to avoid fiber fraying. |
Material-Related Pitfalls to Avoid
- Material deformation: For thin-walled prototypes (épaisseur de paroi <1 mm), choose materials with low thermal expansion (par ex., invar alloy) to prevent warping during machining.
- Material surface quality: If the prototype needs a smooth surface, avoid materials with inclusions (par ex., low-grade steel)—they cause surface blemishes.
- Material cost: For early prototypes, use aluminum instead of titanium (frais 1/5 of titanium) unless strength testing is critical.
5. Conception des luminaires: Securing Prototypes for Stable Machining
A good fixture holds the prototype tightly (no movement during cutting) while protecting its surface. Fixture design focuses on stability, précision, et facilité d'utilisation.
Fixture Design Principles & Espèces
- Key Principles:
- Fixture stability: The fixture’s weight should be 3-5x the prototype’s weight (prevents vibration).
- Fixture precision: The fixture’s positioning error should be ≤1/3 of the prototype’s tolerance (par ex., for a ±0.006 mm prototype, fixture error ≤±0.002 mm).
- Fixture clamping force: Use just enough force to hold the part—too much (par ex., >500 N for plastic prototypes) causes deformation; too little leads to movement.
- Common Fixture Types for Walking Machine Prototypes:
- Vise Fixtures: Ideal for flat or rectangular prototypes (par ex., bracket models). Use soft jaws (rubber or aluminum) for plastic parts to avoid scratches.
- Chuck Fixtures: For cylindrical prototypes (par ex., shaft models). 3-jaw chucks work for symmetric parts; 4-jaw chucks for irregular cylindrical parts.
- Custom Fixtures: For complex prototypes (par ex., pièces aérospatiales courbes). Design with quick-release mechanisms to reduce setup time (depuis 20 minutes pour 5 minutes per prototype).
Exemple: When machining a thin-walled plastic prototype (épaisseur de paroi 0.8 mm), a team used a custom fixture with multiple small clamping points (instead of one large clamp). This reduced deformation from 0.01 mm à 0.003 mm, meeting the prototype’s tolerance requirement.
6. Génération de trajectoire d'outil: Optimizing Cutting Paths for Efficiency
Tool path generation is like planning a road trip—an efficient path saves time and reduces wear. It’s done via CAM software and directly affects machining speed and prototype quality.
Key Steps in Tool Path Generation
- Tool Path Planning:
- For rough machining: Use “zigzag” paths (covers large areas fast) pour enlever l'excédent de matière.
- For finish machining: Use “contour-parallel” paths (follows the part’s shape) to ensure smooth surfaces.
- Optimisation du parcours d'outil:
- Minimize rapid moves (the machine’s fast, non-cutting movement) by arranging paths close together.
- Avoid sharp turns (angles <90°) — they cause tool vibration. Replace with rounded turns (radius ≥1 mm).
- Software Selection:
- Pour des prototypes simples: Use entry-level software like BobCAD-CAM (easy to learn, faible coût).
- For complex 3D prototypes: Use advanced software like Siemens NX (supports multi-axis path generation and tool path simulation).
Tool Path Accuracy & Efficiency Tips
- Tool path accuracy: Set the path tolerance to 1/10 of the prototype’s tolerance (par ex., ±0.005 mm prototype → path tolerance ±0.0005 mm).
- Tool path efficiency: For batch prototype production (10-20 parties), use “batch processing” in CAM software—generate paths for all parts at once, économie 1-2 hours of setup time.
7. Finition de surface: Enhancing Prototype Appearance and Performance
Finition superficielle isn’t just about looks—it affects the prototype’s functionality (par ex., a rough surface increases friction in moving parts). It’s measured by rugosité de la surface (Valeur Ra) and controlled via machining methods and post-treatment.
Surface Finish Standards & Méthodes
| Surface Finish Requirement | Valeur Ra | Machining Method | Post-Treatment |
| Basic (prototypes fonctionnels) | 1.6-6.3 µm | Standard finish machining (vitesse de broche 1500-2000 tr/min, vitesse d'avance 100-150 mm/min) | Ébavurage (remove sharp edges with a file or rotary brush) |
| Moyen (appearance prototypes) | 0.8-1.6 µm | High-speed finish machining (vitesse de broche 3000-4000 tr/min, vitesse d'avance 50-100 mm/min) | Sablage (for uniform matte finish) |
| Haut (precision prototypes) | 0.02-0.8 µm | Walking machine grinding + honing | Polissage (use abrasive paste with 1000-grit sandpaper) ou traitement de surface (par ex., anodizing for aluminum prototypes) |
Surface Finish Inspection
- Utilisez un surface roughness meter to measure Ra value—place the probe on the prototype’s key surface (par ex., a medical part’s contact area) and record the reading.
- For appearance prototypes, do a visual inspection under natural light—check for scratches, marques d'outils, or uneven texture.
Pro Tip: To get a high-gloss finish on plastic prototypes, use a ball-end mill for finish machining (reduces tool marks) and apply a clear coat after machining.
Yigu Technology’s View
Chez Yigu Technologie, we see precision walking machine prototype machining as a synergy of planning and execution. We select hybrid walking machines (±0.002 mm accuracy) for complex prototypes, pair them with custom fixtures to cut deformation, and use AI-powered CAM software for tool path optimization. For material challenges like titanium, we use diamond tools and thermal control. Our focus is on delivering prototypes that mirror final parts—accurate, fonctionnel, and cost-effective—helping clients speed up product development.
FAQs
- Q: How to choose between a CNC walking lathe and milling machine for my prototype?
UN: Pick a CNC walking lathe for cylindrical prototypes (par ex., arbres) with simple features. Choose a CNC walking milling machine for irregular or 3D-shaped prototypes (par ex., parenthèses). For parts with both cylindrical and flat features, use a hybrid walking machine.
- Q: Why does my prototype have poor surface finish even with high-speed machining?
UN: Common causes: 1) Dull tool (replace with a new carbide/ diamond tool); 2) Too high feed rate (reduce to 50-100 mm/min for finish machining); 3) Vibration (use a heavier fixture or add damping pads to the walking machine).
- Q: How to reduce machining time for prototype batches (10-15 parties) without losing precision?
UN: 1) Optimize tool paths (minimize rapid moves via CAM software); 2) Batch similar operations (par ex., drill all parts first, then mill); 3) Use a quick-change fixture (cuts setup time per part from 10 minutes pour 2 minutes).