Le plastic robot prototype model is a vital bridge between a robot’s design concept and its final physical form. Il aide les ingénieurs à vérifier la faisabilité de la conception, fonctionnalité de test, et vérifiez la qualité de l'apparence, ce qui permet d'économiser du temps et des coûts avant la production en série. Que vous développiez un petit robot domestique ou un robot d'automatisation industrielle, this guide breaks down every key step of creating a plastic robot prototype model with real examples and practical data.
1. Conception et planification: Lay the Groundwork for Your Prototype
Design and planning are the first and most critical stages in creating a plastic robot prototype model. A well-thought-out design ensures the prototype truly reflects the final robot’s performance and appearance.
Key Design Steps
- 3D Model Creation: Use professional CAD software (such as SolidWorks or AutoCAD) to build a detailed 3D model. The model must accurately show the robot’s size, forme, internal mechanisms (like gears and motors), and electronic component layout. Par exemple, a small cleaning robot prototype required a 3D model with 0.03mm dimensional accuracy to fit a 12V motor and a 500mAh battery inside its 15x15x8cm body.
- Application Scenario Considerations: Think about how the robot will be used. For an industrial robot that lifts 5kg loads, the 3D model must include reinforced arm structures. For a household robot that moves on carpets, the model needs to account for wheel traction and movement speed (par ex., 0.5MS).
Cas: A robotics company designed a delivery robot prototype. During the 3D modeling phase, they considered the robot’s need to navigate narrow hallways (so they kept its width under 60cm) and carry 2kg packages (so they added a reinforced base). The final 3D model ensured the prototype could handle real-world delivery tasks.
2. Material Selection and Preparation: Choose the Right Plastic
Selecting the right plastic and preparing it properly is essential for a durable and functional plastic robot prototype model. Different robot parts need materials with specific properties.
Common Materials for Plastic Robot Prototype Models
| Material Name | Propriétés clés | Best For Robot Parts | Machining Ease | Coût (Par kg) |
| ABS (Acrylonitrile-Butadiène-Styrène) | Good transparency, facile à traiter, moderate impact resistance | Outer shells, body frames (par ex., cleaning robot casings) | Haut | \(18–)28 |
| PC (Polycarbonate) | Haute résistance aux chocs, résistant à la chaleur (jusqu'à 130°C), rigide | Arm parts, motor covers (par ex., industrial robot arms) | Moyen | \(25–)35 |
| PMMA (Acrylique) | 92% transmission de la lumière, résistant aux rayures | Transparent parts (par ex., robot camera covers, display windows) | Moyen | \(22–)32 |
| PP (Polypropylène) | Résistant à l'usure, acid/alkali-proof, flexible | Roues, moving joints (par ex., household robot wheels) | Haut | \(15–)25 |
| Nylon | Haute résistance à la traction, résistant à l'usure, flexible | Engrenages, ceintures (par ex., robot arm gears) | Faible | \(35–)45 |
| POM (Polyoxyméthylène) | Excellent dimensional stability, faible friction | Pièces de précision (par ex., supports de capteur, petits engrenages) | Moyen | \(30–)40 |
Material Preparation Tips
- Coupe: Trim raw plastic sheets/rods to a size slightly larger than the prototype part (par ex., add 5mm to each dimension) to leave room for machining.
- Traitement thermique: For materials like PC, heat them at 80°C for 1 hour to reduce internal stress—this prevents the prototype from warping after machining.
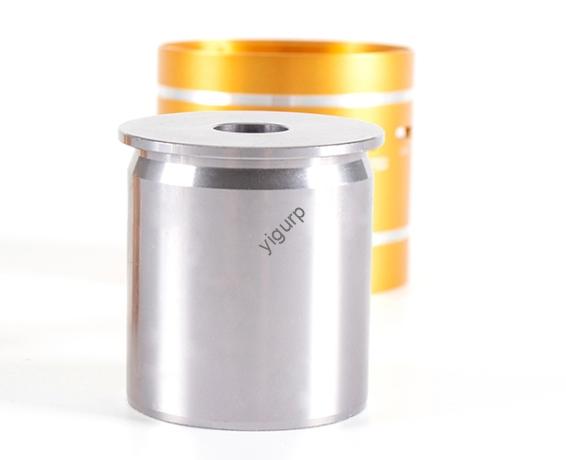
3. Core Manufacturing Methods: Bring the Prototype to Life
There are three main ways to make a plastic robot prototype model, each suited for different needs (vitesse, quantité, complexité).
Manufacturing Method Comparison
| Method | Comment ça marche | Idéal pour | Délai de mise en œuvre | Cost Per Prototype |
| Usinage CNC | Computer-controlled tools cut plastic into shape. | Prototypes de haute précision (par ex., robot arms with 0.01mm accuracy) | 2–4 jours | \(80–)300 |
| 3D Impression | Ultraviolet light cures liquid resin layer-by-layer. | Rapide, prototypes complexes (par ex., robot with intricate internal channels) | 1–2 jours | \(50–)200 |
| Silicone Molding | A silicone mold is made from an original sample for batch copying. | Small-batch prototypes (5–50 unités, par ex., test runs of robot wheels) | 3–5 jours | \(30–)120 |
Exemple: A team needed 10 prototypes of a robot’s gear box. They first made one CNC-machined POM gear box (for high precision), then created a silicone mold from it. The mold produced 10 identical gear boxes in 4 days—costing 35% less than making 10 separate CNC prototypes.
4. Assembly and Testing: Ensure Functionality
Assembly and testing turn individual parts into a working plastic robot prototype model and verify if it meets design goals.
Assembly Steps
- Assemblage de précision: Use tools like calipers to ensure parts fit correctly. For a robot arm, the joint parts must align within ±0.02mm to move smoothly.
- Component Integration: Install electronic parts (moteurs, capteurs, batteries) soigneusement. For a robot with a camera, the camera lens must be aligned with the robot’s “eye” opening to capture clear images.
Testing Types
| Test Type | What to Check | Exemple |
| Sports Performance Testing | Movement speed, range of motion, stabilité | A delivery robot should move at 0.8m/s and turn 360° without tipping. |
| Electrical System Testing | Battery life, sensor accuracy, motor function | A cleaning robot’s battery should last 2 heures, and its dirt sensor should detect particles as small as 0.1mm. |
| Load Testing | How much weight the robot can carry/lift | An industrial robot arm should lift 5kg without bending. |
Cas: A prototype of a household companion robot underwent testing. Its movement speed was 0.6m/s (meeting the 0.5–0.7m/s design range), its battery lasted 2.5 heures (exceeding the 2-hour target), and its touch sensor correctly responded to 98% of taps—confirming it was ready for further optimization.
5. Surface Treatment and Post-Processing: Improve Appearance and Durability
Surface treatment and post-processing make the plastic robot prototype model look professional and last longer.
Surface Treatment Options
- Peinture: Use robot-grade paint to match the final product’s color. A medical robot prototype was painted white (to meet hospital hygiene standards) with blue accents (for brand recognition).
- Placage: Add a thin metal coating (par ex., nickel) to parts like robot “hands” to improve wear resistance.
- Anodisation: For aluminum-plastic composite parts (par ex., robot frames), anodizing adds a protective layer that resists scratches.
Étapes de post-traitement
- Ébavurage: Use 400-grit sandpaper to smooth tool marks on the robot’s body—this prevents scratches on users’ hands.
- Polishing and Oil Spraying: Polish transparent parts (like PMMA camera covers) to make them clear, then spray oil on the outer shell to add a matte or glossy finish. For a toy robot prototype, oil spraying gave it a soft matte texture that kids loved.
6. Quality Inspection and Shipping: Deliver a Reliable Prototype
The final steps ensure the plastic robot prototype model meets standards and arrives safely to the client.
Quality Inspection Checklist
- Précision dimensionnelle: Use a coordinate measuring machine (MMT) to check if parts match the 3D model. A robot arm’s length should be 30cm ±0.03mm.
- Appearance Check: Look for cracks, paint chips, ou des surfaces inégales. The outer shell should have no visible tool marks.
- Functional Retest: Run a quick test to ensure the robot still works after surface treatment. Par exemple, check if the robot can move and its sensors still function.
Packaging and Shipping Tips
- Safe Packaging: Use foam inserts to hold the prototype in place and double-walled cardboard boxes to protect it. For a delicate robot with sensors, add anti-static bags to prevent electrical damage.
- Logistics Selection: Choose a logistics provider with experience shipping fragile items (par ex., DHL, UPS). For international clients, include a “Prototype Only” label to avoid customs delays.
Yigu Technology’s Perspective on Plastic Robot Prototype Models
Chez Yigu Technologie, we know creating a plastic robot prototype model requires balancing precision and functionality. Many clients struggle with choosing materials for moving parts or achieving high accuracy in complex structures. Our solution: we offer tailored material advice (par ex., nylon for gears, PC for high-stress arms) and use CNC machining for precision parts plus silicone molding for small batches—cutting lead times by 25%. Our team also conducts strict load and electrical tests, ensuring prototypes meet design goals. We help robotics brands turn innovative ideas into testable prototypes fast.
FAQ
- Q: Which material is best for a robot’s moving wheels?
UN: PP (Polypropylène) est idéal. It’s wear-resistant (so wheels last longer), flexible (so it can handle bumpy surfaces), and easy to machine—perfect for robot wheels that move on floors or carpets.
- Q: How long does it take to make a plastic robot prototype model?
UN: It depends on the method and complexity. A simple CNC-machined cleaning robot prototype takes 3–5 days. A complex 3D-printed industrial robot prototype takes 4–7 days. Surface treatment and testing add 1–2 days.
- Q: Can 3D printing be used for a robot prototype that needs to lift heavy loads?
UN: It’s not recommended. Most 3D printing resins have low tensile strength (can’t handle heavy loads). For load-bearing parts (like robot arms), use CNC-machined PC or nylon—these materials are strong enough to lift 5kg or more.