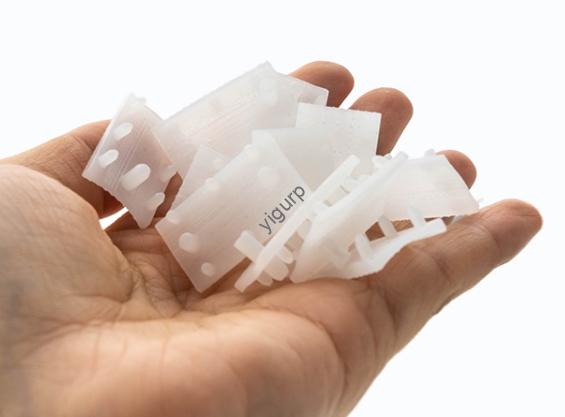
Plastic medical device prototypes are a critical part of medical product development—they let engineers test safety, fonctionnalité, et conformité avant la production en série. Contrairement aux prototypes en plastique classiques, les médicaux doivent répondre à des normes strictes d’hygiène, biocompatibilité, et durabilité. This guide breaks down every key step in creating reliableplastic medical device prototypes, with real examples and data to ensure success.
1. Sélection des matériaux: Prioritize Safety and Compliance
Choosing the right material is the first and most important step forplastic medical device prototypes. Materials must not only work mechanically but also meet medical industry rules (like FDA or ISO standards) to avoid harming patients.
Common Medical-Grade Plastics for Prototypes
| Material Name | Propriétés clés | Best For Medical Devices | Biocompatibilité | Coût (Par kg) |
|---|---|---|---|---|
| ABS (Acrylonitrile-Butadiène-Styrène) | Facile à usiner, bonne résistance aux chocs | Boîtiers d'appareils (par ex., ultrasound machine shells) | Conforme à l'ISO 10993 | $18–$28 |
| PP (Polypropylène) | Résistant aux produits chimiques, tolérant à la chaleur (jusqu'à 120°C) | Disposable parts (par ex., corps de seringue, sample containers) | Approuvé par la FDA | $15–$25 |
| PMMA (Acrylique) | 92% transparence, résistant aux rayures | Clear parts (par ex., IV fluid chambers, surgical light covers) | Conforme à la norme ISO 10993 | $22–$32 |
| PC (Polycarbonate) | Haute résistance à la chaleur (jusqu'à 130°C), fort | Sterilizable parts (par ex., autoclave-compatible tool cases) | Conforme aux normes FDA | $25–35$ |
| COUP D'OEIL (Polyéther Éther Cétone) | Biocompatible, haute résistance, résistant à la chaleur | Implantable prototypes (par ex., small bone screws) | FDA-approved for implants | $150–$200 |
| Pennsylvanie (Nylon) | Flexible, résistant à l'usure | Moving parts (par ex., insulin pump valves) | Conforme à la norme ISO 10993 | $35–$45 |
Conseils de sélection
- Biocompatibility First: Always pick materials tested to ISO 10993 (for biological safety) or FDA standards—this ensures the prototype won’t cause allergic reactions or toxicity.
- Sterilization Needs: If the device will be autoclaved (chaleur élevée), choose PC or PEEK over ABS (which melts at lower temps).
- Transparence: For parts that need visibility (like fluid tubes), PMMA is better than opaque plastics like PP.
Cas: A team developing a portable blood glucose monitor needed a prototype housing. They chose ABS— it’s easy to machine, conforme à l'ISO 10993, and could withstand daily use. The prototype passed drop tests (1m onto concrete) and didn’t crack, making it ready for further testing.
2. Core Processing Methods: Balance Precision and Speed
Plastic medical device prototypes use two main processing methods, each suited for different needs (précision, complexité, or speed).
Processing Method Comparison
| Method | Comment ça marche | Idéal pour | Précision | Délai de mise en œuvre | Cost Per Prototype |
|---|---|---|---|---|---|
| Usinage CNC | Computer-controlled tools cut plastic into shape. | Pièces de haute précision (par ex., syringe nozzles with ±0.01mm accuracy) | ±0,01mm | 2–4 jours | $80–$300 |
| 3D Impression | Resin is cured layer-by-layer with UV light to form parts. | Géométries complexes (par ex., prototypes with internal channels for fluids) | ±0,05 mm | 1–2 jours | $50–$200 |
Note: 3D printing is fast but has limits—material choices are narrower (mostly resins), and parts may not be as strong as CNC-machined ones. For implantable prototypes, CNC machining with PEEK is safer.
Exemple: A company needed a prototype for a surgical tool with tiny internal fluid channels. They used 3D printing to create the complex shape in 1.5 days—much faster than CNC machining (ce qui prendrait 3 jours). The prototype’s channels were smooth enough for fluid flow, passing functional tests.
3. Post-traitement: Ensure Safety and Durability
Post-processing forplastic medical device prototypes focuses on hygiene, durabilité, and compliance—unlike regular prototypes, which prioritize appearance.
Key Post-Processing Steps
- Traitement de surface:
- Alcohol Paint Testing: Spray the prototype with medical-grade paint, then test it by exposing to alcohol (a common disinfectant) pour 3 mois. The paint must not crack, blister, or peel—this ensures it won’t flake off and contaminate patients.
- Lissage: Use 400–800 grit sandpaper to remove tool marks. Smooth surfaces are easier to clean and disinfect, reducing bacteria buildup.
- Vacuum Replicas (Silicone Molding):
- Pour les prototypes en petits lots (5–20 units, like test runs of IV connectors), make a silicone mold from a CNC-machined master part. This method is fast (3–5 jours) and ensures all replicas are identical.
- Critical Tips: Use low-bubble silicone and medical-grade materials—hire experienced technicians to avoid mold defects (like air pockets) that ruin parts.
Cas: A team made 10 prototypes of an IV connector using vacuum replicas. They first created a CNC-machined PP master part, then used a silicone mold to make copies. Tous 10 replicas passed leak tests (no fluid seepage at 5 psi pressure), meeting medical standards.
4. Conception de moules & Fabrication: For Scalable Prototypes
If you plan to scale up to small-batch production, mold design is key forplastic medical device prototypes. Molds must be precise and easy to sterilize.
Mold Design Essentials
- Material Choice: Use corrosion-resistant, highly polishable steel like Sweden’s S136H or Japan’s NAR-80. These steels don’t rust (critical for hygiene) and can be polished to a smooth finish, ensuring prototype surfaces are clean.
- Traitement thermique: Harden the mold’s template and core with quenching or vacuum quenching. This controls hardness (usually 50–55 HRC) and prevents flash burrs (tiny plastic bits) during injection molding—burrs could contaminate medical devices.
- Structural Design:
- Gate Position: Place gates (where plastic enters the mold) away from critical parts (like syringe nozzles) to avoid defects.
- Circuit de refroidissement: Add evenly spaced cooling channels to prevent uneven material flow—this stops the prototype from warping.
- Exhaust Method: Include small vents to release air bubbles, which can create holes in the prototype.
5. Environnement & Équipement: Maintain Sterility
The production environment and equipment forplastic medical device prototypes must be sterile to avoid contamination—this is a non-negotiable medical standard.
Workshop Requirements
- Clean Workshop: Use a fully enclosed space with constant temperature (22–25°C) and humidity (40–60%). Install high-power air conditioners and ventilators to remove harmful gases (like plastic fumes) quickly.
- No Release Agents: Never use release agents (chemicals that help parts come out of molds)—they can leave residues on prototypes, which are toxic if they touch patients.
Equipment Selection
- Machines de moulage par injection: Choose small-screw machines (50–100 tonnes) pour les prototypes. They’re more precise than large machines and better for small batches.
- Automation Tools: Add automatic unloading devices and manipulators. This lets the process go from molding to packaging without human touch—reducing the risk of contamination from hands.
Yigu Technology’s Perspective on Plastic Medical Device Prototypes
Chez Yigu Technologie, we knowplastic medical device prototypes demand strict safety and precision. Many clients struggle with material compliance or mold defects—our solution: we only use FDA/ISO-approved plastics (like PEEK for implants, PC for sterilizable parts) and S136H steel for molds. Our CNC machines hit ±0.01mm accuracy, and our clean workshops meet medical standards. We also test prototypes with alcohol paint and leak checks, ensuring they pass industry rules. We help medical brands create reliable prototypes fast, cutting development time by 25%.
FAQ
- Q: Which material is best for a plastic medical device prototype that needs to be autoclaved?
UN: PC (Polycarbonate) est idéal. It can withstand autoclave temperatures (jusqu'à 130°C) and meets FDA standards. PEEK is also a good choice for high-heat, implantable prototypes, but it’s more expensive. - Q: Can 3D printing be used for implantable plastic medical device prototypes?
UN: It’s not recommended for final implants, but it works for early testing. Most 3D printing resins aren’t strong enough for long-term implantation. For implantable prototypes, use CNC-machined PEEK—it’s FDA-approved and biocompatible. - Q: How long does it take to make a CNC-machined plastic medical device prototype?
UN: It depends on complexity. A simple ABS housing takes 2–3 days. A precise PEEK implant prototype (with ±0.01mm accuracy) takes 4–5 days. Post-traitement (like alcohol paint testing) adds 1–2 days.