Avez-vous déjà eu du mal à trouver un prototype en métal qui corresponde à la conception unique de votre produit ?? Lorsque les pièces standards ne peuvent pas répondre à vos dimensions spécifiques, formes, ou fonctionnalités, non-standard prototype sheet metal forming process comes to the rescue. Cette méthode de fabrication personnalisée adapte les prototypes métalliques à vos besoins précis, ce qui change la donne pour le développement de produits, production en faible volume, and special part creation. Dans ce guide, we’ll break down everything you need to know to leverage this process effectively.
1. What Exactly Is Non-standard Prototype Sheet Metal Forming?
Let’s start with the basics.Non-standard prototype sheet metal forming is a specialized metalworking process that creates custom prototypes by shaping sheet metal according to clients’ unique requirements—no more sticking to one-size-fits-all industry standards.
Key Traits vs. Standard Sheet Metal Forming
To better understand its value, let’s compare it with standard sheet metal forming using a simple table:
| Aspect | Non-standard Prototype Sheet Metal Forming | Standard Sheet Metal Forming |
|---|---|---|
| Design Basis | Client’s specific needs (custom dimensions/shapes) | Fixed industry standards |
| Volume de production | Faible (prototypage, small-batch special parts) | Haut (production de masse) |
| Flexibilité | Haut (adjustable for unique designs) | Faible (fixed for standard parts) |
| Use Case | Product design validation, special-purpose parts | Routine, composants à grand volume |
Real-World Example
Imagine you’re developing a compact medical device that needs a custom sheet metal housing to fit tiny internal components. Standard sheet metal housings are too big or have the wrong cutouts—this is where non-standard prototype sheet metal forming shines. It creates a housing that’s perfectly tailored to your device’s size and feature needs, helping you test the design quickly.
2. The Step-by-Step Non-standard Prototype Sheet Metal Forming Process
The process follows a clear, linear flow to ensure precision and meet your requirements. Let’s walk through each step:
Étape 1: Design Phase – Lay the Groundwork
This phase is all about turning your ideas into a workable plan.
- 3Modélisation D: Use CAD (Conception Assistée par Ordinateur) logiciel (par ex., SolidWorks, AutoCAD) to build a detailed 3D model of the prototype. Every curve, hole, and dimension is designed to match your exact needs—no guesswork here.
- Revue de conception: A critical check to avoid costly mistakes. Engineers and designers assess two key points:
- Manufacturability: Can we actually make this prototype with existing tools? Par exemple, is a super-tight bend angle feasible with our press brakes?
- Fonctionnalité: Will the prototype do what it’s supposed to? If it’s a bracket for a machine, will it hold the required weight?
Étape 2: Sélection des matériaux & Pretreatment – Pick the Right “Building Block”
The material makes or breaks the prototype’s performance.
- Choose the Right Material: Select based on how the prototype will be used:
- Acier inoxydable: Great for parts exposed to moisture (par ex., food processing equipment prototypes) – it resists rust and corrosion.
- Aluminium: Lightweight and affordable, perfect for aerospace or automotive prototypes where weight matters.
- Cuivre: Ideal for parts needing good electrical conductivity (par ex., custom electrical enclosures).
- Material Pretreatment: Get the sheet metal ready for processing:
- Ébavurage: Remove sharp edges from the sheet to prevent injuries during handling and ensure smooth assembly.
- Cleaning: Wipe off oil, dust, or rust—this helps later steps like painting or plating stick better.
Étape 3: Coupe & Shaping – Turn Flat Sheets into 3D Shapes
Now it’s time to transform the flat sheet metal into the prototype’s basic form.
- CNC Cutting: Use computer-controlled machines for precision:
- Découpe Laser CNC: Best for intricate shapes (par ex., petits trous, complex curves) with accuracy up to ±0.1mm.
- Poinçonnage CNC: Faster for simple shapes (par ex., square or circular cutouts) in low-volume runs.
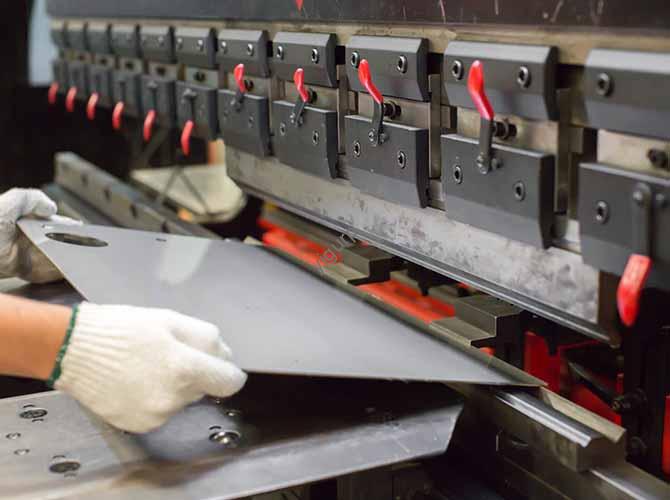
- Pliage & Formation: Use a CNC press brake to bend the cut sheet to your desired angle (par ex., 90 degrees for a box-shaped prototype). The machine’s computer control ensures every bend is consistent—no lopsided parts here.
Étape 4: Soudage & Assembly – Put It All Together (Si nécessaire)
If your prototype has multiple parts (par ex., a frame with a base and sides), this step combines them.
- Soudage: Join components using methods like MIG (pour l'aluminium) or TIG (pour l'acier inoxydable) soudage. The goal is strong, seamless joints that hold up under use.
- Assemblée: Fit the welded parts together per the design. This might include adding screws or hinges so you can take the prototype apart for testing or adjustments.
Étape 5: Surface Treatment – Boost Durability & Looks
A prototype isn’t just functional—it should also look professional.
- Ponçage & Polissage: Smooth out weld lines and cut edges. Par exemple, if the prototype is for a consumer product (like a kitchen gadget), a polished finish makes it look market-ready.
- Painting or Plating: Add protection and style:
- Peinture: Use spray paint (par ex., époxy) to resist scratches and add color.
- Placage: Apply a thin metal layer (par ex., zinc for rust resistance, chrome for shine).
Étape 6: Quality Inspection – Ensure Perfection
The final check to make sure the prototype meets your standards.
- Dimensional Check: Use tools like calipers or CMMs (Machines à mesurer tridimensionnelles) to verify every dimension matches the 3D model. If the design calls for a 150mm length, the prototype should be spot-on (within ±0.5mm).
- Tests fonctionnels: Test the prototype in real-world conditions. For a custom hinge, does it open and close smoothly 1,000 times? For a bracket, does it hold the weight it’s supposed to?
3. Why Choose Non-standard Prototype Sheet Metal Forming?
You might wonder: “Why not just use standard parts to save time and money?” Here are three key reasons:
- Faster Product Development: Instead of waiting for standard parts that don’t fit, you get a prototype tailored to your design in weeks—not months. This lets you test and tweak your idea faster.
- Reduced Risk: By testing a custom prototype, you catch flaws (par ex., a weak weld, wrong dimension) tôt. Fixing these before mass production saves you thousands in rework costs.
- Perfect for Unique Needs: Whether you need a heat-resistant prototype for a furnace or a tiny one for a wearable device, this process adapts to your needs—standard parts can’t do that.
Yigu Technology’s View on Non-standard Prototype Sheet Metal Forming
Chez Yigu Technologie, we seenon-standard prototype sheet metal forming as the backbone of innovation. Many clients—startups to big firms—use it to turn bold ideas into tangible prototypes. Our team blends advanced CAD design, high-precision CNC tools, and strict quality checks to deliver prototypes that meet even complex needs. We prioritize flexibility: whether it’s a single prototype or small-batch parts, we adjust to your timeline and budget. For us, every custom prototype helps clients solve problems and stay ahead in competitive markets.
FAQ
Q1: How long does it take to make a non-standard sheet metal prototype?
It depends on complexity. A simple prototype (par ex., un support plat) prend 3 à 5 jours. A complex one with welding and plating takes 1–2 weeks.
Q2: Is non-standard prototype sheet metal forming expensive?
While unit costs are higher than standard parts, it’s cost-effective. Spending $500 on a prototype to fix design flaws saves tens of thousands in mass production rework.
Q3: What materials work best for this process?
It depends on use: Stainless steel for corrosion resistance, aluminum for light weight, copper for conductivity. Our team can help you pick the right one for your project.