Que vous soyez un ingénieur produit testant une nouvelle conception de capteur ou un spécialiste des achats recherchant des prototypes pour les dispositifs médicaux, metal instrument prototype models are critical to turning ideas into viable products. Ils vous permettent de valider les conceptions, fonctionnalité de test, et évitez les erreurs coûteuses avant la production de masse. This guide breaks down everything you need to know—from material choices to quality control—with real-world examples and data to help you make informed decisions.
1. Choosing the Right Metal: Material Selection for Prototype Success
The metal you pick directly impacts your prototype’s performance, coût, et usinabilité. Below is a comparison of the most popular options, with use cases to clarify which fits your project.
| Metal Type | Propriétés clés | Typical Use Cases | Fourchette de coût (USD/livre) | Machinability Score (1-10, 10=easy) |
|---|---|---|---|---|
| Alliage d'aluminium | Faible densité, haute résistance, bonne résistance à la corrosion | Electronique grand public, light industrial meters | $2.50 – $4.00 | 9 |
| Acier inoxydable | Excellente résistance à la corrosion, stabilité à haute température | Instruments médicaux, pièces porteuses | $3.00 – $6.50 | 5 |
| Alliage de titane | Ultra-haute résistance, biocompatibilité, résistance à la chaleur | Aerospace sensors, high-end medical devices | $30.00 – $50.00 | 3 |
Real Example: A team developing a portable environmental monitor chose6061 alliage d'aluminium for their prototype. Its light weight (1/3 the density of steel) made the device easy to carry, and its high machinability cut production time by 30% compared to stainless steel.
2. The Design Phase: Laying the Foundation for Accurate Prototypes
A strong design phase prevents rework later. Two steps are non-negotiable here:
3D Model Design
Use software likeSolidWorks ouUG NX to create a detailed 3D model of your instrument. This model must include every detail—from the shape of external casings to the layout of internal circuits.
Tip: Pour pièces complexes (like curved sensor housings), utiliserCatia—it’s ideal for capturing intricate geometries. A automotive sensor manufacturer once reduced prototype errors by 40% by adding tolerance labels to their Catia model.
Design Analysis
Avant usinage, test your design with simulation tools. These tools analyze stress, déformation, and dynamics to spot issues early.
Étude de cas: A industrial thermometer team used simulation software to check how their prototype would perform in high temperatures (jusqu'à 200°C). They found a weak spot in the housing that would warp—fixing it before machining saved $2,000 in rework costs.
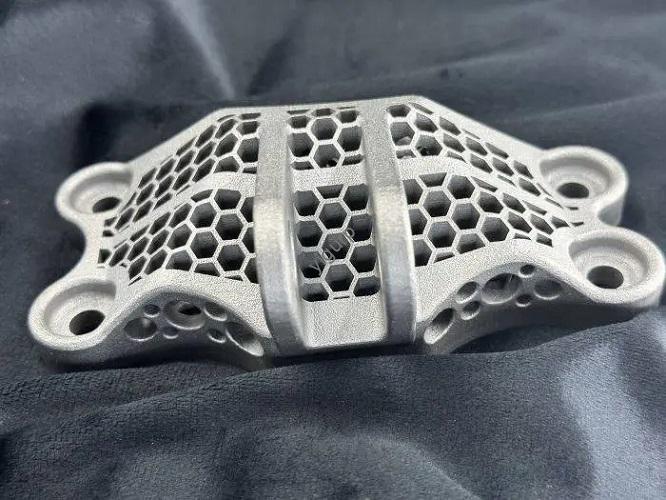
3. Programmation & Usinage: Turning Designs Into Physical Prototypes
Once your design is ready, it’s time to turn it into a physical part. This phase relies on precision and testing.
Programmation FAO
CAM software (commeMastercam ouSolidCam) converts your 3D model into code that CNC machines can read. The software generates tool paths—step-by-step instructions for the machine’s cutting tools.
Pourquoi c'est important: A well-written CAM program improves efficiency. A medical device maker used SolidCam to optimize tool paths for their prototype’s tiny components, cutting machining time from 8 heures pour 5 hours per part.
Program Testing
Never skip this step! Use simulation tools to test your CNC program for errors or collisions (par ex., a cutting tool hitting the machine). This ensures safety and accuracy.
Usinage CNC
Choose the right CNC machine based on your part’s complexity:
- 3-machines à axes: Great for simple parts (like flat instrument panels). They’re cost-effective and fast.
- 5-machines à axes: Perfect for complex parts (like angled sensor ports). They can machine multiple sides in one go, improving precision.
Data Point: 5-axis machining achieves tolerances as tight as ±0.001 inches—critical for instruments that need high measurement accuracy (like lab scales).
4. Post-traitement: Enhancing Prototype Performance & Apparence
Après usinage, your prototype needs post-processing to meet functional and aesthetic goals.
Traitement de surface
Common processes include:
- Ébavurage: Removing sharp edges to prevent damage to other parts.
- Sablage: Creating a matte finish for better grip (useful for handheld instruments).
- Anodisation: Adding a protective layer to aluminum prototypes—this boosts corrosion resistance by 50%.
Exemple: A marine instrument manufacturer anodized their aluminum prototype to withstand saltwater. The prototype lasted 3x longer in testing compared to an uncoated version.
Assemblée & Essai
Assemble the parts into a complete prototype, then run tests to check:
- Measurement accuracy: Does the instrument give correct readings?
- Stability: Does it work consistently over time?
- Environmental adaptability: Can it handle humidity, changements de température, or vibration?
Test Tip: For medical instruments, add biocompatibility tests to ensure the prototype is safe for human contact.
5. Contrôle de qualité: Ensuring Your Prototype Meets Standards
Contrôle de qualité (QC) keeps your prototype reliable. Two key practices:
Full Monitoring
Set up checkpoints at every stage—from material inspection to final assembly. If a part is substandard (par ex., a hole that’s too small), rework or redo it immediately.
Certification ISO
FollowOIN 9001 normes. This ensures consistent quality and traceability—so you can track every step of the process, from which metal batch was used to who machined the part.
Statistic: Companies using ISO 9001 for prototype machining reduce defect rates by an average of 25%, according to a 2024 manufacturing report.
Yigu Technology’s Perspective on Metal Instrument Prototype Models
Chez Yigu Technologie, we believemetal instrument prototype models are the bridge between innovation and market success. We prioritize material matching—helping clients choose alloys that balance performance and cost—and use 5-axis CNC machining for complex parts to ensure precision. Our ISO 9001-certified process includes real-time monitoring and post-processing tests, so every prototype meets functional and durability needs. For high-end projects (like aerospace sensors), we recommend titanium alloys for their unmatched strength, and our simulation tools cut rework time by 35% on average.
FAQ
- What’s the average lead time for a metal instrument prototype?
Lead time depends on complexity: simple 3-axis parts take 3–5 days, while complex 5-axis prototypes take 7–10 days. Post-traitement (like anodizing) adds 1–2 days. - Can I use a metal prototype for small-batch production?
Oui! If your prototype passes all tests, many manufacturers can scale it to small batches (50–100 unités) without redesigning—saving time and money. - Which metal is best for medical instrument prototypes?
Acier inoxydable (pour la résistance à la corrosion) or titanium alloy (pour la biocompatibilité) are top choices. Titanium is ideal for implants or instruments that touch human tissue.