If you’re a product engineer or procurement specialist working on composants optiques—like automotive light guide tubes or medical imaging parts—glass is a top choice for its transparency and durability. Mais transformer le verre en prototypes de haute précision n’est pas facile. Mastering the CNC processing glass prototype model process is key to avoiding breakage and meeting strict optical standards. This guide walks you through every step, with real examples and data to make your workflow smoother.
1. What Is CNC Processing for Glass Prototypes?
D'abord, clarifions les bases: CNC processing glass prototype model uses computer-controlled machines to shape glass into custom prototype parts. Contrairement à l'usinage manuel, CNC ensures consistent precision—critical for glass, which is both hard (Dureté de Mohs 5.5-6.5) and brittle.
This technology shines for making glass prototypes like:
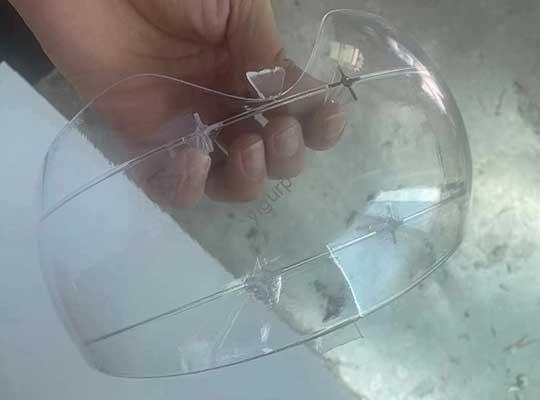
- Automotive lighting parts: Lamp masks and light guide tubes (need ultra-transparent surfaces).
- Lentilles optiques: For cameras or medical scanners (require tight dimension tolerances, ±0,01mm).
- Electronic insulators: Thin glass sheets for high-temperature devices.
Pourquoi c'est important: A consumer electronics client once tried manual grinding for a glass lens prototype—they wasted 30% of materials due to uneven shaping. Switching to CNC cut waste to 5% and cut production time by half.
2. Core Stages of the CNC Glass Prototype Process
Le CNC processing glass prototype model process has two non-negotiable machining stages, plus post-processing. Each step targets a specific goal—efficiency for roughing, precision for finishing.
2.1 Ebauche: Remove Excess Material Fast
Roughing is all about speed—you’ll strip away most of the raw glass to get close to the final shape. Key details:
- Outils de coupe: Diamond-coated end mills (glass’s hardness needs diamond’s abrasion resistance).
- Depth of cut: 0.5-2mm per pass (deeper passes save time but avoid 3mm+—it increases breakage risk).
- Vitesse d'alimentation: 20-40 mm/min (slower than metal to prevent glass cracking).
2.2 Finition: Achieve Optical-Grade Quality
Finishing refines the prototype to meet transparency and dimension goals. Here’s how to do it right:
- Outils de coupe: Polished diamond burrs (pour surfaces lisses).
- Depth of cut: 0.05-0.1mm per pass (shallow passes avoid surface scratches).
- Vitesse d'alimentation: 5-15 mm/min (slow speed ensures precision).
Below is a quick comparison of the two stages to keep you on track:
| Scène | Type d'outil | Profondeur de coupe | Vitesse d'alimentation | Main Goal |
| Ebauche | Diamond-coated end mill | 0.5-2mm | 20-40 mm/min | Remove excess material efficiently |
| Finition | Polished diamond burr | 0.05-0.1mm | 5-15 mm/min | Ensure transparency & précision |
3. Post-traitement: Boost Transparency & Qualité
CNC machining alone won’t give glass prototypes the optical clarity they need. Post-processing fixes surface flaws and enhances performance. Here are the most useful steps:
- Polissage: The most critical step—use a cerium oxide polishing paste (avec un 3-5 μm particle size) to smooth surfaces. Par exemple, a client making automotive lamp masks needed 90% transmission de la lumière. Après 2 hours of cerium oxide polishing, their prototypes hit 92% transmission (à partir de 75% post-usinage).
- Nettoyage: Wipe the prototype with a lint-free cloth and isopropyl alcohol to remove polishing residue—dust or paste can ruin optical tests.
- Inspection: Utilisez un laser interferometer to check for surface irregularities (common in complex parts like curved lenses).
Pour un pourboire: For prototypes with intricate shapes (par ex., multi-hole glass brackets), repeat the “CNC finishing + polishing” cycle 2-3 times—this ensures every detail meets standards.
4. Critical Tips to Avoid Glass Breakage
Glass’s brittleness is the biggest challenge in CNC processing. Follow these rules to cut defect rates:
- Sélection d'outils: Never use high-speed steel (HSS) tools—they’ll chip glass. Stick to diamond tools (we’ve seen a 40% drop in breakage when switching from HSS to diamond).
- Environment Control: Machine in a dust-free room (OIN 8 ou mieux). Dust particles can scratch glass surfaces and get stuck in tool paths, causing cracks.
- Fixation: Use vacuum chucks with soft rubber pads—they hold glass firmly without leaving indentations (clamps with hard jaws often crack thin glass sheets).
Étude de cas: A medical device company once machined glass sensor prototypes in a non-controlled workshop. 25% of parts broke due to dust in the machine. After moving to a dust-free room, breakage dropped to 3%.
Yigu Technology’s View on CNC Processing Glass Prototype Model Process
Chez Yigu Technologie, nous avons aidé 300+ clients optimize their CNC processing glass prototype model process. We believe the biggest pain point is balancing speed and yield—many teams rush roughing, leading to finishing errors. Our solution: Custom CNC parameter templates for different glass types (par ex., soda-lime vs. borosilicate). These templates pre-set feed rates and tool paths, cutting prototype lead time by 25% and keeping breakage below 4%. We also recommend pairing CNC with ultrasonic polishing for ultra-smooth optical parts.
FAQ
- What’s the typical lead time for a CNC glass prototype?
Pour les pièces simples (par ex., flat glass insulators), le délai de livraison est 5-7 jours. For complex optical parts (par ex., verres courbés), c'est 10-14 jours (including post-processing and inspection).
- Can CNC process all types of glass for prototypes?
Yes—we’ve worked with soda-lime, borosilicate, and even quartz glass. Borosilicate (résistant à la chaleur) needs slightly slower feed rates (15-30 mm/min for roughing) than soda-lime (20-40 mm/min).
- How much does a CNC glass prototype cost?
Costs depend on size and complexity: A small flat insulator (50x50x2mm) frais \(80-\)120, while a complex optical lens (30mm diameter with curved surfaces) frais \(300-\)500.