Si vous cherchez à créer des prototypes avec un logiciel, lumière – aspect diffusant plutôt qu’une transparence totale, vous vous demandez peut-être comment utiliser de la résine translucide pour l'impression 3D. La réponse est un oui catégorique! La résine translucide est une option fantastique pour les prototypes imprimés en 3D, offrant un mélange unique d’esthétique et de fonctionnalité. Let’s explore how to make the most of translucent resin in your 3D printing projects.
Why Translucent Resin is Great for 3D Printing Prototypes
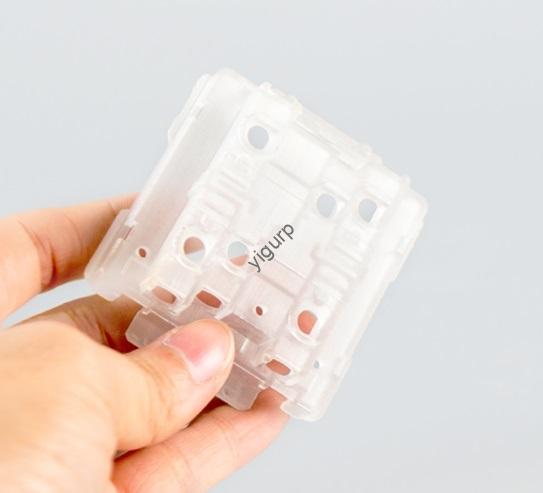
Translucent resin has quickly become a favorite among prototype makers, and it’s easy to see why. Its special properties make it perfect for certain types of projects.
- Natural light diffusion is its standout feature. Unlike fully transparent materials that let light pass through clearly, translucent resin scatters light gently, creating a soft, frosted appearance. This makes it ideal for prototypes like light covers, abat-jour, or any part where a warm, diffused glow is desired.
- Reduced post – processing needs save time and effort. Translucent resin prints with a naturally smooth surface, so you won’t need as much sanding or polishing compared to other materials. This is a big plus when you’re working on tight deadlines or need to produce multiple prototype iterations quickly.
- Versatile aesthetic appeal works across industries. Whether you’re prototyping consumer electronics, dispositifs médicaux, or decorative items, the subtle translucency adds a professional, haut – end look that plain opaque materials can’t match.
Choosing the Right Translucent Resin: Que rechercher
Not all translucent resins are the same, so picking the right one for your prototype is key to success. Here are the important factors to consider:
- Optical properties should top your list. Look for resins specifically formulated for translucency, such as RAYSHAPE’s Clear 10 résine, which is known for its excellent light – diffusing qualities. These resins are designed to maintain consistent translucency across the entire part, avoiding patchy or uneven areas.
- Printer compatibility is a must – check. Translucent resins are typically used with SLA (Stéréolithographie) or DLP (Traitement numérique de la lumière) printers, which use UV light to cure the resin. Always confirm that the resin you choose works with your printer’s wavelength and curing system to avoid printing issues.
- Cohérence du matériau matters for reliable results. Haut – quality translucent resins have a uniform viscosity, which helps ensure smooth printing and consistent layer adhesion. Avoid resins that are too thick or have particles floating in them, as these can cause clogs or uneven prints.
Poste – Processing Tips for Translucent Resin Prototypes
While translucent resin requires less post – processing than some other materials, a little extra work can take your prototype to the next level.
- Light polishing enhances smoothness. Even though the printed surface is already smooth, a quick polish with a soft cloth or 800 – grit sandpaper can remove any minor layer lines and boost the resin’s light – diffusing properties. Be gentle – you don’t want to over – sand and create scratches that would scatter light unevenly.
- Oil spraying adds a subtle finish. A light coat of clear oil spray can enhance the translucency while protecting the surface from scratches. This step is especially useful if your prototype will be handled frequently during testing or presentations.
- Avoid heavy sanding. Unlike transparent resin, which benefits from aggressive sanding to achieve clarity, translucent resin’s beauty lies in its soft texture. Too much sanding can make the surface too smooth, reducing its ability to diffuse light effectively.
Important Printing Environment Considerations
The environment where you print with translucent resin can affect both the quality of your prototype and its longevity, especially for more complex designs.
- Humidity control is crucial, especially for prototypes with cavities or hollow sections. Moisture trapped inside these spaces can cause the prototype to crack or even burst as the humidity inside and outside the part equalizes over time. Keep your printing area’s humidity below 50% and make sure any hollow parts are completely dry before and after printing.
- Dust protection est essentiel. Even small dust particles are more visible on translucent surfaces than on opaque ones. Keep your printer and workspace clean, use a dust cover when the printer isn’t in use, and handle printed parts with clean gloves to avoid leaving fingerprints or smudges that would mar the translucent effect.
Creating Custom Effects with Translucent Resin
One of the best things about translucent resin is its ability to be customized with color while maintaining its light – diffusing properties. Here’s how to do it:
- Mix with colored resins for unique shades. If you want a colored translucent prototype, try mixing a small amount of colored resin with your translucent resin. Par exemple, adding a touch of black resin creates a sleek, smoky translucent effect that still allows light to pass through. Commencez par un 10:1 ratio of translucent to colored resin and adjust until you get the look you want.
- Test mixtures first. Always print a small sample with your resin mixture before starting on your main prototype. This lets you check the color intensity and translucency level, saving you time and material if you need to adjust the ratio.
- Stir thoroughly for even color. When mixing resins, take your time to stir them completely. Uneven mixing can result in streaks or spots in your prototype, which are more noticeable in translucent materials than in opaque ones.
Translucent Resin vs. Transparent Resin: Knowing the Difference
It’s easy to confuse translucent and transparent resins, but they have distinct properties that make them suitable for different projects. Here’s a quick comparison:
| Aspect | Translucent Resin | Transparent Resin |
| Light Transmission | Diffuses light softly; not completely clear | Allows light to pass through clearly |
| Poste – Processing Needs | Minimal; light polishing only | More extensive; requires sanding and buffing |
| Idéal pour | Couvertures légères, pièces décoratives, diffused glow effects | Lentilles, clear windows, parts needing clarity |
| Esthétique | Frosted, soft appearance | Verre – comme, clear appearance |
- Choosing between them depends on your prototype’s needs. If you need a part that diffuses light or has a subtle, elegant look, translucent resin is the way to go. If you need true clarity, like for a lens or a clear window, opt for transparent resin instead.
Optimizing Your Printing Settings for Translucent Resin
To get the best results with translucent resin, a few adjustments to your printing settings can make a big difference:
- Épaisseur de couche affects surface smoothness. A layer thickness of 20 – 30 microns works well for most translucent resin prototypes. This balances print speed with surface quality – thinner layers create a smoother surface but take longer to print, while thicker layers print faster but may show more layer lines.
- Exposure time should be calibrated carefully. Follow the resin manufacturer’s recommended exposure times, as under – exposure can lead to weak parts with uneven translucency, while over – exposure can make the resin more opaque than desired. A quick test print with different exposure times can help you find the sweet spot.
- Vitesse d'impression impacts detail retention. Translucent resin prints best at moderate speeds (40 – 60 mm/s for most printers). Printing too fast can cause layer adhesion issues, while printing too slow may lead to over – guérir.
Yigu Technology’s View
Translucent resin is a versatile choice for 3D printed prototypes, offering unique light diffusion and reduced post – traitement. Its ability to create soft, professional finishes makes it ideal for diverse applications. Chez Yigu Technologie, we recommend focusing on quality resin selection, humidity control, and gentle post – processing to maximize its potential, ensuring stunning, functional prototypes every time.
FAQ
- Is translucent resin easier to print with than transparent resin?
Oui, translucent resin generally requires less post – processing due to its naturally smooth surface and doesn’t need extensive sanding to achieve its desired look, making it more user – friendly.
- Can translucent resin prototypes be used for functional testing?
Absolument. Many translucent resins offer good mechanical strength, making them suitable for testing form, ajuster, and basic functionality, though they may not be ideal for high – stress structural parts.
- How do I prevent moisture issues in translucent resin prototypes?
Control your printing environment’s humidity (keep it below 50%), ensure hollow parts are completely dry before and after printing, and store finished prototypes in a dry area to avoid cracking or bursting.