Pour les passionnés d'aviation, ingénieurs, et les amateurs, construire un modèle réduit d'avion est un travail d'amour, mais avec des méthodes traditionnelles (comme couper du plastique à la main ou assembler des kits préfabriqués) limite souvent la créativité et les détails. That’s where 3D printing model aircraft change le jeu. Cette technologie vous permet de transformer des conceptions personnalisées en éléments physiques, high-precision models—whether you’re recreating a vintage WWII fighter or designing a futuristic drone. From creative concept to final test flights, this guide breaks down every stage of 3D printing a model aircraft, avec des exemples concrets, tool comparisons, and tips to avoid common mistakes.
1. Étape 1: Creative Design – Turn Your Aviation Vision into a Concept
Every great 3D printed model aircraft starts with a clear creative design. This step is about translating your ideas into a tangible plan—no advanced technical skills needed, just a focus on key details that make your model realistic and functional.
What to Include in Your Creative Design:
- Aircraft Type: Is it a fixed-wing plane (par ex., a Spitfire), a helicopter, or a drone? This dictates the model’s basic shape.
- Échelle: Choose a scale that balances detail and printability (common scales: 1:48 for small models, 1:24 pour plus grand, more detailed ones). Par exemple, un 1:48 scale Spitfire will be ~20cm long—perfect for most home 3D printers.
- Principales fonctionnalités: Note details like wings (straight, courbé, or swept), train d'atterrissage, hélices, and cockpit windows. Functional models may need extra features (par ex., a removable battery compartment for a flying drone).
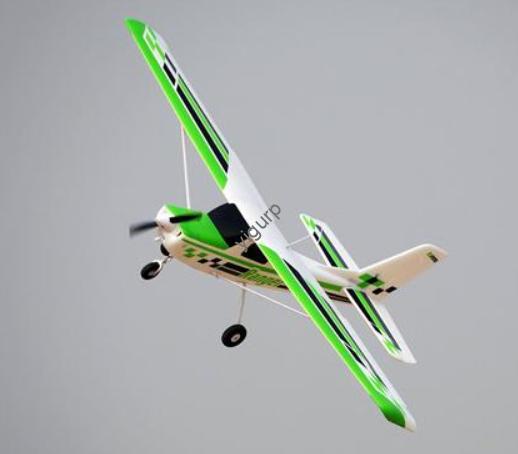
Real-World Example: Designing a 1:48 Scale WWII Spitfire
A hobbyist wanted to 3D print a Spitfire model. Their design steps:
- Researched reference photos of a real Spitfire to get accurate proportions (par ex., wingspan vs. fuselage length).
- Sketched a side view on paper: 20cm fuselage length (1:48 échelle), 24cm wingspan, and a rounded cockpit.
- Marked functional details: a rotating propeller, retractable landing gear (for display), and tiny decal placements (par ex., squadron logos).
This sketch became the blueprint for the 3D modeling stage.
2. Étape 2: 3D Modeling – Convert Your Design to a Digital Model
Once you have a creative design, the next step is to build a 3D digital model en utilisant un logiciel spécialisé. The software you choose depends on your skill level and the complexity of your aircraft. Below is a comparison of top options:
| 3D Modeling Software | Skill Level | Coût | Principales fonctionnalités | Idéal pour |
| Tinkercad | Beginner | Gratuit | Browser-based; uses basic shapes (cubes, cylindres) | Simple aircraft (par ex., a basic drone frame) |
| SketchUp Make | Beginner/Intermediate | Gratuit | Drag-and-drop tools; pre-made aviation assets (par ex., hélices) | Fixed-wing planes with basic details |
| Mixer | Intermediate/Advanced | Gratuit | Powerful for organic shapes (par ex., curved wings); supports texture mapping | Highly detailed models (par ex., a vintage fighter with panel lines) |
| SolidWorks | Avancé | Paid ($4,000+/année) | Professional engineering tools; ideal for functional parts (par ex., flying drone motors) | Engineers designing functional aircraft prototypes |
Exemple: Modeling a Spitfire in Blender
The hobbyist used Blender to build their Spitfire model:
- Started with a basic fuselage shape (a stretched cylinder), then added curved wings using Blender’s “Extrude” tool.
- Added fine details: used the “Loop Cut” tool to create panel lines on the fuselage, and modeled a tiny cockpit with a seat and control stick.
- Imported a pre-made propeller model from Blender’s asset library (saving hours of work) and adjusted its size to fit the fuselage.
The final digital model was ready in 8 hours—far faster than hand-drawing a traditional blueprint.
3. Étape 3: Model Optimization – Ensure It’s 3D Printable
A model that looks great on screen might fail during printing if not optimized. Model optimization fixes structural flaws, réduit le gaspillage de matériaux, and ensures compatibility with your printer.
Key Optimization Steps:
- Check Structural Stability: Ensure parts like wings and landing gear are thick enough to support their weight. For a 1:48 Spitfire, wings should be at least 1.5mm thick (thinner wings may break during printing).
- Eliminate Overhangs: Overhangs (parts that extend outward without support, par ex., a wing tip) can collapse. Use your modeling software to add small supports (par ex., thin struts) or adjust the design (par ex., angle the wing slightly downward).
- Hollow Large Parts: Fuselages or wings can be hollowed out (leaving a 1–2mm wall) to save material. Par exemple, hollowing a Spitfire fuselage reduced material use by 40% and cut print time by 2 heures.
- Split Large Models: If your aircraft is bigger than your printer’s build volume (par ex., a 30cm wingspan model for a 22cm printer), split it into parts (par ex., left wing, right wing, fuselage) using the “Split” tool. Add 0.1mm tolerance between parts for easy assembly later.
Exemple: Fixing Overhangs on a Drone Model
An engineer designing a 3D printed drone noticed the propeller arms had a 60° overhang—too steep for printing without supports. They optimized the model by:
- Adding small triangular supports between the arms and fuselage.
- Reducing the overhang angle to 45° (the maximum most printers can handle without supports).
The optimized model printed perfectly, with no broken parts.
4. Étape 4: Print Preparation – Get Ready to Bring Your Model to Life
Before printing, you need to prepare your digital model for the printer. This involves two critical steps: file export and slicing.
UN. Export the Model to a Printable Format
Most 3D printers use STL (Stéréolithographie) ou OBJ (Wavefront Object) fichiers. To export:
- In your modeling software, go to “File” > “Export” > Select “STL.”
- Choose “Binary STL” (smaller file size) instead of “ASCII STL” (larger and less compatible).
- If your model is split into parts, export each part as a separate STL file (par ex., “Spitfire_Fuselage.stl,” “Spitfire_LeftWing.stl”).
B. Slice the Model with Slicing Software
Logiciel de découpage converts the STL file into Code G—the instructions the printer uses to print layer by layer. Popular options include Cura (gratuit) and Simplify3D (paid). Key slicing settings for model aircraft:
| Slicing Setting | What It Does | Recommended for Model Aircraft |
| Hauteur de couche | Thickness of each layer; smaller = more detail | 0.15–0,2 mm (balances detail and speed) |
| Infill Density | Material percentage inside the model | 20–30% (strong enough for display; 50% for flying models) |
| Vitesse d'impression | How fast the printer moves | 40–50mm/s (reduces blurring on small parts like propellers) |
| Structures de soutien | Extra material for overhangs | Enable for overhangs >45°; use “tree supports” to save material |
Exemple: Slicing the Spitfire Model
The hobbyist used Cura to slice their Spitfire:
- Imported all STL parts (fuselage, ailes, propeller) into Cura.
- Selected their printer (Creality Ender 3, build volume 220×220×250mm) and set layer height to 0.15mm for fine detail.
- Set infill to 25% (enough for display) and enabled tree supports for the wing tips.
- Clicked “Slice”—Cura generated a G-code file and showed a preview: total print time was 12 heures, and material use was 80g of PLA.
5. Étape 5: 3D Printing – Start the Build Process
With your sliced file ready, it’s time to print. Here’s how to ensure success:
Pre-Print Checks:
- Level the Print Bed: An unlevel bed causes parts to stick poorly or warp. Use your printer’s auto-leveling tool (if available) or manually adjust the bed screws.
- Load the Right Material: PLA is great for display models (facile à imprimer, faible coût). For flying models or durable parts (par ex., train d'atterrissage), use PETG or ABS (plus fort, more impact-resistant).
- Test a Small Part First: Print a tiny component (par ex., the propeller) to check for issues (par ex., adhérence des couches, detail clarity) before printing the entire model.
During Printing:
- Monitor the First Layer: The first layer should stick smoothly to the bed—if it’s patchy, pause the printer and adjust the bed height.
- Avoid Unattended Printing: For long prints (8+ heures), check in every 1–2 hours to ensure no material jams or layer shifts.
Real-World Example: Printing the Spitfire
The hobbyist loaded PLA filament into their Ender 3 and started printing:
- The first layer (fuselage base) stuck perfectly—no warping.
- Après 6 heures, they printed the wings; tree supports were easy to remove later.
- The final part (propeller) took 45 minutes and came out with crisp detail (even the tiny blade grooves were visible).
6. Étape 6: Post-Processing – Polish and Assemble Your Model
Après l'impression, your model needs a little work to look its best. Post-traitement includes cleaning, ponçage, peinture, et assemblage.
UN. Clean and Sand the Parts
- Remove Supports: Use pliers or a hobby knife to gently peel off supports. Pour les petites pièces (par ex., cockpit windows), use a sanding stick (400 grincer) to smooth leftover marks.
- Sand the Surface: Start with 200-grit sandpaper for rough edges, then 400-grit for a smooth finish. Sanding removes layer lines—critical for a realistic look.
- Fill Gaps: If parts have small gaps (par ex., between fuselage and wings), use PLA filler or super glue mixed with baking soda to fill them.
B. Paint and Add Details
- Prime the Model: Apply a thin coat of primer (gray or white) to help paint stick. Let it dry for 1–2 hours.
- Paint the Base Color: Use acrylic spray paint for large areas (par ex., olive drab for a WWII Spitfire) and small brushes for details (par ex., red propeller tips).
- Add Decals: Apply water-slide decals (par ex., squadron logos) for authenticity. Seal with a clear coat to protect the paint.
C. Assemble the Model
- Glue Parts Together: Use PLA glue (for PLA parts) or super glue (for PETG/ABS) to attach wings, fuselage, et train d'atterrissage. Hold parts together with clamps until the glue dries (10–15 minutes).
- Install Functional Parts: For flying models, add motors, batteries, and controllers. For display models, attach a stand to show off the aircraft in mid-flight.
7. Étape 7: Assembly Test – Check Functionality and Balance
The final step is to test your model—especially if it’s a functional flying aircraft.
For Display Models:
- Check Balance: Place the model on a stand—ensure it doesn’t tip forward or backward. Adjust the stand position if needed.
- Inspect Details: Check for loose parts (par ex., a wobbly propeller) and re-glue if necessary.
For Flying Models:
- Rotation Test: Spin the propeller to ensure it rotates smoothly (no friction from the fuselage).
- Test Flight: Start with a short, low flight in an open area. Adjust the controls (par ex., elevator trim) if the model drifts or stalls.
Exemple: Testing a 3D Printed Drone
An engineer tested their 3D printed drone:
- Spun the propellers—they rotated at 3,000 RPM (no jams), thanks to the 1.5mm thick motor mounts.
- Did a 2-minute test flight: the drone hovered steadily, and the 3D printed landing gear absorbed the impact of a soft landing.
The model performed as well as commercial drones—at 1/3 le coût.
Yigu Technology’s View on 3D Printing Model Aircraft
Chez Yigu Technologie, we believe 3D printing model aircraft is a perfect blend of creativity and engineering—it lets enthusiasts and professionals alike push the limits of aviation design. Our 3D printers (like the YG-200, with a 250×250×300mm build volume) are optimized for aircraft models: they handle PLA/PETG smoothly and offer precise layer control (jusqu'à 0,1 mm) for fine details like panel lines. We’ve worked with aviation clubs to print 1:48 scale fighter jets, cutting their build time from 2 semaines (méthodes traditionnelles) à 3 jours. For beginners, we recommend starting with a simple drone frame to learn the process, then moving to complex fixed-wing models. 3D printing doesn’t just make model building faster—it makes it more accessible, turning aviation dreams into tangible models.
FAQ:
Q1: Can I 3D print a flying model aircraft, or are they just for display?
Oui! You can print functional flying models—just choose the right material (PETG or ABS for durability) and design for weight balance. Par exemple, a 3D printed drone with a lightweight PLA fuselage and PETG motor mounts can fly for 10–15 minutes on a small battery. Just ensure parts like wings are thick enough (1.5–2mm) to handle wind forces.
Q2: What’s the smallest 3D printer I can use for a model aircraft?
Most home 3D printers (build volume 200×200×200mm or larger) work for small to medium models (1:48 à 1:32 échelle). Par exemple, a 220×220mm printer can print a 1:48 Spitfire (~20cm long) in one piece. If you want a larger model (1:24 échelle), split it into parts (ailes, fuselage) that fit the printer.
Q3: How much does it cost to 3D print a model aircraft?
Costs are low—typically \(5–)50, depending on size and material. Un petit 1:48 Spitfire uses ~80g of PLA (\(2–)3). A larger 1:24 scale model uses ~300g of PETG (\(10–)15). Add \(5–)10 for paint and decals, and total cost is far less than pre-made premium model kits (\(50–)100+).