La fundición a presión es la piedra angular de la fabricación de metales en gran volumen, especialmente para aleaciones de aluminio, permitiendo la producción de precisión, piezas complejas utilizadas en la automoción, electrónica, y ferretería. Sin embargo, muchos ingenieros y fabricantes todavía tienen preguntas.: ¿Cuál es el mecanismo central detrás de la fundición a presión?? ¿Cómo afectan los procesos clave a la calidad de las piezas?? ¿Y qué parámetros necesitan un control estricto?? This article breaks down the fundamental principle, proceso paso a paso, parameter optimization, and quality control strategies of die casting—helping you master this efficient manufacturing technology.
1. Core Principle of Die Casting: How Does It Work?
en su corazon, die casting relies on high pressure and high speed to shape molten metal into precise parts. Below is a 总分 structure explaining its key mechanisms, power sources, and critical conditions:
1.1 Fundamental Mechanism
Die casting’s core logic is “force-driven filling + pressure-assisted solidification”:
- High-Speed Injection: metal fundido (p.ej., aluminum alloy heated to 660~720°C) is injected into a precision metal mold cavity at speeds of 5~50 m/s. This ensures the metal flows quickly to fill even tiny mold details (p.ej., 0.5mm-thin walls or embossed patterns) before solidifying.
- High-Pressure Holding: After the cavity is filled, the die-casting machine maintains a pressure of 20~150 MPa for 1~10 seconds. This compresses the molten metal, eliminates internal pores, and improves part density—critical for parts needing high strength (p.ej., automotive engine brackets).
1.2 Power Source: The “Driving Force” of Die Casting
El hydraulic system of the die-casting machine is the key power provider:
- It drives the injection punch to push molten metal into the mold cavity (generating injection force).
- It controls mold clamping force (to keep the mold closed during high-pressure injection, preventing metal leakage).
- Para producción a gran escala, modern machines use servo-hydraulic systems—reducing energy consumption by 30% compared to traditional hydraulic systems while ensuring stable pressure output.
1.3 Critical Conditions: Parameters That Determine Quality
Four core parameters must be strictly controlled to avoid defects like cold shuts (unfused metal seams) or shrinkage holes:
| Critical Parameter | Definición | Rango típico (Aleación de aluminio) | Impact on Quality |
| Molten Metal Temperature | Temperature of the metal liquid before injection. | 660~720°C | Too low: Poor fluidity → incomplete cavity filling. Too high: Grain coarsening → reduced part strength. |
| Temperatura del molde | Temperature of the metal mold before injection. | 180~250°C | Too low: Metal solidifies too fast → cold shuts. Too high: Extended cooling time → low production efficiency. |
| Presión de inyección | Pressure applied to push molten metal into the mold. | 20~150 MPa | Too low: Internal pores → low part density. Too high: Mold damage or metal overflow → scrap parts. |
| Filling Time | Time for molten metal to fill the entire mold cavity. | 0.01~0.1 seconds (partes delgadas); 0.1~0.5 seconds (thick parts) | Too long: Metal solidifies mid-flow → incomplete filling. Too short: Turbulence → air entrapment (porosidad). |
2. Step-by-Step Process of Die Casting: From Raw Material to Finished Part
The die casting process is a linear, sequential workflow—each step directly impacts the final part quality. Below is a time-axis breakdown of the 6 core steps, with key actions and quality checks:
2.1 Paso 1: Raw Material Preparation & Fusión
- Selección de materiales: Choose die-casting-specific alloys (p.ej., aluminum alloy ADC12 for high fluidity, 6061 for high strength) that meet part performance needs.
- Fusión: Heat the alloy in a crucible furnace to 660~720°C. Use a temperature sensor to monitor in real time—avoid overheating.
- Desgasificación & Refining: Add scouring agents (p.ej., hexachloroethane) to remove hydrogen (a major cause of porosity) and impurities (p.ej., slag). Para piezas de alta precisión, usar vacuum degassing—reducing hydrogen content by 80%.
Control de calidad: Use a metal sample analyzer to verify alloy composition (ensure no excess impurities like lead or cadmium).
2.2 Paso 2: Preparación del molde & Pre-Treatment
- Mold Installation: Fix the pre-machined metal mold (made of H13 hot-work steel for wear resistance) to the die-casting machine’s fixed and moving platens. Align the mold carefully to avoid metal leakage.
- Mold Preheating: Heat the mold to 180~250°C using electric heaters or hot oil circulation. Use thermocouples to ensure uniform temperature (±10°C variation is acceptable).
- Release Agent Spraying: Spray a water-based or oil-based release agent on the mold cavity surface. Este: 1) Prevents metal from sticking to the mold; 2) Extends mold life (by reducing thermal shock); 3) Improves part surface finish.
Control de calidad: Inspect the mold cavity for scratches or residue—repair scratches >0.1mm deep to avoid part surface defects.
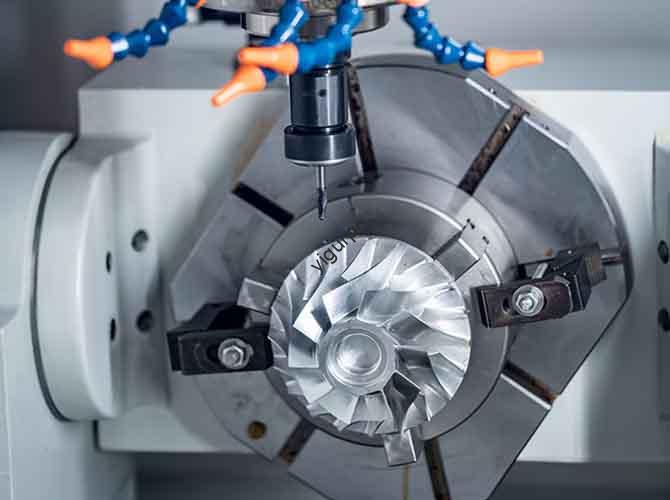
2.3 Paso 3: High-Pressure Injection
- Metal Feeding: Pour molten aluminum alloy into the machine’s pressure chamber.
- Injection Execution: The hydraulic system drives the punch to push the metal into the mold cavity at 5~50 m/s. Para piezas complejas (p.ej., cajas electrónicas), usar two-stage injection: Low speed (5~15 m/s) for the initial filling (reducing turbulence) and high speed (15~50 m/s) for the final filling (ensuring detail replication).
Control de calidad: Monitor injection pressure in real time—abnormal spikes may indicate mold blockages (stop immediately to avoid machine damage).
2.4 Paso 4: Pressure Holding & Enfriamiento
- Pressure Holding: Maintain 20~150 MPa pressure for 1~10 seconds. This compresses the molten metal, eliminating shrinkage holes and improving density.
- Enfriamiento: Let the part solidify inside the mold. Cooling time depends on part thickness: 5~15 seconds for thin parts (p.ej., 1mm-thick phone casings) and 15~60 seconds for thick parts (p.ej., 10mm-thick automotive brackets).
Control de calidad: Use an infrared thermometer to confirm part temperature drops to 300~400°C (aleación de aluminio) before mold opening—too high a temperature causes part deformation.
2.5 Paso 5: Mold Opening & Eliminación de piezas
- Mold Opening: The die-casting machine’s hydraulic system pulls the moving platen back, opening the mold.
- Expulsión: An ejection mechanism (pins or plates) pushes the part out of the mold cavity. For fragile parts (p.ej., thin-walled electronics parts), usar multiple small ejection pins (instead of a single large pin) to avoid part cracking.
- Guarnición: Remove excess material (gate, riser, destello) using a trimming press or CNC router. Para piezas de alta precisión, use laser trimming—achieving a cutting accuracy of ±0.05mm.
Control de calidad: Inspect the part for surface defects (p.ej., rebabas, rayones)—burrs >0.03mm must be removed.
2.6 Paso 6: Post-Treatment
Post-treatment enhances part performance and aesthetics. Choose processes based on part needs:
| Post-Treatment Type | Objetivo | Application Scenarios |
| Tratamiento térmico | – Recocido: Eliminate internal stress (prevents part warping). – Aging: Improve strength (p.ej., 6061 alloy strength increases by 40% after T6 aging). | Parts needing high strength (automotive drive shafts, componentes aeroespaciales). |
| Tratamiento superficial | – Arenado: Create a matte finish (hides minor surface defects). – Pulido: Achieve a mirror finish (decorative parts like furniture hardware). – Anodizado: Form a protective alumina film (corrosion resistance for outdoor parts). – galvanoplastia: Add metal layers (chrome for wear resistance, nickel for decoration). | – Arenado: Piezas industriales (carcasas de bombas). – Pulido: Piezas decorativas (faucet handles). – Anodizado: Accesorios al aire libre (street lamp brackets). – galvanoplastia: Adornos automotrices (manijas de las puertas). |
| Control de calidad: For anodized parts, test corrosion resistance via a salt spray test (must pass 48 hours without rust). |
3. Common Defects & Solución de problemas: How to Fix Issues
Even with strict process control, defects may occur. Below is a causal chain breakdown de 3 common defects and their solutions:
| Common Defect | Root Cause | Troubleshooting Solution |
| Cold Shuts (unfused metal seams on part surface) | 1. Molten metal temperature too low. 2. Mold temperature too low. 3. Filling time too long (metal solidifies mid-flow). | 1. Increase molten metal temperature by 10~20°C. 2. Raise mold temperature by 20~30°C. 3. Shorten filling time by 0.01~0.05 seconds (increase injection speed). |
| Porosity (tiny holes inside the part) | 1. Inadequate degassing (high hydrogen content). 2. Injection speed too fast (turbulence traps air). 3. Holding pressure too low (no pore compression). | 1. Extend degassing time by 2~5 minutes or use vacuum degassing. 2. Reduce injection speed by 5~10 m/s (use two-stage injection). 3. Increase holding pressure by 10~20 MPa. |
| Shrinkage Holes (large holes in thick part sections) | 1. Holding time too short (metal shrinks without pressure). 2. Cooling time too short (part not fully solidified). 3. Mold cavity design flawed (thick sections with no risers). | 1. Extend holding time by 1~3 seconds. 2. Increase cooling time by 5~10 seconds. 3. Modify mold design: Add risers (metal reservoirs) to thick sections. |
Yigu Technology’s Perspective on Die Casting Principle and Process
En Yigu Tecnología, we believe “principle mastery + process refinement” is the key to stable die casting quality. Many clients struggle with recurring defects (p.ej., porosidad) because they focus only on parameters, not the underlying principle (p.ej., how hydrogen causes pores). We advocate a “3-layer approach”: 1) Train teams on die casting principles (p.ej., pressure-assisted solidification) to help them understand por qué parameters matter; 2) Use intelligent monitoring systems to track real-time parameters (molten metal temperature, presión de inyección) and alert for deviations; 3) Para piezas personalizadas, optimize mold design (p.ej., adding risers to thick sections) based on the filling principle—reducing defect rates by 40% on average. We also prioritize eco-friendly processes (p.ej., servo-hydraulic machines, water-based release agents) to meet sustainability goals.
Preguntas frecuentes (Frequently Asked Questions)
- q: Why is mold preheating necessary? Can I skip it to save time?
A: No—mold preheating is critical. Cold molds cause molten metal to solidify too fast, leading to cold shuts (unfused seams) and poor part strength. Skipping preheating may seem to save 5~10 minutes per mold, but it increases scrap rates by 20~30%—costing more in the long run.
- q: For aluminum alloy die casting, what’s the difference between ADC12 and 6061 aleaciones? Which should I choose?
A: ADC12 has high fluidity (ideal for complex, thin-walled parts like electronics enclosures) but lower strength. 6061 has higher strength and corrosion resistance (suitable for load-bearing parts like automotive brackets) but lower fluidity. Choose ADC12 for complex shapes; choose 6061 for parts needing strength or outdoor use.
- q: How to confirm if a die-cast part has internal porosity? Can it be fixed after production?
A: Usar X-ray inspection (for critical parts like aerospace components) o hydrostatic testing (for pressure-containing parts like pump housings) to detect internal porosity. Small pores (≤0.1mm) can be fixed via impregnation (filling pores with resin or wax). Large pores (>0.1milímetros) usually require reworking or scrapping—better to prevent them by optimizing degassing and holding pressure during production.