Si alguna vez te has preguntado cómo crear piezas de cerámica complejas, desde tazas personalizadas hasta esculturas artísticas, sin el moldeado manual tradicional., 3D printing ceramics is the innovative solution. A diferencia de la impresión 3D con plástico o resina, La impresión 3D de cerámica combina la durabilidad y la belleza de los materiales cerámicos con la precisión de la fabricación aditiva.. Si bien es más desafiante técnicamente, it opens up endless possibilities for designers, artists, y fabricantes.
En esta guía, we’ll break down every stage of the process of 3D printing ceramics, explain key tools and materials, share real-world examples, and add data to help you understand how to succeed with this technology. Whether you’re an artist exploring new forms or a manufacturer looking to streamline production, this content will answer your questions.
What Makes 3D Printing Ceramics Unique?
Before diving into the steps, let’s clarify why 3D printing ceramics destaca. Traditional ceramic making requires molds, hand-sculpting, and firing—steps that limit design complexity and take time. 3D printing ceramics, by contrast, builds pieces layer by layer using specialized ceramic materials, then sinters (heats) them to create a hard, finished product.
The biggest challenge? Ceramic materials are brittle and require high temperatures to set—so the process needs precise control over printing and sintering. But the payoff is huge: a 2024 industry report found that 3D printed ceramics reduce material waste by 60% en comparación con los métodos tradicionales, y 78% of artists using the technology say it lets them create designs they couldn’t make by hand.
The Step-by-Step Process of 3D Printing Ceramics
The process of 3D printing ceramics has six core stages, each with specific goals and tools. A continuación se muestra un desglose detallado, including average timelines, key equipment, and tips to avoid common mistakes. We’ve also included a comparison table to simplify the steps.
| Step Name | Core Goal | Key Tools/Equipment | Tiempo promedio (Per Piece) | Critical Tips for Success |
| 1. Preparación de materiales | Create a print-ready ceramic mixture that’s stable and easy to extrude | Ceramic powder, binders (p.ej., PVA), mixing equipment (blenders, extruders) | 1–2 horas | Ensure powder particle size is 1–50μm (too large causes clogs; too small is hard to handle) |
| 2. Printer Selection & Configuración | Choose a printer that handles high-temperature ceramics and calibrate it | Professional ceramic 3D printer (p.ej., WASP Delta Clay, 3DCeram C100), calibration tools | 30 mins–1 hour | Calibrate nozzle height to avoid material buildup; preheat the print bed to 40–60°C |
| 3. 3D Model Design | Create a digital blueprint of the ceramic piece with print-friendly dimensions | programas CAD (p.ej., Licuadora, Fusión 360, Rinoceronte) | 1–4 horas (varía según la complejidad) | Keep wall thickness at 1–3mm (thinner cracks; thicker takes longer to sinter) |
| 4. rebanar & Parameter Setting | Convert the model into layer-by-layer printer instructions | Ceramic-specific slicing software (p.ej., Simplificar 3D, Cura for Ceramics) | 20–40 minutes | Set layer height to 0.1–0.3mm; adjust print speed to 10–30mm/s (faster causes uneven extrusion) |
| 5. Impresión & Debinding | Print the ceramic piece, then remove binders to prepare for sintering | 3D printer, debinding oven (or chemical debinder) | 2–8 horas (impresión) + 4–12 hours (debinding) | Let the printed piece dry for 24 hours before debinding (previene el agrietamiento) |
| 6. Sinterización & Postprocesamiento | Heat the piece to harden the ceramic, then refine its appearance | High-temperature kiln (1200–1600°C), papel de lija, glazes, polishing tools | 8–24 hours (sintering) + 1–3 horas (posprocesamiento) | Sinter slowly (1–2°C per minute) para evitar deformaciones; use fine-grit sandpaper (800–1200 grano) for smoothing |
Paso 1: Material Preparation – The Foundation of 3D Printed Ceramics
The first step is to create a printable ceramic mixture (called a “feedstock”). This mixture combines ceramic powder with binders to make it easy to extrude and stable during printing.
- Key Components:
- Ceramic Powder: The base material—common types include alumina (para mayor durabilidad), circonita (para la fuerza), and kaolin (for art pieces). The powder’s particle size is critical: 1–50μm works best (por 2024 ceramic 3D printing guidelines).
- Binders: Materials like PVA (polyvinyl alcohol) or wax that hold the powder together. Binders make up 10–30% of the mixture—too little, and the mixture is brittle; demasiado, and it shrinks too much during sintering.
- Preparation Process:
- Mix the ceramic powder and binder in a specialized blender (p.ej., a twin-screw extruder) until it forms a smooth, dough-like consistency.
- Test the mixture by extruding a small amount—if it holds its shape without cracking, it’s ready.
Ejemplo: A pottery studio making 3D printed mugs uses kaolin powder (para un acabado suave) and PVA binder. They mix 80% kaolin with 20% PVA, then test the mixture by extruding a 5cm strip—it stays firm, so they move to printing.
Paso 2: Printer Selection & Setup – Choose the Right Tool
Not all 3D printers work for ceramics—you need a professional ceramic 3D printer designed to handle thick, abrasive ceramic mixtures and high temperatures.
- Top Printer Options:
- WASP Delta Clay: Affordable for small studios; uses a delta-style design for precise extrusion.
- 3DCeram C100: Grado industrial; prints with high-resolution (up to 50μm) and supports multiple ceramic materials.
- ExOne S-Max Pro: Uses binder jetting (instead of extrusion) for large ceramic pieces (p.ej., architectural tiles).
- Setup Steps:
- Install a ceramic-compatible nozzle (usually made of stainless steel or ruby—abrasion-resistant materials).
- Calibrate the printer: Adjust the nozzle height to 0.1–0.2mm above the print bed (too close causes clogs; too far, and layers don’t stick).
- Preheat the print bed to 40–60°C (helps the ceramic mixture set faster).
Data Tip: A 2024 survey of ceramic 3D printing users found that 65% of printing failures are due to poor calibration—taking extra time to set up the printer reduces mistakes by 80%.
Paso 3: 3D Model Design – Print-Friendly Blueprints
Designing a 3D model for ceramics is different from designing for plastic—you need to account for shrinkage (ceramics shrink 10–20% during sintering) y resistencia estructural.
- Software Choice:
- Licuadora: Great for artistic designs (p.ej., esculturas); free and open-source.
- Fusión 360: Ideal for functional pieces (p.ej., tazas, bochas); lets you adjust wall thickness and add drainage holes.
- Rinoceronte: Perfect for complex shapes (p.ej., curved vases); supports NURBS modeling for smooth surfaces.
- Design Rules:
- Wall Thickness: Keep it 1–3mm. Thinner walls crack during sintering; thicker walls take longer to heat evenly.
- Avoid Overhangs: If your design has parts sticking out (p.ej., a mug handle), add support structures (made of the same ceramic mixture—they’re easy to remove later).
- Account for Shrinkage: Enlarge the model by 10–20% in the software (p.ej., a 10cm mug should be designed as 11–12cm to end up at 10cm after sintering).
Ejemplo: An artist designs a ceramic vase with curved sides using Blender. They make the walls 2mm thick, add small supports for the curved top, and enlarge the model by 15% (to account for shrinkage). The final sintered vase is 25cm tall—exactly the size they wanted.
Paso 4: rebanar & Parameter Setting – Translate Model to Printer Language
Slicing software converts your 3D model into instructions the printer can understand. para cerámica, you need software that handles thick materials and slow print speeds.
- Recommended Software:
- Simplificar 3D: Supports ceramic printers and lets you adjust extrusion rate (critical for thick mixtures).
- Cura for Ceramics: A modified version of Cura with presets for ceramic materials (p.ej., alúmina, circonita).
- Key Parameters:
- Altura de capa: 0.1-0,3 mm (thinner layers = smoother finish; thicker layers = faster printing).
- Print Speed: 10–30mm/s (ceramic mixtures are thick—faster speeds cause uneven extrusion).
- Filling Density: 80–100% for functional pieces (p.ej., tazas); 50–70% for decorative pieces (p.ej., esculturas) to save material.
Ejemplo: A manufacturer slicing a ceramic gear model uses Simplify3D. They set layer height to 0.2mm, print speed to 20mm/s, and filling density to 90% (para la fuerza). The software generates a G-code file that the printer will use to build the gear.
Paso 5: Impresión & Debinding – Build and Prep the Piece
Now it’s time to print the ceramic piece—and then remove the binders (the “glue” that holds the powder together) to prepare for sintering.
- Proceso de impresión:
- Load the ceramic mixture into the printer’s extruder.
- Start the print—monitor the first 10 minutes to ensure the mixture extrudes evenly and sticks to the bed.
- Let the printed piece (called a “green part”) dry for 24 horas. This removes moisture and prevents cracking during debinding.
- Debinding:
- Método 1: Chemical debinding—soak the green part in a solvent (p.ej., acetona) for 4–8 hours to dissolve the binder.
- Método 2: Thermal debinding—heat the green part in an oven at 200–400°C for 6–12 hours to burn off the binder.
Ejemplo: A studio prints a ceramic bowl. Después de imprimir, they let it dry for 24 horas, then use thermal debinding—heating it to 300°C for 8 horas. The bowl loses 15% of its weight (from binder removal) and is now ready for sintering.
Paso 6: Sinterización & Post-Processing – Harden and Refine
Sintering is the final step—heating the piece to high temperatures to fuse the ceramic particles into a hard, durable material. Post-processing then refines the appearance.
- Sintering Process:
- Place the debound piece in a high-temperature kiln.
- Heat it slowly (1–2°C per minute) to 1200–1600°C (varía según el material: alumina needs 1600°C; kaolin needs 1200°C).
- Hold the temperature for 2–4 hours (called “soaking”) to ensure full fusion.
- Cool the kiln slowly (1–3°C per minute) para evitar grietas.
- Pasos de posprocesamiento:
- Lijado: Use 800–1200 grit sandpaper to smooth rough edges.
- Glazing: Apply ceramic glaze (for color or shine) and fire the piece again at 800–1000°C for 1–2 hours.
- Pulido: Use a ceramic polisher to add a glossy finish (for art pieces or high-end tableware).
Data Tip: A 2024 study found that slow heating and cooling during sintering reduce cracking by 90%—rushing this step is the #1 cause of failed ceramic prints.
Key Applications of 3D Printing Ceramics
3D printing ceramics is used in many industries—here are the most common use cases (con 2024 demand data):
- Arte & Diseño: 45% of 3D printed ceramic orders are for sculptures, jarrones, or custom art pieces (artists love the design freedom).
- Vajilla: 30% are for mugs, bochas, and plates—3D printing lets brands create unique, personalized designs.
- Médico: 15% are for dental crowns or bone implants (zirconia ceramics are biocompatible and strong).
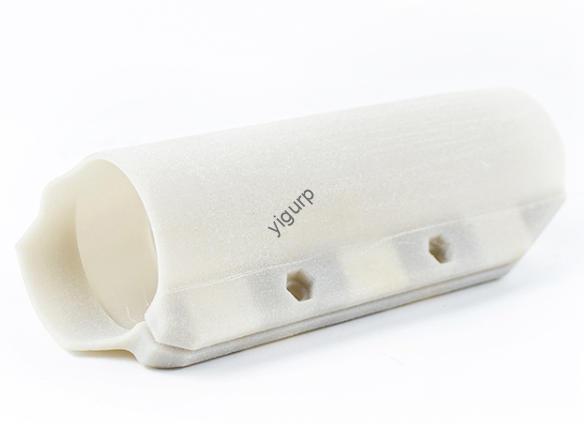
- Industrial: 10% are for high-temperature parts (p.ej., engine components—alumina ceramics resist heat up to 1700°C).
Yigu Technology’s Perspective on 3D Printing Ceramics
En Yigu Tecnología, we see 3D printing ceramics as a transformative technology for art and manufacturing. The key to success is mastering material preparation and sintering—these steps determine the piece’s strength and appearance. For beginners, we recommend starting with kaolin (easy to work with) and a mid-range printer like the WASP Delta Clay. Para clientes industriales, we prioritize zirconia and alumina for functional parts, as they balance durability and printability. As ceramic powders become more affordable and printers more user-friendly, we expect 3D printed ceramics to become mainstream—and we’re excited to help clients unlock its potential.
Frequently Asked Questions (Preguntas frecuentes)
1. How long does the entire 3D printing ceramics process take?
From start to finish, it takes 3–7 days. Material preparation takes 1–2 hours, printing takes 2–8 hours, drying/debinding takes 28–36 hours, sintering takes 8–24 hours, and post-processing takes 1–3 hours. The longest steps are drying and sintering—rushing these causes cracks.
2. Is 3D printing ceramics more expensive than traditional ceramic making?
Initial costs are higher (ceramic printers cost \(5,000–)50,000), but long-term costs are lower. A 2024 analysis found that 3D printing ceramics reduces material waste by 60% and labor costs by 40% en comparación con los métodos tradicionales. Para lotes pequeños (1–10 pieces), it’s cheaper—for large batches, traditional methods may still be better (for now).
3. Can I 3D print ceramics at home, or do I need a professional setup?
You can print small ceramic pieces at home with a mid-range printer (p.ej., WASP Delta Clay, ~$8,000) and basic materials (kaolin powder + PVA binder). Sin embargo, sintering requires a high-temperature kiln (1200+°C)—many home users use local pottery studios for kiln access. For complex or large pieces, a professional setup is better.